DISASSEMBLY
1
Pusher
Pulp Guard
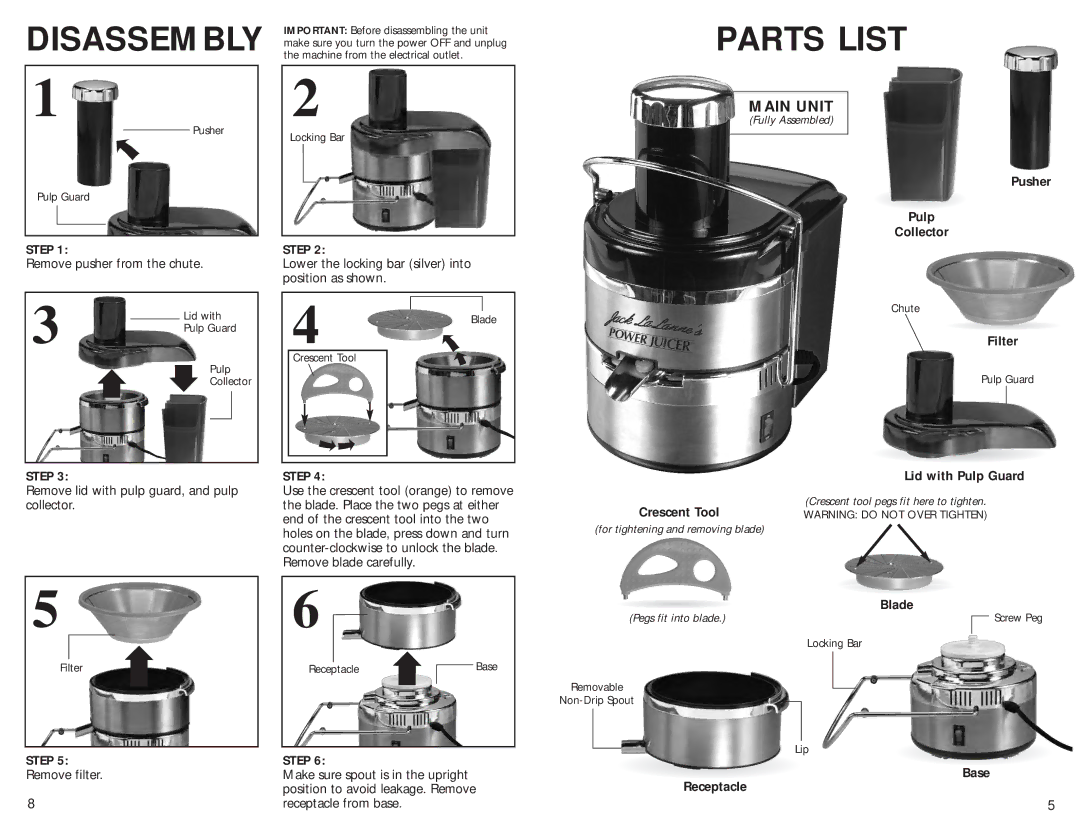
IMPORTANT: Before disassembling the unit make sure you turn the power OFF and unplug the machine from the electrical outlet.
2
Locking Bar
PARTS LIST
MAIN UNIT
(Fully Assembled)
Pusher
Pulp
Collector
STEP 1:
Remove pusher from the chute.
3 |
| Lid with | ||
|
| |||
|
| Pulp Guard | ||
|
|
| Pulp | |
|
|
| Collector | |
|
|
|
|
|
|
|
|
|
|
STEP 2:
Lower the locking bar (silver) into position as shown.
4 Blade
Crescent Tool
Chute
Filter
Pulp Guard
STEP 3:
Remove lid with pulp guard, and pulp collector.
5
Filter
STEP 5:
Remove filter.
8
STEP 4:
Use the crescent tool (orange) to remove the blade. Place the two pegs at either end of the crescent tool into the two holes on the blade, press down and turn
6
ReceptacleBase
STEP 6:
Make sure spout is in the upright position to avoid leakage. Remove receptacle from base.
Crescent Tool
(for tightening and removing blade)
(Pegs fit into blade.)
Removable
Receptacle
Lid with Pulp Guard
(Crescent tool pegs fit here to tighten.
WARNING: DO NOT OVER TIGHTEN)
Blade
![]() Screw Peg
Screw Peg
Locking Bar
Lip
Base
5
