
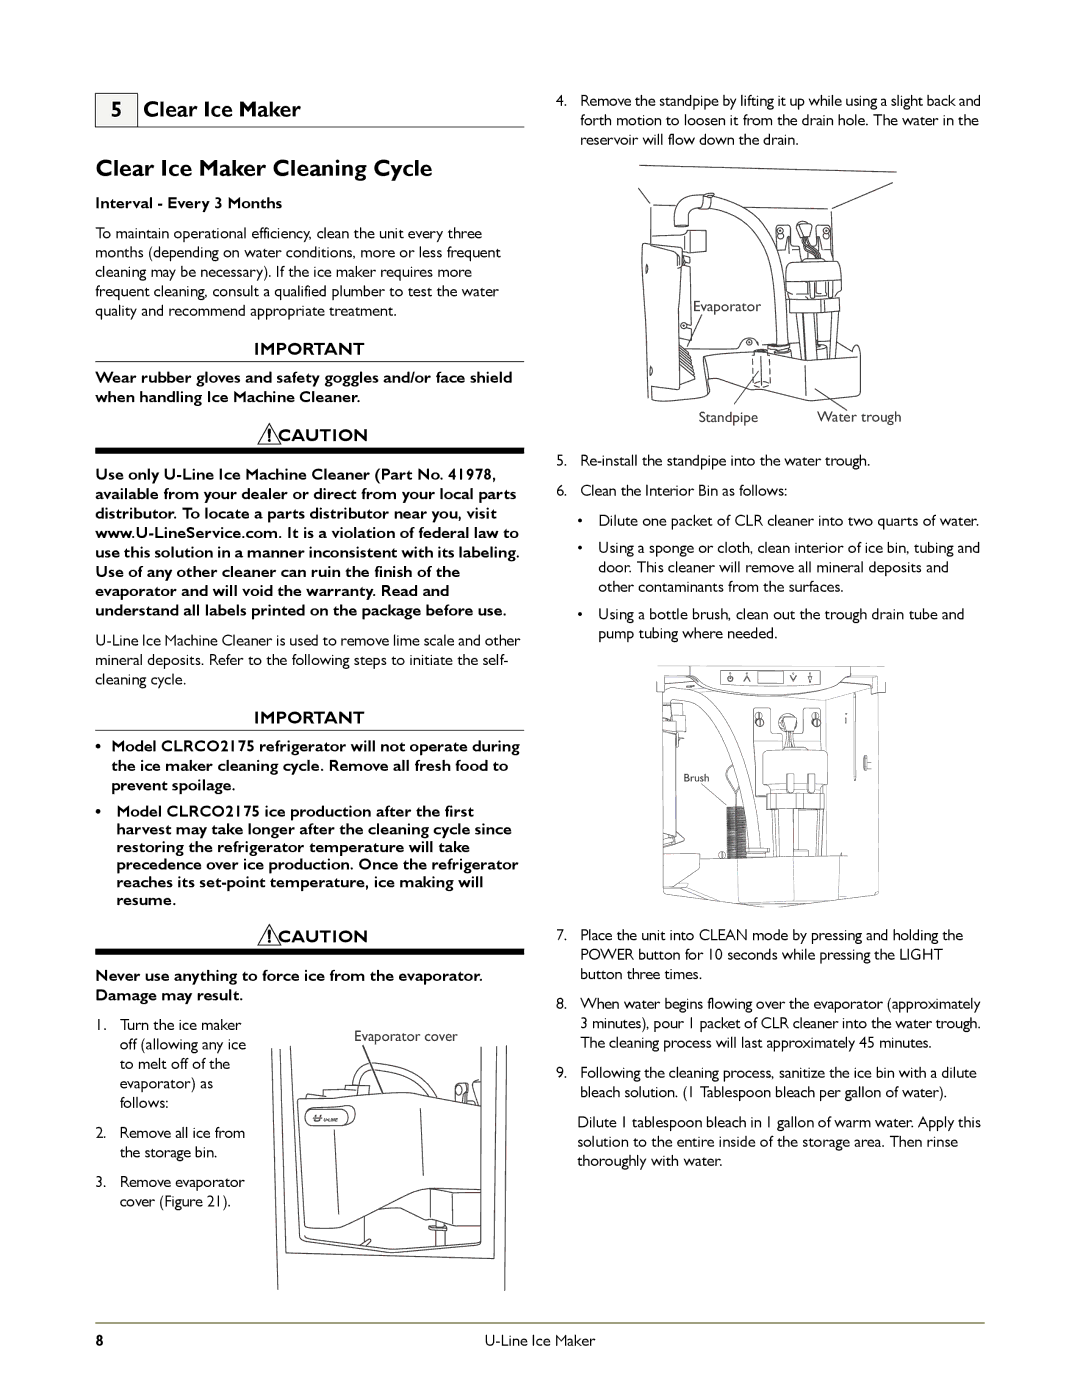
CLR2160 STAINLESS, CLR2160OD OUTDOOR specifications
The U-Line CLR2160OD Outdoor and CLR2160 Stainless refrigerator models combine functionality, durability, and stylistic elegance to meet the demands of modern outdoor living spaces. Designed to withstand the elements while providing reliable cooling, both models are ideal for homeowners who desire convenience and aesthetic appeal in their outdoor entertaining areas.One of the standout features of the CLR2160OD Outdoor model is its robust construction tailored specifically for outdoor use. Built with stainless steel, it boasts superior weather resistance, ensuring the longevity of the unit even in harsh conditions. The durable materials protect against rust and corrosion, making it perfect for backyards and patios. Its sleek, modern design complements various outdoor settings and adds a touch of sophistication to any gathering.
The CLR2160 stainless version offers the same high-quality performance with a polished appearance, making it a great fit for indoor or outdoor use. Both models feature a generous capacity, allowing users to store wine, beverages, and snacks with ease. With adjustable shelves, the refrigerators optimize storage space according to user preferences, accommodating taller bottles and various sizes.
In terms of technology, both models come with a digital control system that allows precise temperature adjustments. This ensures that beverages are stored at the perfect temperature for enjoyment. The efficient cooling system works quietly, minimizing noise disruption, and enhances the overall user experience. Moreover, the U-Line models are designed to be energy efficient, helping consumers save on utility bills while being environmentally friendly.
The CLR2160OD and CLR2160 Stainless units can also be equipped with additional features such as interior LED lighting, which provides visibility without generating excess heat, further preserving the cooling efficiency. A reversible door swing adds flexibility, allowing homeowners to customize installation based on their space and preferences.
In conclusion, the U-Line CLR2160OD Outdoor and CLR2160 Stainless refrigerators stand out as premier choices for anyone looking to enhance their outdoor or indoor living experience. With their blend of stylish design, robust build, energy efficiency, and user-friendly features, they offer unparalleled convenience for entertaining guests or simply enjoying a relaxing afternoon at home.