
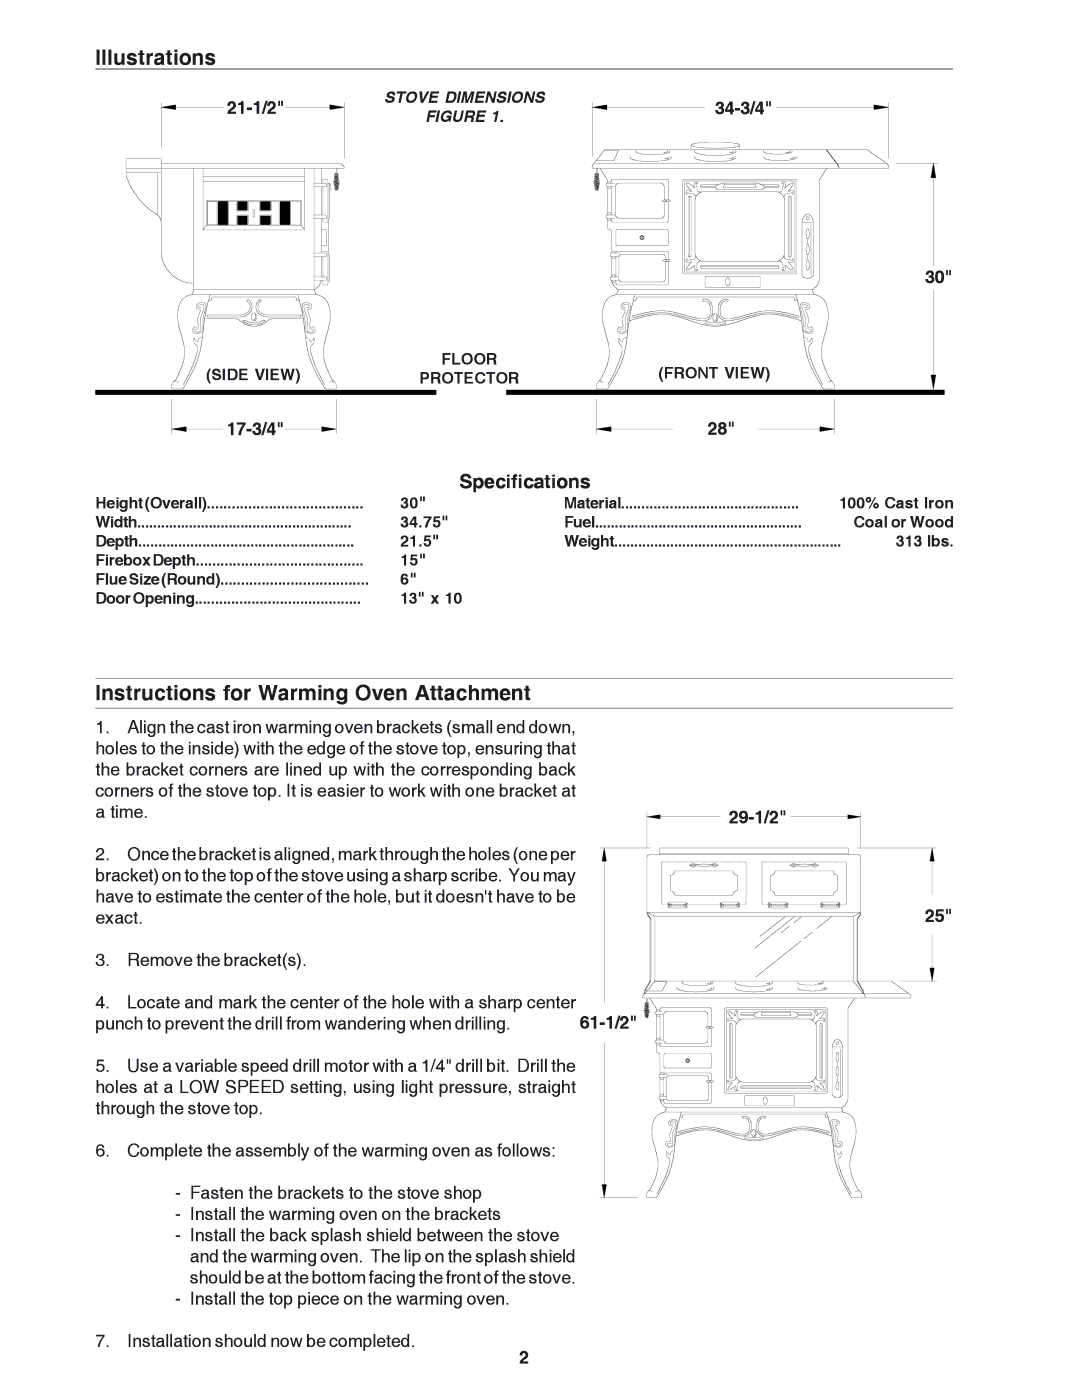
1864 specifications
The United States Stove 1864 is a remarkable piece of engineering that harkens back to an era when stoves were not just functional items but also integral parts of home design and family life. This stove exemplifies the tradition of American craftsmanship and innovation, serving as a reliable heat source while showcasing aesthetic appeal.One of the main features of the United States Stove 1864 is its robust construction. Crafted from heavy-duty cast iron, it provides durability and longevity, allowing it to withstand high temperatures and the daily rigors of use. The cast iron material also helps in retaining heat, which means the stove can maintain warmth in a room long after the fire has gone out, contributing to energy efficiency.
The design of the 1864 model is distinctive, often characterized by ornate details that reflect the craftsmanship of the period. This stove usually boasts intricate patterns and designs, making it a beautiful addition to rustic and vintage-style homes. Its traditional design complements various interior settings, enhancing the charm of any space.
In terms of technology, the United States Stove 1864 employs an efficient combustion system. This system ensures that wood or other solid fuels are burned cleanly, reducing smoke output and maximizing heat generation. It often includes features like a hand-cranked blower to regulate airflow, which further optimizes combustion efficiency.
The stove typically incorporates a large firebox, allowing ample space for logs, which translates to longer burn times with fewer reloads. This is particularly advantageous for users looking to maintain consistent warmth without frequent stoking. Furthermore, many models have adjustable dampers, enabling users to control the burn rate and heat output according to their needs.
Another characteristic worth noting is the stove's versatility. While primarily designed for heating spaces, it can also be used for cooking purposes, providing a dual function that was highly valued in homes of yesteryear. This ability allows families to prepare meals over the stove while benefiting from its heating capabilities.
Overall, the United States Stove 1864 is a perfect blend of aesthetic beauty, efficiency, and practicality. Its solid construction, traditional design, and advanced combustion technology make it a timeless piece that not only warms homes but also adds historical charm to any setting. Whether used in a modern home or a rustic cabin, this stove is a testament to the enduring qualities of American manufacturing and design.