Features and Operation
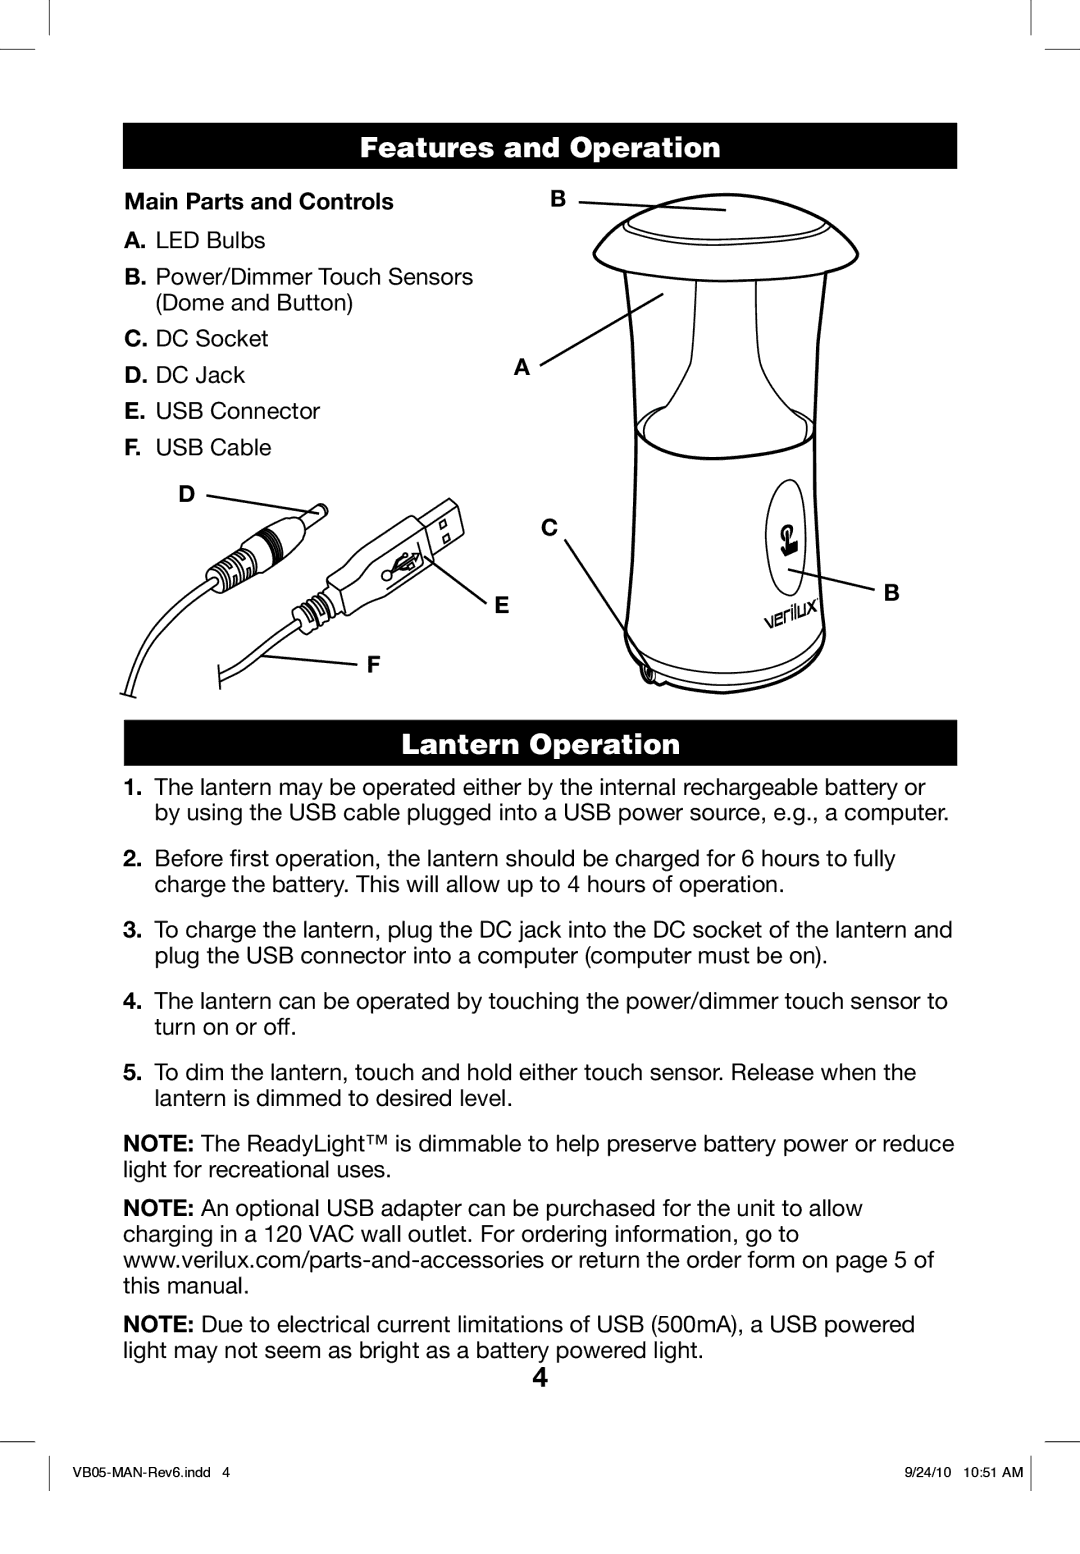
Main Parts and Controls | B |
A. LED Bulbs
B. Power/Dimmer Touch Sensors
(Dome and Button)
C. DC Socket
D. DC JackA
E. USB Connector
F. USB Cable
D
C
E
![]() F
F
B
Lantern Operation
1.The lantern may be operated either by the internal rechargeable battery or by using the USB cable plugged into a USB power source, e.g., a computer.
2.Before first operation, the lantern should be charged for 6 hours to fully charge the battery. This will allow up to 4 hours of operation.
3.To charge the lantern, plug the DC jack into the DC socket of the lantern and plug the USB connector into a computer (computer must be on).
4.The lantern can be operated by touching the power/dimmer touch sensor to turn on or off.
5.To dim the lantern, touch and hold either touch sensor. Release when the lantern is dimmed to desired level.
NOTE: The ReadyLight™ is dimmable to help preserve battery power or reduce light for recreational uses.
NOTE: An optional USB adapter can be purchased for the unit to allow charging in a 120 VAC wall outlet. For ordering information, go to
NOTE: Due to electrical current limitations of USB (500mA), a USB powered light may not seem as bright as a battery powered light.
4
| 9/24/10 10:51 AM |