Manuals
/
ViewSonic
/
Computer Equipment
/
Computer Monitor
ViewSonic
VG510b, VG510s
manual
Quick Installation, ViewSonic VG510b/VG510s, Connect video cable
Models:
VG510b, VG510s
G510b
1
5
20
20
Download
20 pages
18.44 Kb
1
2
3
4
5
6
7
8
Troubleshooting
Specifications
Install
Warranty
Adjusting the Screen Image
Setting the Timing Mode
Cleaning the LCD Display
Safety
Page 5
Image 5
Page 4
Page 6
Page 5
Image 5
Page 4
Page 6
Contents
Bedienungsanleitung Guía del usuario
User Guide Guide de l’utilisateur
Guida dellutente Guia do usuário Användarhandbok
Käyttöopas
Using the LCD Display
Contents
Getting Started
Other Information
ViewSonic VG510b/VG510s
Product Registration
Product Name
ViewSonic VG510b/VG510s
Getting Started
Package Contents
Precautions
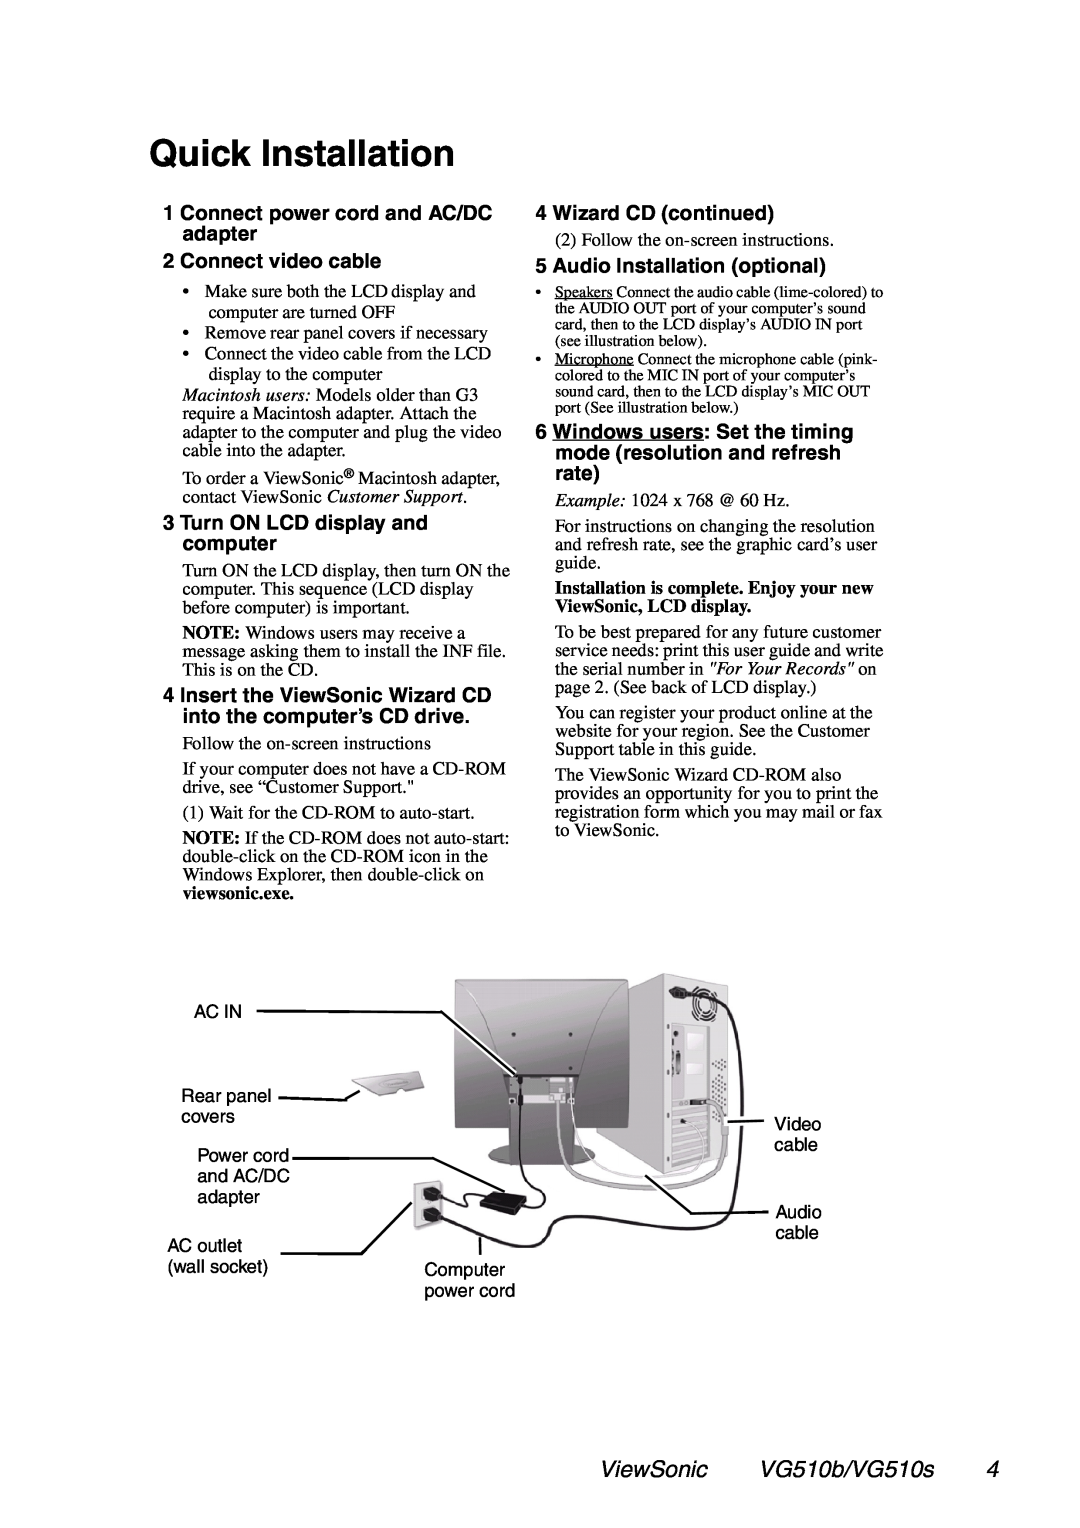
1 Connect power cord and AC/DC adapter
Quick Installation
5 Audio Installation optional
2 Connect video cable
Installation of Wall Mount Optional
Setting the Timing Mode
Using the LCD Display
OSD and Power Lock Settings
VESA 1024 x 768 @ 60 Hz
Front Control Panel shown below
Adjusting the Screen Image
Do the following to adjust the screen image
Control Explanation
Main Menu Controls
Fine Tune control
Manual Image Adjust
Setup Menu displays the menu shown below
Other Information
Specifications
No power
Troubleshooting
Power is ON but no screen image
Wrong or abnormal colors
Country
Customer Support
Web site
T = Telephone
To clean the screen
Cleaning the LCD Display
To clean the case
Disclaimer
What the warranty covers
Limited Warranty
How long the warranty is effective
Who the warranty protects
Appendix
Safety Guidelines
For the United States and Canada
For European Countries
FCC Warning
Compliance Information for U.S.A
CE Conformity for Europe
ViewSonic Corporation
Top
Page
Image
Contents