MU209
ViewMateTM Travel Mouse
Quick Start Guide/Guide Rapide De Début
Guía Rápida Del Comienzo/Быстро Направляющий выступ Старта
FCC Statement
This device complies with part 15 of FCC Rules. Operation is subject to the following two conditions: (1) this device may not cause harmful interference, and
(2) this device must accept any interference received, including interference that may cause undesired operation.
This equipment has been tested and found to comply with the limits for a Class B digital device, pursuant to part 15 of FCC Rules. These limits are designed to provide reasonable protection against harmful interference when the equipment is operated in a residential installation. This equipment generates, uses, and can radiate radio frequency energy and, if not installed and used in accordance with the instruction guide, may cause harmful interference to radio communications. However, there is no guarantee that interference will not occur in a particular installation. If this equipment does cause harmful interference to radio or television reception, which can be determined by turning the equipment off and on, the user is encouraged to try to correct the interference by one or more of the following measures:
•Reorient or relocate your TV or radio receiving antenna.
•Increase the separation between your TV and radio equipment and your mouse.
•Connect your computer equipment into a separate electrical outlet or circuit from your TV or radio equipment.
•Consult the dealer or an experienced radio/TV technician for help.
Warning: You are cautioned that changes or modifications not expressly approved by the party responsible for compliance could void your authority to operate the equipment.
This Class B digital apparatus meets all requirements of the Canadian
The device complies with the requirements of the EEC directive 89/336/EEC as amended by 92/31/EEC and 93/68/EEC Art.5 with regard to “Electromagnetic compatibility,” and 73/23/EEC as amended by 93/68/EEC Art.13 with regard to “Safety.”
Caution: AVOID PROLONGED USE OF THE MOUSE WITHOUT BREAKS. Take regular breaks and keep a good posture. Consult your physician promptly if you notice any loss of motion or pain in your wrist when using the mouse.
Product Instructions/Instructions du produit/Instrucciones del Producto/ Инструкции по эксплуатации изделия
1.Plug & play
•Turn on your computer and monitor
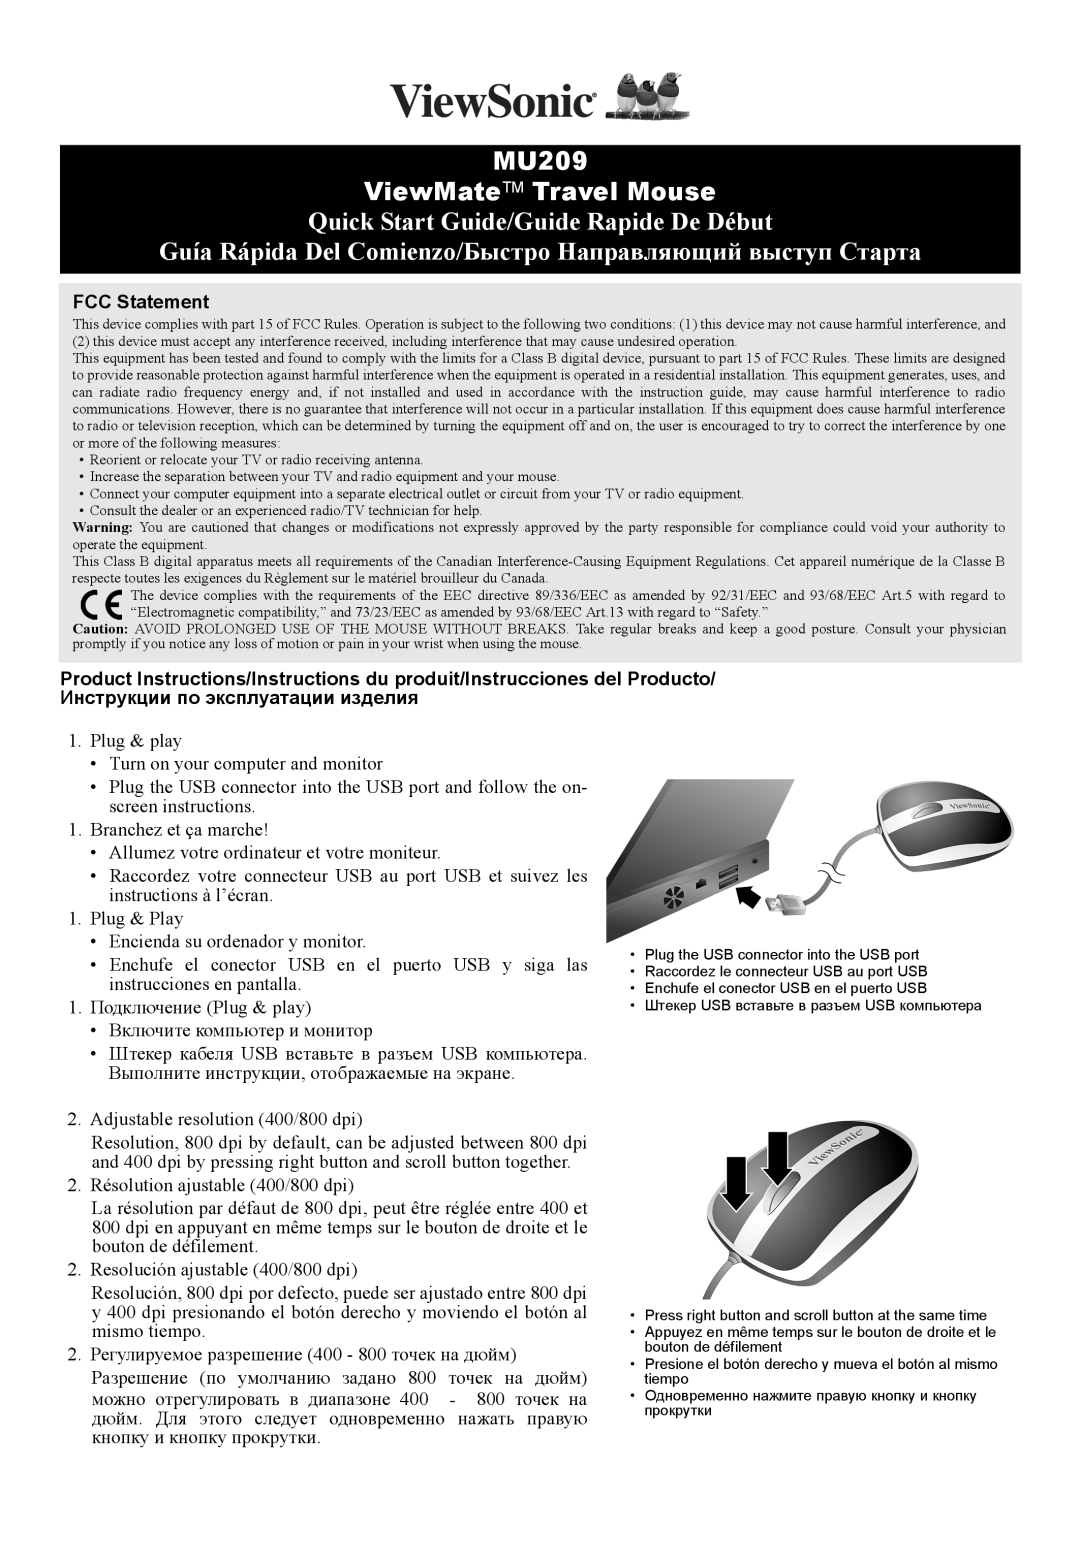
•Plug the USB connector into the USB port and follow the on- screen instructions.
1.Branchez et ça marche!
•Allumez votre ordinateur et votre moniteur.
•Raccordez votre connecteur USB au port USB et suivez les instructions à l’écran.
1.Plug & Play
•Encienda su ordenador y monitor.
•Enchufe el conector USB en el puerto USB y siga las instrucciones en pantalla.
1.Подключение (Plug & play)
•Включите компьютер и монитор
•Штекер кабеля USB вставьте в разъем USB компьютера. Выполните инструкции, отображаемые на экране.
2.Adjustable resolution (400/800 dpi)
Resolution, 800 dpi by default, can be adjusted between 800 dpi and 400 dpi by pressing right button and scroll button together.
2.Résolution ajustable (400/800 dpi)
La résolution par défaut de 800 dpi, peut être réglée entre 400 et 800 dpi en appuyant en même temps sur le bouton de droite et le bouton de défilement.
2. Resolución ajustable (400/800 dpi)
Resolución, 800 dpi por defecto, puede ser ajustado entre 800 dpi y 400 dpi presionando el botón derecho y moviendo el botón al mismo tiempo.
2.Регулируемое разрешение (400 - 800 точек на дюйм) Разрешение (по умолчанию задано 800 точек на дюйм) можно отрегулировать в диапазоне 400 - 800 точек на дюйм. Для этого следует одновременно нажать правую кнопку и кнопку прокрутки.
•Plug the USB connector into the USB port
•Raccordez le connecteur USB au port USB
•Enchufe el conector USB en el puerto USB
•Штекер USB вставьте в разъем USB компьютера
•Press right button and scroll button at the same time
•Appuyez en même temps sur le bouton de droite et le bouton de défilement
•Presione el botón derecho y mueva el botón al mismo tiempo
•Одновременно нажмите правую кнопку и кнопку прокрутки