
PJ458D specifications
The ViewSonic PJ458D is a state-of-the-art projector designed for both professional and personal use, showcasing advanced features and technologies that enhance the viewing experience. This projector stands out for its versatility, making it suitable for education, corporate environments, and home entertainment.One of the main features of the ViewSonic PJ458D is its impressive brightness level, boasting up to 4000 lumens. This high brightness ensures that presentations and videos remain clear and vibrant in various lighting conditions, making it an excellent choice for conference rooms and classrooms where ambient light is often unavoidable. Coupled with a 20,000:1 contrast ratio, this projector produces sharp images with deep blacks and bright whites, ensuring an immersive viewing experience.
The PJ458D employs DLP (Digital Light Processing) technology, which delivers outstanding color accuracy and detail. This technology minimizes the rainbow effect common in some projectors, providing smoother transitions and enhancing overall image quality. The projector supports Full HD resolution at 1920 x 1080 pixels, allowing users to enjoy high-definition content without any loss in fidelity.
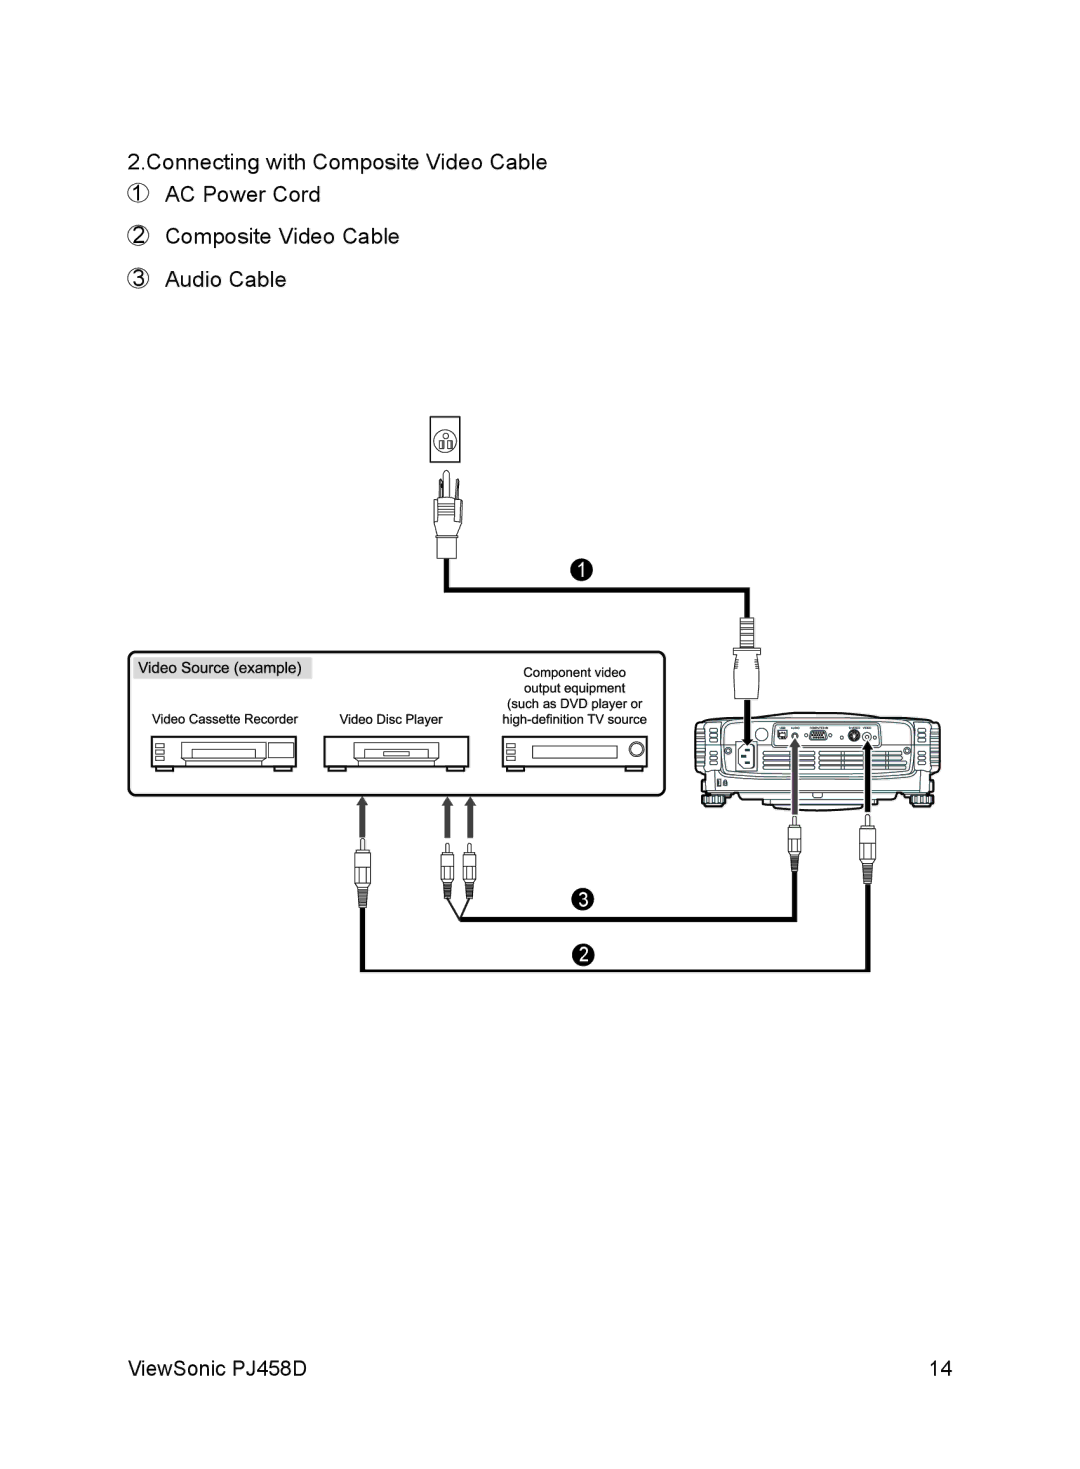
Connectivity options are another highlight of the ViewSonic PJ458D. It is equipped with multiple inputs, including HDMI, VGA, USB, and composite connections, making it compatible with a wide range of devices such as laptops, tablets, and streaming devices. This extensive connectivity ensures users can easily switch between different sources during presentations or movie nights.
Portability is also a key characteristic of the PJ458D. Its lightweight design and compact size make it easy to transport, allowing users to take it to different venues without hassle. The projector comes with a built-in carry handle, further enhancing its portability.
The PJ458D is user-friendly, equipped with simple-to-navigate controls and an intuitive interface. It features an automatic keystone correction function that ensures images are projected in the correct shape, even when the projector is not perfectly aligned with the screen.
In summary, the ViewSonic PJ458D is a powerful projector that offers exceptional brightness, impressive color accuracy, and versatile connectivity options. Whether for business presentations, educational purposes, or home entertainment, the PJ458D provides users with an outstanding visual experience, reflecting ViewSonic's commitment to quality and innovation in projector technology.