
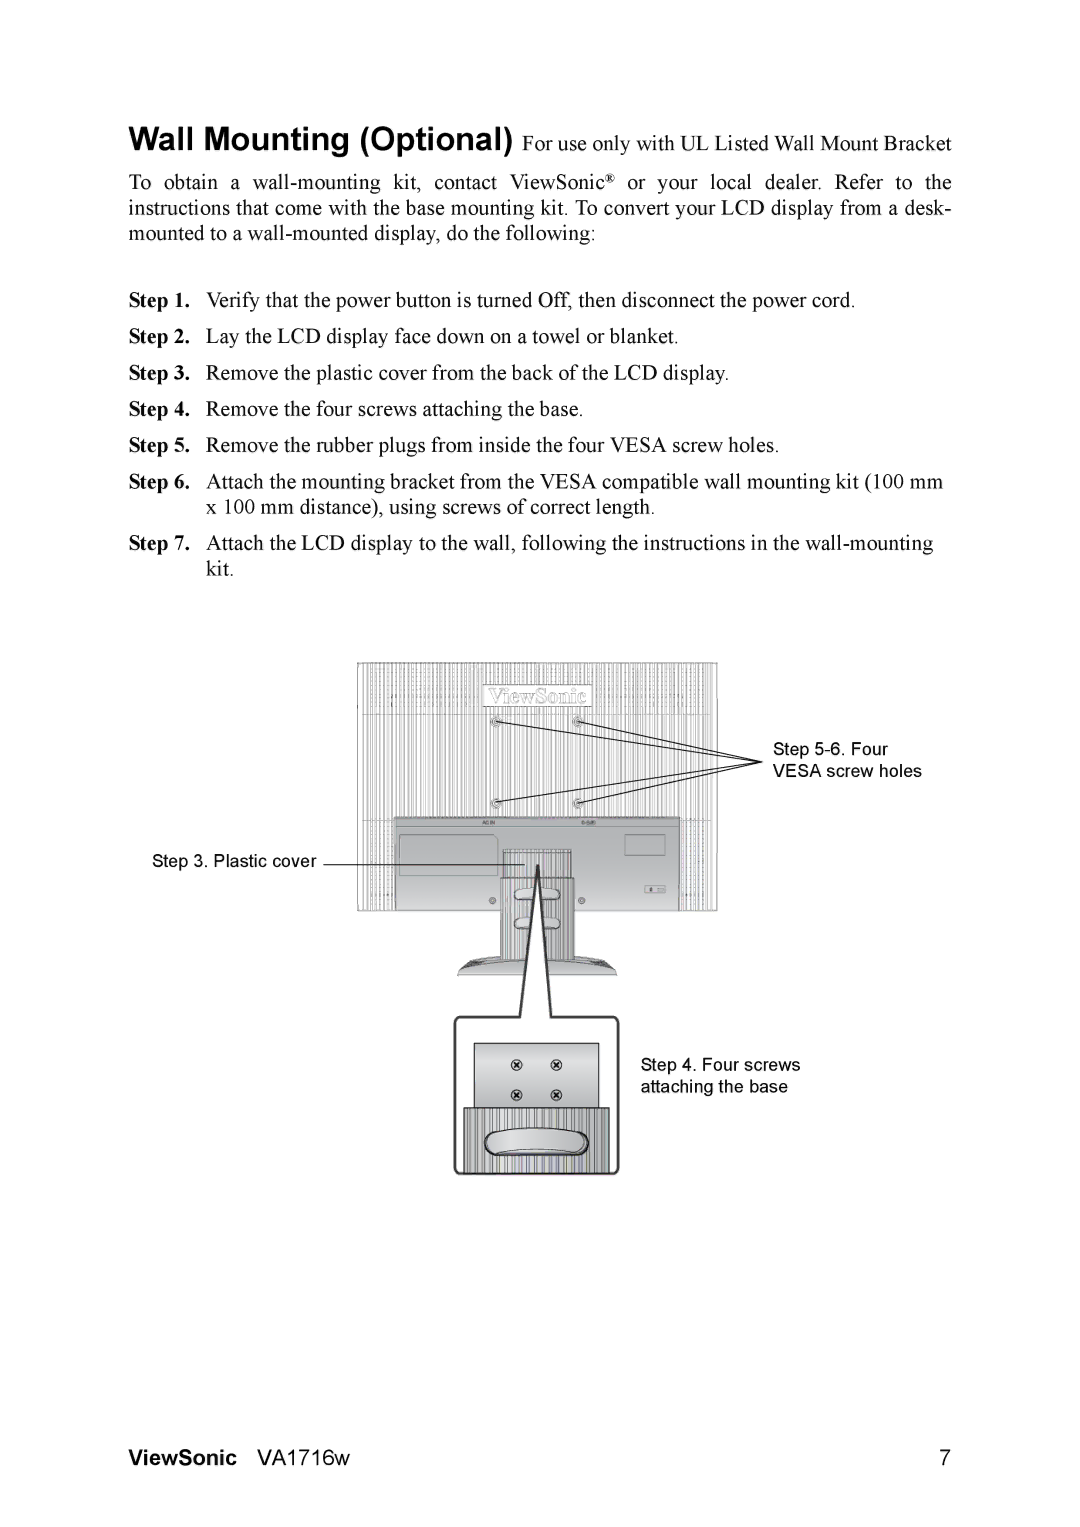
VS11882, VA1716w specifications
The ViewSonic VS11882, VA1716w is a versatile and reliable monitor designed to meet the demands of both home and office environments. Known for its impressive display quality and user-friendly features, this monitor has become a popular choice among professionals and casual users alike.One of the standout features of the VA1716w is its 17-inch display, which offers a resolution of 1440 x 900 pixels. This native WXGA+ resolution delivers crisp and clear visuals, making it suitable for a variety of tasks ranging from document editing to graphic design. The monitor utilizes a 16:10 aspect ratio, providing a wider viewing area that enhances productivity by allowing users to view multiple windows simultaneously.
The VA1716w incorporates advanced viewing technologies, including an ultra-wide viewing angle of 160 degrees both horizontally and vertically. This ensures that images maintain their integrity and color accuracy, even when viewed from off-angles. Additionally, the monitor features a fast response time of 5 milliseconds, which significantly reduces motion blur during fast-paced video playback and gaming.
The design of the VA1716w is both sleek and functional. It boasts a thin bezel and a slim profile, making it an aesthetically pleasing addition to any workspace. The monitor is also equipped with a tilt function, allowing users to adjust the screen to their preferred viewing angle for maximum comfort.
In terms of connectivity, the ViewSonic VA1716w offers a range of options, including VGA and DVI ports, making it compatible with various devices such as laptops, desktops, and media players. This flexibility ensures that users can achieve seamless integration into their existing setups.
Energy efficiency is another notable characteristic of the VA1716w. It is designed to meet stringent energy-saving standards, which not only benefits the environment but also helps reduce overall power consumption and operating costs.
Overall, the ViewSonic VS11882, VA1716w stands out as a reliable and affordable monitor that combines impressive display capabilities with practical features. Its quality construction, coupled with versatile connectivity options, makes it an ideal choice for both casual users and professionals seeking an effective and efficient display solution. Whether for work, study, or entertainment, the VA1716w delivers a satisfying visual experience that meets the demands of today's digital lifestyle.