
VG191 specifications
The ViewSonic VG191 is an outstanding 19-inch LCD monitor designed to enhance user experience in both home and office environments. Featuring a sleek design and compact footprint, it is well-suited for a variety of applications, ranging from casual computing to professional use.With a maximum resolution of 1280x1024 pixels, the VG191 provides crisp and clear visuals that are ideal for completing tasks whether it be documents, spreadsheets, or multimedia consumption. The 5ms response time ensures smooth transitions and reduces ghosting effects, making it suitable for light gaming and video playback.
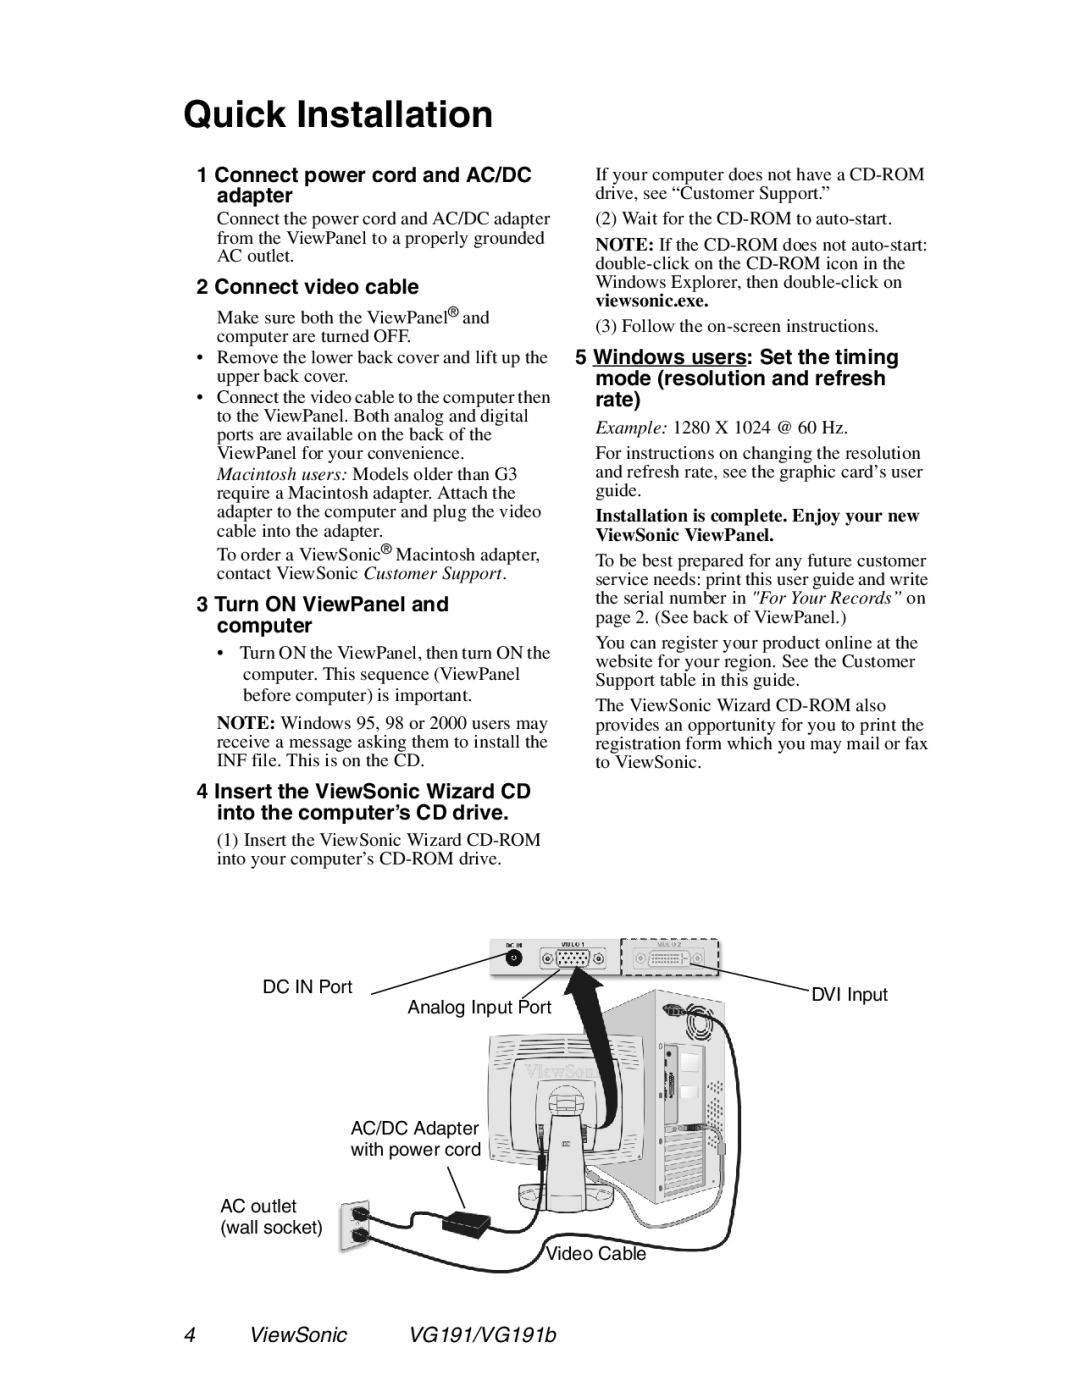
One of the standout features of the VG191 is its extensive connectivity options. It includes both VGA and DVI-D inputs, enabling compatibility with a wide range of devices, from older PCs to modern laptops and media players. This versatility allows users to connect their preferred computers or devices effortlessly.
The monitor is equipped with ViewSonic’s exclusive Eco Mode which enhances energy efficiency. This feature helps to reduce power consumption without compromising on performance, leading to a smaller carbon footprint and lower energy costs. Alongside energy efficiency, the VG191 also boasts a built-in VESA mount, providing options for wall mounting according to user preference.
Another noteworthy characteristic is its ergonomic design. The monitor offers tilt adjustments, allowing users to set the screen at the most comfortable angle for extended periods of use. This feature greatly enhances user comfort and helps reduce eye strain.
To further complement the viewing experience, the VG191 delivers vibrant color accuracy and a wide viewing angle thanks to its advanced panel technology. With a contrast ratio of 1000:1 and a brightness level of 250 cd/m², the monitor produces vivid images that maintain clarity across various lighting conditions.
In summary, the ViewSonic VG191 stands out due to its impressive features, including a 19-inch display, versatile connectivity, energy-saving technologies, ergonomic adjustments, and superior color performance. Whether for work or play, this monitor caters to users seeking reliability and quality in their display solutions. It's a solid choice for anyone looking to enhance their digital experience.