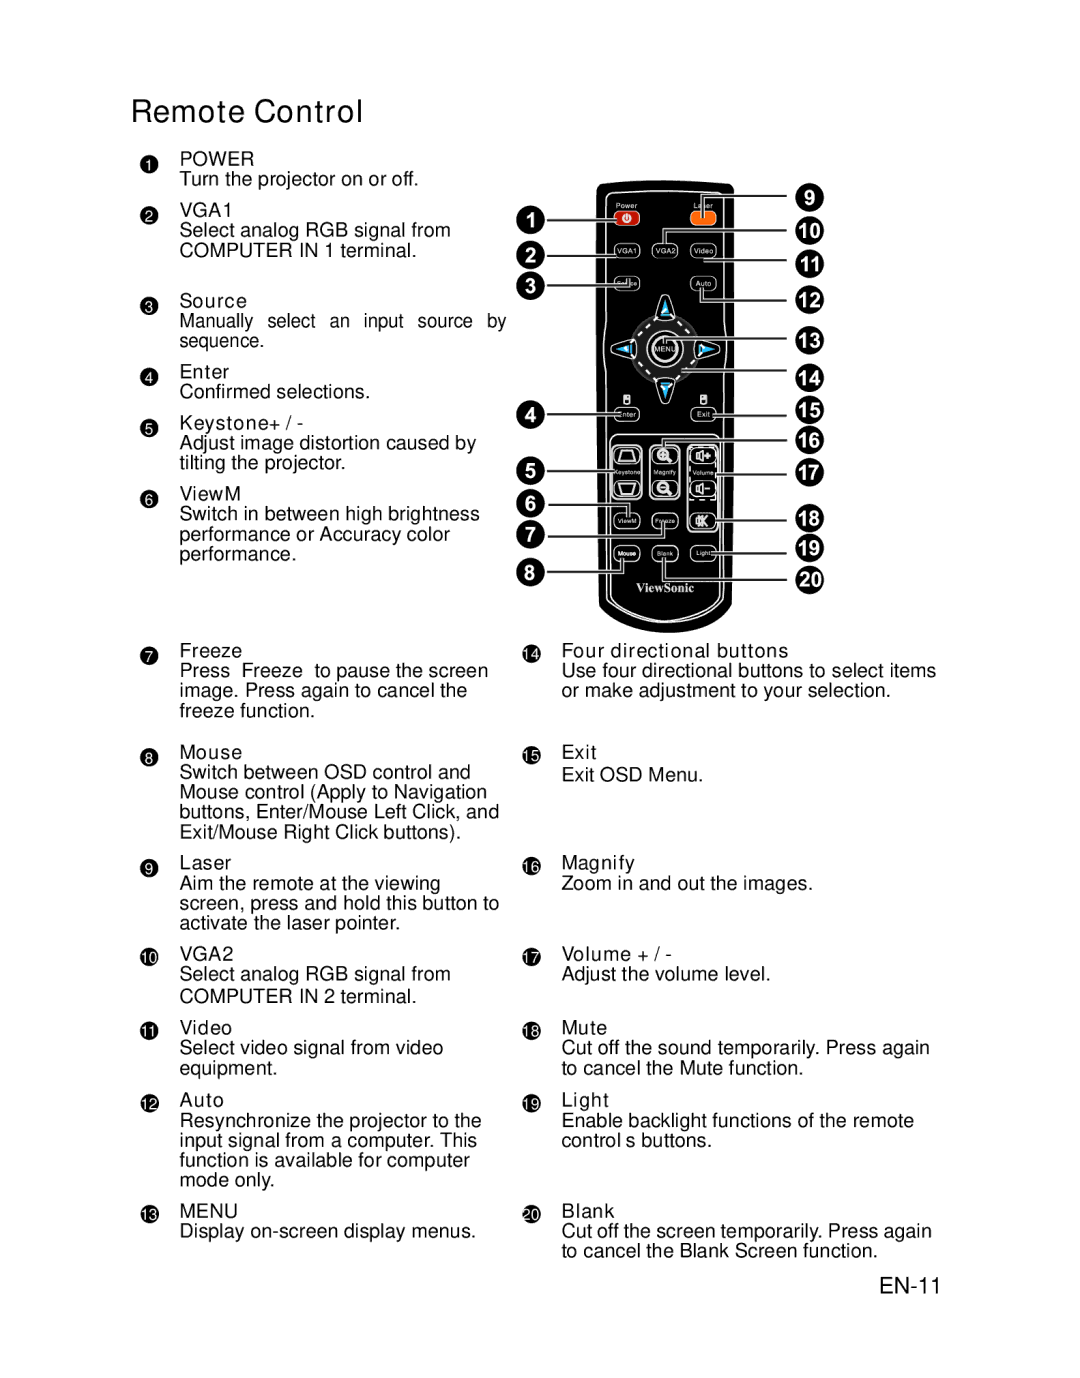
Remote Control
1POWER
Turn the projector on or off.
2VGA1
Select analog RGB signal from COMPUTER IN 1 terminal.
3Source
Manually select an input source by sequence.
4Enter
Confirmed selections.
5Keystone+ / -
Adjust image distortion caused by tilting the projector.
6ViewM
Switch in between high brightness performance or Accuracy color performance.
7Freeze
Press “Freeze” to pause the screen image. Press again to cancel the freeze function.
8Mouse
Switch between OSD control and Mouse control (Apply to Navigation buttons, Enter/Mouse Left Click, and Exit/Mouse Right Click buttons).
9Laser
Aim the remote at the viewing screen, press and hold this button to activate the laser pointer.
10VGA2
Select analog RGB signal from COMPUTER IN 2 terminal.
11Video
Select video signal from video equipment.
12Auto
Resynchronize the projector to the input signal from a computer. This function is available for computer mode only.
13MENU
Display
14Four directional buttons
Use four directional buttons to select items or make adjustment to your selection.
15Exit
Exit OSD Menu.
16Magnify
Zoom in and out the images.
17Volume + / -
Adjust the volume level.
18Mute
Cut off the sound temporarily. Press again to cancel the Mute function.
19Light
Enable backlight functions of the remote control’s buttons.
20Blank
Cut off the screen temporarily. Press again to cancel the Blank Screen function.
