
VX2439WMH specifications
The ViewSonic VX2439WMH is a remarkable display that strikes a balance between performance, features, and affordability, making it a suitable choice for both casual users and professionals. This 24-inch monitor boasts an impressive Full HD resolution of 1920 x 1080, allowing for crystal-clear visuals whether you're watching movies, playing games, or working on graphic design projects.One of the standout features of the VX2439WMH is its advanced IPS (In-Plane Switching) technology, which enhances color accuracy and consistency across wide viewing angles. This means that regardless of your position relative to the screen, colors remain vibrant and true-to-life. The monitor has a typical brightness of 250 cd/m² and a contrast ratio of 1000:1, ensuring excellent visibility in various lighting conditions.
The VX2439WMH is equipped with a rapid 5ms response time, which minimizes motion blur during fast-paced action scenes in games and movies, allowing for a smooth viewing experience. Furthermore, it supports a 75Hz refresh rate, which is beneficial for gamers who want a bit more fluidity compared to traditional 60Hz displays. The inclusion of Adaptive Sync technology also aids in minimizing screen tearing, providing a seamless and immersive gaming experience.
Connectivity options on the VX2439WMH are robust, featuring HDMI, DisplayPort, and VGA ports, allowing users to connect multiple devices effortlessly. This versatility ensures compatibility with laptops, gaming consoles, and desktop computers alike. Additionally, the monitor includes built-in speakers, which offer decent audio performance for casual use, although dedicated speakers or headphones are recommended for an enhanced audio experience.
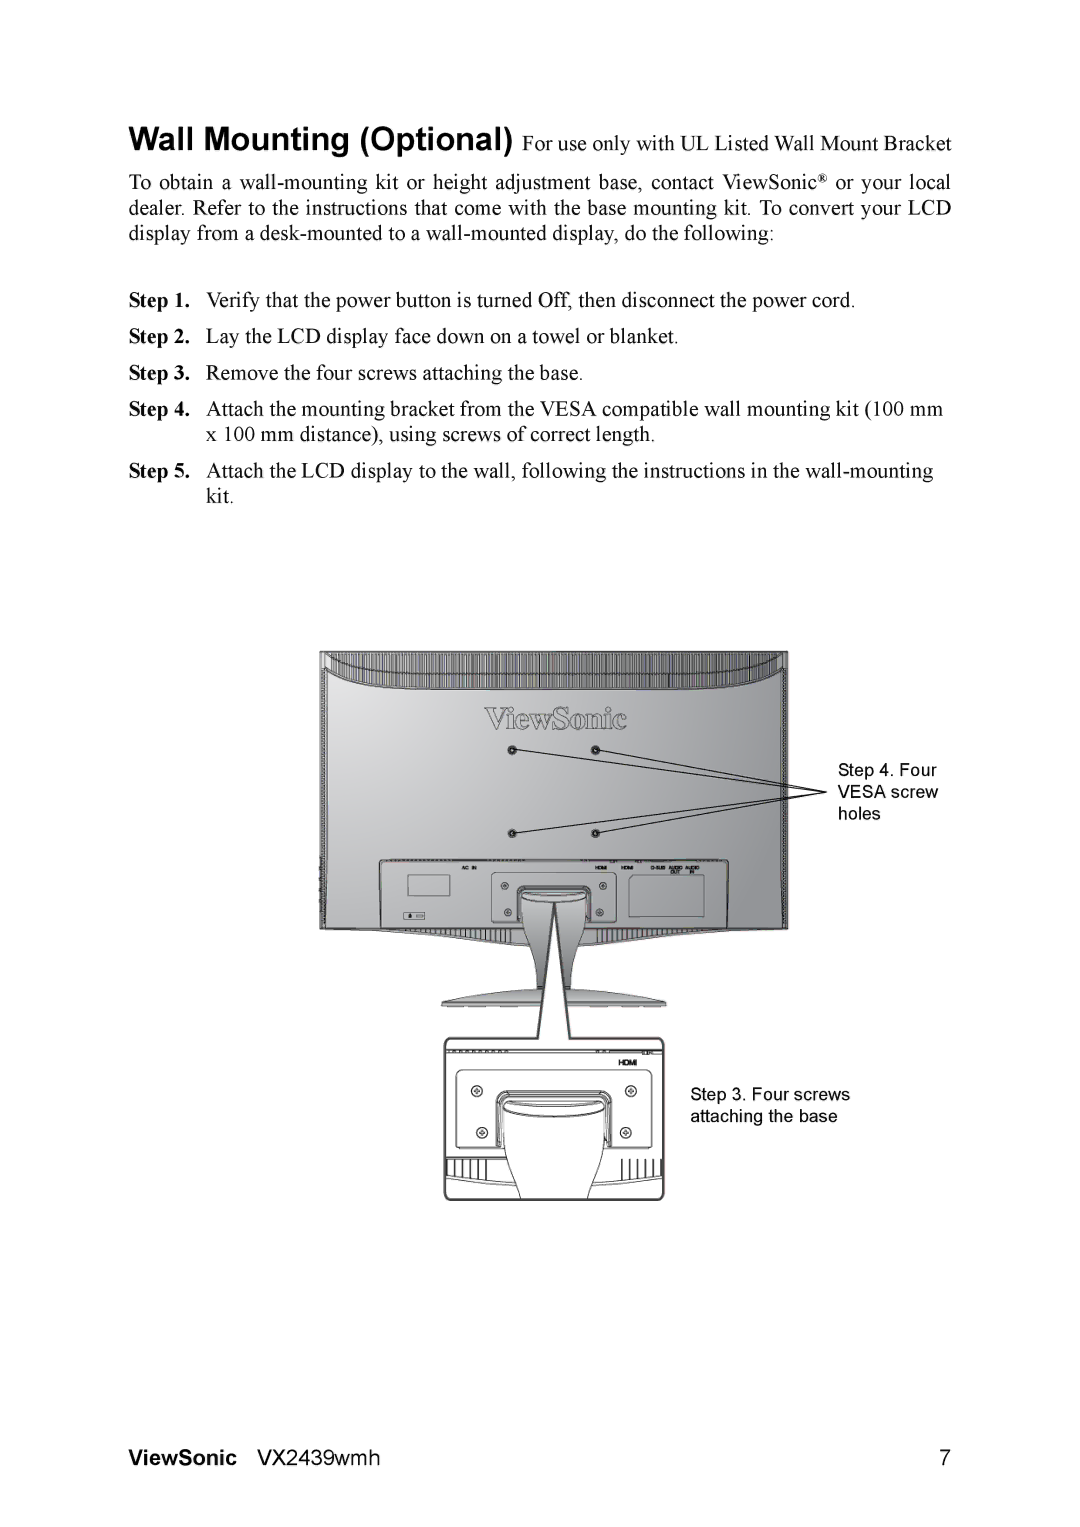
The design of the ViewSonic VX2439WMH is sleek and modern, with slim bezels that maximize the screen real estate while giving it a contemporary look. The adjustable stand provides options for tilt adjustments, enabling users to find the most comfortable viewing angle. For those who prefer a more ergonomic setup, the monitor can also be VESA-mounted.
In summary, the ViewSonic VX2439WMH is a versatile and feature-rich monitor that excels in delivering stunning visuals and smooth performance. With its IPS technology, rapid response time, and multiple connectivity options, it's an excellent choice for gaming, multimedia consumption, and productivity tasks. For users looking for a reliable and stylish monitor, the VX2439WMH is certainly worth considering.