
DEV900 specifications
The Viking DEV900 is a state-of-the-art device that blends cutting-edge technology with user-friendly features, designed specifically for various applications in industrial settings. It is engineered to enhance productivity while ensuring optimal performance and reliability, making it a robust solution for modern enterprises.One of the standout features of the Viking DEV900 is its high processing power, which is driven by a state-of-the-art multi-core processor. This allows the device to handle intensive computational tasks with ease, making it suitable for data analytics, advanced simulations, and real-time processing. With its extensive memory and storage capabilities, users can easily manage large datasets and complex applications, ensuring that their operations run smoothly.
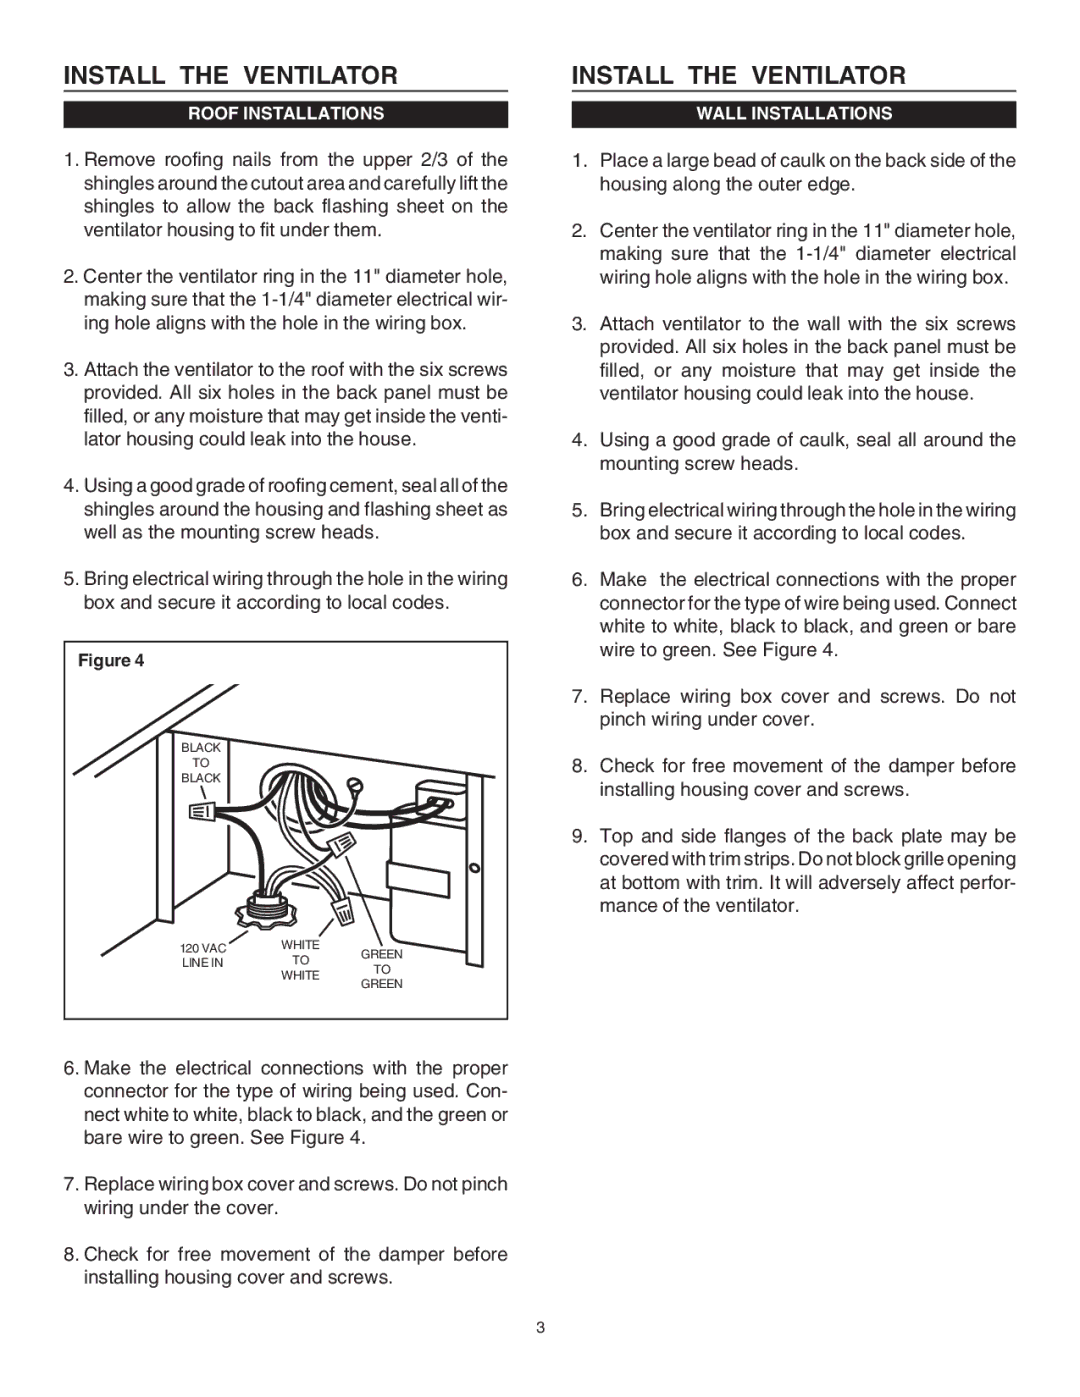
In terms of connectivity, the Viking DEV900 is equipped with a variety of ports, including USB, HDMI, and Ethernet, allowing it to connect to a wide range of peripherals and networks. It supports both wired and wireless communication protocols, enabling seamless integration into existing infrastructure. This versatility makes it an ideal choice for businesses that require a device that can adapt to different environments and technical requirements.
The device also features advanced security measures, including encryption and user authentication, ensuring that sensitive data remains protected against unauthorized access. This is particularly important in industries such as finance, healthcare, and government, where data integrity and confidentiality are paramount.
Another significant aspect of the Viking DEV900 is its durable design. Built to withstand harsh conditions, it features rugged housing that is resistant to dust and moisture. This durability makes it suitable for deployment in challenging environments, such as manufacturing floors, outdoor sites, and warehouses where traditional devices may struggle.
Moreover, the Viking DEV900 is designed with energy efficiency in mind, minimizing power consumption without sacrificing performance. This not only helps reduce operational costs but also supports sustainability initiatives by lowering the carbon footprint.
In summary, the Viking DEV900 stands out as a powerful, versatile, and reliable device that is well-suited for a wide range of industrial applications. Its robust technological features, combined with user-centric design and advanced security measures, make it a valuable asset for organizations looking to enhance their operational efficiency and security.