Manuals
/
Vinotemp
/
Kitchen Appliance
/
Refrigerator
Vinotemp
VT-SC-1 Parts And Identification, Installation, Electrical Connection, F. Adjusting Leg
Models:
VT-SC-1
1
4
8
8
Download
8 pages
24.16 Kb
1
2
3
4
5
6
7
8
Troubleshooting
Install
Warranty
Maintenance
Service & Important Notice
Page 4
Image 4
Page 3
Page 5
Page 4
Image 4
Page 3
Page 5
Contents
O W N E R ’ S M A N U A L
W W W . V I N O T E M P . C O M
Beverage Cooler
V T - S C
Your Beverage Cooler
General Operating Instructions
TABLE OF CONTENTS
IMPORTANT SAFETY INSTRUCTIONS
INSTALLATION
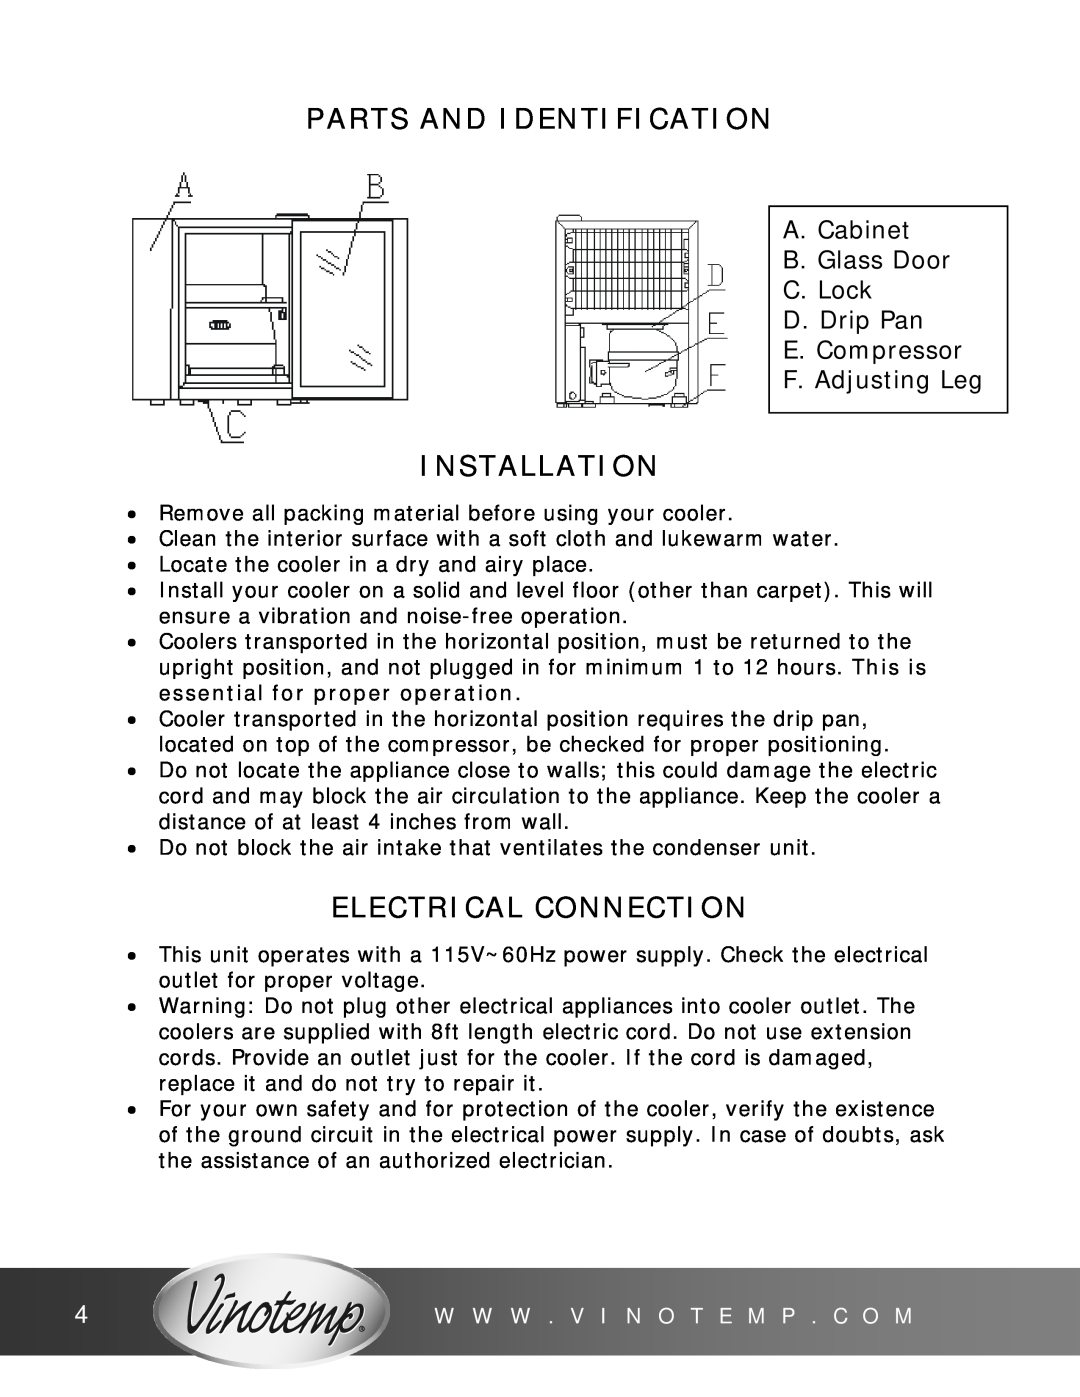
PARTS AND IDENTIFICATION
ELECTRICAL CONNECTION
F. Adjusting Leg
START-UP PROCEDURES
MAINTENANCE
Cleaning
Power failure
TROUBLESHOOTING
CIRCUIT DIAGRAM
Your cooler does not work
Your cooler makes too much noise
TERMS OF SALE AND WARRANTY
Please do not place the unit within reach of children
SERVICE & IMPORTANT NOTICE
For adult use only
Top
Page
Image
Contents