VTech 9111, VT 9115 Getting Started, Handset Features, Base Unit Features

Models: 9111 VT 9115

1 4
Download 4 pages 14.2 Kb
Page 2
Image 2

GETTING STARTED


WALL MOUNTING

TONE

PULSE

AC ELECTRICAL


OUTLET

wooden stud

wallboard

TONE PULSE

Setting Up Your VT 9111/VT 9115

1.Choose an area near an electrical outlet and a telephone wall jack.

2.Connect the telephone line cord. Insert one end of the telephone line cord into the jack at the rear of the base unit. Plug the other end into a telephone wall jack. Make sure the plugs snap securely into place.

3.Plug the AC power adapter into an electrical outlet and the DC connector to the back of the base unit.

CAUTION:Use only the AC adapter shipped with your VT 9111/VT 9115. This is a Class 2 AC adapter, specifically designed for use with the VT 9111/VT 9115.

NOTE: Connect power to the base unit before placing the handset in the cradle.

4.Set the TONE/PULSE switch on the base unit. If you have touch tone service on your phone line, set the switch to TONE. If you have rotary service, set the switch to PULSE.

TELEPHONE

WALL JACK

5.CHARGE THE HANDSET BATTERIES BEFORE USE. The batteries recharge automatically whenever the handset is in the base unit cradle. The batteries must be charged for 24 hours before using your phone for the first time.

6.CHECK FOR A DIAL TONE. After the batteries are charged, pick up the handset and press the PHONE key. The

IN USE indicator should light up, and you should hear a dial tone. If not, see IN

CASE OF DIFFICULTY.

CAUTION:

1.Never install telephone wiring during a lightning storm.

2.Never install telephone jacks in wet locations unless the jack is specifically designed for wet locations.

3.Never touch uninsulated telephone wires or terminals unless the telephone line has been disconnected at the network interface.

4.Use caution when installing or modifying telephone lines.

4

1.Choose a spot near an electrical outlet and a telephone jack.Your phone requires a modular telephone jack and

astandard electrical outlet (120V AC). The power cord is six feet long; make sure there is an electrical outlet within reach of the base. The outlet should not be controlled by a wall switch. If the switch is ever turned off, the phone will not operate.

2.Position the wall mount adapter on the base. Line up the tabs on the wall mount adapter with the holes on the bottom of the base. Snap the wall mount adapter firmly in place.

3.Mount the base on the wall. Position the base so the mounting studs will fit into the holes on the bottom of the base. Position the power cord to extend down the wall the phone is to be mounted on. Slide the base down on the mounting studs until it locks into place.

5

4.Connect the telephone cord. The telephone line cord has a snap-in plug at each end. Insert one of the plugs into the jack on the bottom of the base. Insert the other end of the plug into the wall jack.

5.Connect the power cord. Plug the DC connector into the DC jack at the rear of the base unit. Plug the AC power adapter into an electrical outlet.

6.Set the dial mode switch on the base unit. If you have touch tone service on

your phone line, set the switch to TONE.

If you have rotary service, set the switch

to PULSE.

HANDSET FEATURES

IN USE LED


VOLUME SWITCH

OFF KEY

PHONE KEY

CHAN KEY


TONE/KEY

MEM KEY

PROG KEY REDIAL KEY

BASE UNIT FEATURES

TONE/PULSE SWITCH

*This switch will switch the phone between TONE dialing and PULSE dialing.

CHARGING LED

*The CHARGE LED illuminates steadily when the handset is in the base cradle to indicate that the handset battery is being charged.

IN USE LED

* Immediately after placing the handset in the

base cradle, the IN USE LED flashes to indicate

that the initialization (assigning a new security

code and channel) is in progress

* The IN USE LED will stop flashing and go out

when the initialization is complete.

IN USE LED

*The IN USE LED lights when the phone line is being used by the handset.

*It flashes in cadence with an incoming ring.

*It flashes quickly during PROG mode.

PHONE KEY/ FLASH KEY

*Press the PHONE key to make a call.

*If you are currently on a call, pressing

PHONE flashes the line. This would be used with a feature like call waiting to

PROG KEY

* Press PROG key to enter PROGRAM mode. See Programming Speed Dial Numbers for more details.

REDIAL KEY

* When you hear the dial tone, pressing

the REDIAL key will dial out the last

number that was called on your phone.

* It can also be used to store the last

number dialed into the speed dial

memory. See Storing a Redial Number

PAGE KEY

*Press the PAGE key to page the handset.

*Press it a second time to cancel a page.

*The base will ring the handset 4 times before ending the page automatically.

*The handset can also cancel the page by pressing the OFF key.

*

The IN USE LED illuminates whenever the


handset is being used.

*

This LED also flashes with the cadence of the


incoming ring.

POWER LED

*The POWER LED illuminates when the base power adapter is plugged in and power is applied to the base unit.

7

answer your second call.

CHAN KEY

*Pressing the CHAN key when the handset is in use will activate a channel change to the next free channel.

*This is used if you are experiencing noise or interface on the current channel.

OFF KEY

* Press the OFF key to exit all modes of operation.

MEM KEY

*Press the MEM key to enter MEMORY mode.

*The sequence for dialing out a speed dial number in memory is: PHONE, MEM, Number Button (0-9).

into Speed Dial for details.

TONE/ KEY

*In PULSE dialing mode, this key is used to switch to Temporary TONE dialing mode.

VOLUME SWITCH

*3 level of volume level( )

*Upper position of switch is high volume level.

*Middle position is medium.

*Lower position is low.

BATTERY LOW WARNING BEEP

*The handset will make two beeps when the handset battery is getting low and needs to be recharged.

CUT


CUT


REPLACEMENT BATTERY ORDER FORM


For VTECH 9111/9115 Cordless Telephone


Name:


Address:


City:


State:


Zip:


daytime phone Number: (

)


ORDER INFORMATION


For Model VT 9111/VT 9115


(QTY.) Batteries @$19.95 each............................$


METHOD OF PAYMENT: DO NOT SEND CASH


CHECK

MONEY ORDER

VISA

MASTERCARD


AMERICAN EXPRESS

CREDIT CARD#


EXP. DATE


CARD HOLDER’S SIGNATURE

PLACE ORDER FORM AND PAYMENT IN ENVELOPE AND SEND TO:

VTECH COMMUNICATIONS

8770 SW NIMBUS AVENUE

BEAVERTON, OREGON 97008-7195 USA

YOU MAY ALSO ORDER BY PHONE. CALL 1-800-595-9511

6

Page 2
Image 2
VTech 9111, VT 9115 important safety instructions Getting Started, Handset Features, Base Unit Features

9111, VT 9115 specifications

The VTech VT 9115 and VT 9111 are advanced cordless phone systems that blend modern technology with user-friendly features to enhance communication at home or in the office. These models are designed to meet the diverse needs of users, offering smart solutions for everyday calling tasks.

At the core of the VTech VT 9115 and VT 9111 is their excellent call clarity and reliability. Utilizing DECT 6.0 technology, these phones provide a secure connection with less interference from other wireless devices, resulting in clearer sound quality and longer range. This technology is particularly valuable in busy households or offices where multiple wireless devices may be in use.

One of the standout features of these phone systems is their digital answering system. The integrated answering machine allows users to conveniently manage their messages with ease. It supports features such as remote access, enabling users to check their messages while away from home. The ability to screen calls through the answering machine provides an added layer of security and control for the user.

Another impressive characteristic of the VTech VT 9115 and VT 9111 is their large backlit LCD display. This feature enhances visibility for users, making it easier to view caller ID information and navigate through the menu options, even in low-light conditions. The intuitive interface simplifies the process of saving contacts and adjusting settings.

The phones also come equipped with a robust phonebook, capable of storing an extensive number of contacts. This feature allows users to quickly access frequently dialed numbers without having to memorize them. Additionally, the call waiting and caller ID features ensure users never miss an important call, providing essential information about incoming calls.

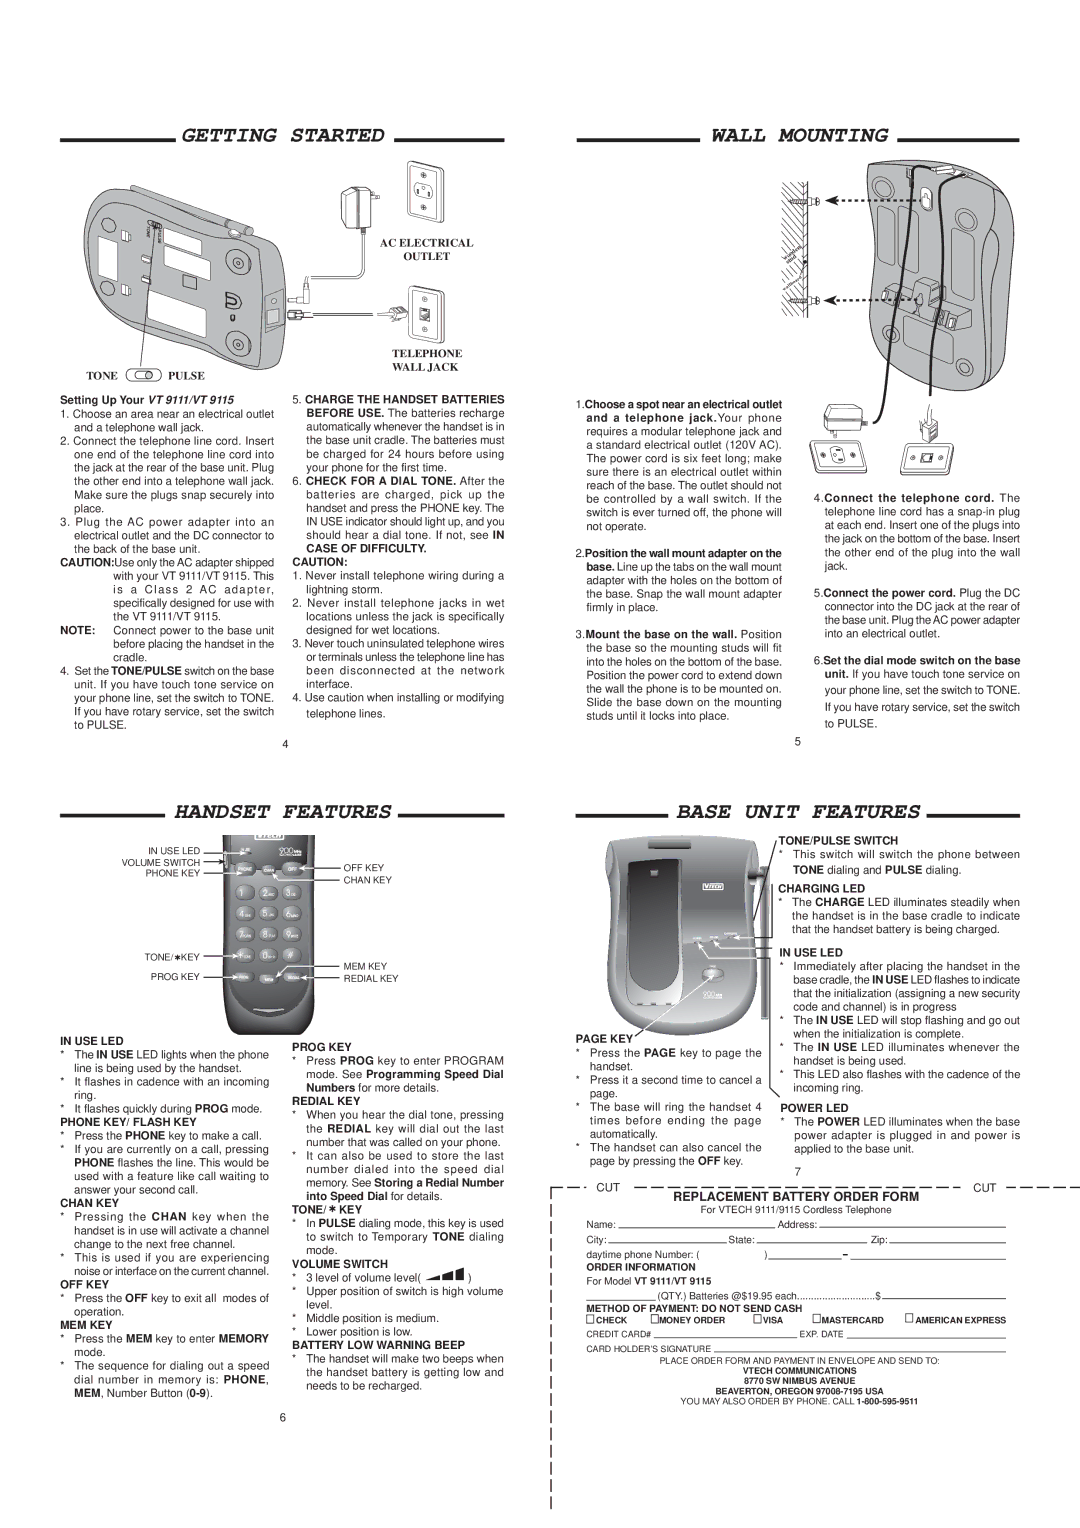
In terms of design, the VTech VT 9115 and VT 9111 are stylish and ergonomically designed. The compact size and lightweight nature make them easy to handle, while the comfortable keypad ensures efficient dialing. The base unit feature allows for easy charging, and the extended battery life signifies that users won’t have to worry about running out of power in the middle of important conversations.

Overall, the VTech VT 9115 and VT 9111 cordless phone systems combine modern technology with practical features to deliver an efficient and enjoyable communication experience. The inclusion of DECT 6.0 technology, a digital answering system, and user-friendly designs make these models ideal choices for anyone looking for reliable home or office communication solutions. Whether you need a system for personal use or professional needs, these models stand out for their quality and performance.