Step 23
Complete accessory installation
You will need:
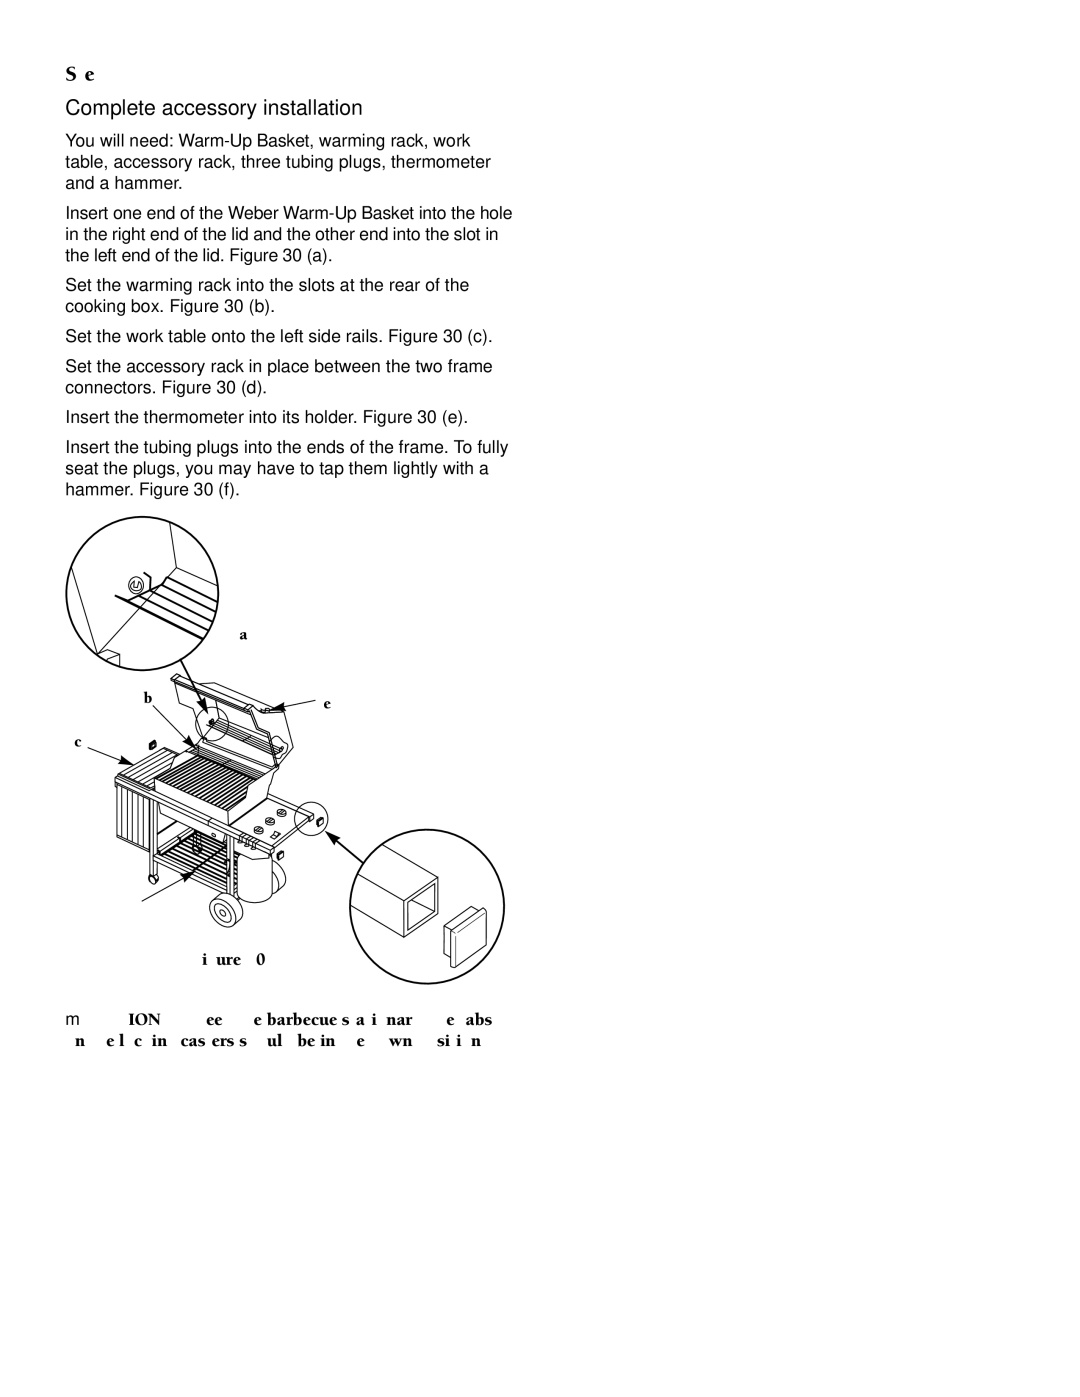
Insert one end of the Weber
Set the warming rack into the slots at the rear of the cooking box. Figure 30 (b).
Set the work table onto the left side rails. Figure 30 (c).
Set the accessory rack in place between the two frame connectors. Figure 30 (d).
Insert the thermometer into its holder. Figure 30 (e).
Insert the tubing plugs into the ends of the frame. To fully seat the plugs, you may have to tap them lightly with a hammer. Figure 30 (f).
| (a) |
(b) | (e) |
|
(c)
(f)
(d)
Figure 30
mCAUTION: To keep the barbecue stationary, the tabs on the locking casters should be in the down position.
22