MAINTENANCE

WARNING: Always stop unit and dis- connect spark plug wire (or disconnect pow- erhead from power source) before performing maintenance.

CHECK FOR DAMAGED OR WORN PARTS

Contact an authorized service dealer for re- placement of damaged or worn parts.

SBlade Shield -- Discontinue use of edger if blade shield is damaged.

CHECK FOR LOOSE

FASTENERS AND PARTS

SBlade nut S Fasteners

INSPECT AND CLEAN UNIT AND DECALS

S After each use, inspect complete unit for loose or damaged parts. Clean the unit and decals using a damp cloth with a mild deter- gent.

SWipe off unit with a clean dry cloth.

BLADE MAINTENANCE

WARNING: The blade will continue to spin after the engine stops or after the throttle trigger has been released. To avoid serious injury, make sure the blade has stopped coasting and disconnect the spark plug (or disconnect powerhead from power source) before performing work on the blade.

WARNING: Always replace a blade that is bent, warped, cracked, broken, or damaged in any other way. Never attempt to straighten and reuse a damaged blade. Use only specified replacement blade. Wear pro- tective gloves when handling or performing maintenance on the blade to help avoid injury.

SThe blade is reversible. When the cutting edge on one side becomes worn, turn the blade over (see BLADE REPLACEMENT in the SERVICE AND ADJUSTMENTS section).

SCheck blade for flatness periodically. Lay the blade on a flat surface to inspect for flat- ness. Throw away a blade that is not flat.

SERVICE AND ADJUSTMENTS

BLADE REPLACEMENT

WARNING: The blade will continue to spin after the engine stops or after the throttle trigger has been released. To avoid serious injury, make sure the blade has stopped coasting and disconnect the spark plug (or disconnect powerhead from power source) before performing work on the blade.

WARNING: Wear protective gloves when handling or performing maintenance on the blade to avoid injury. The blade is sharp and can cut you even when it is not moving.

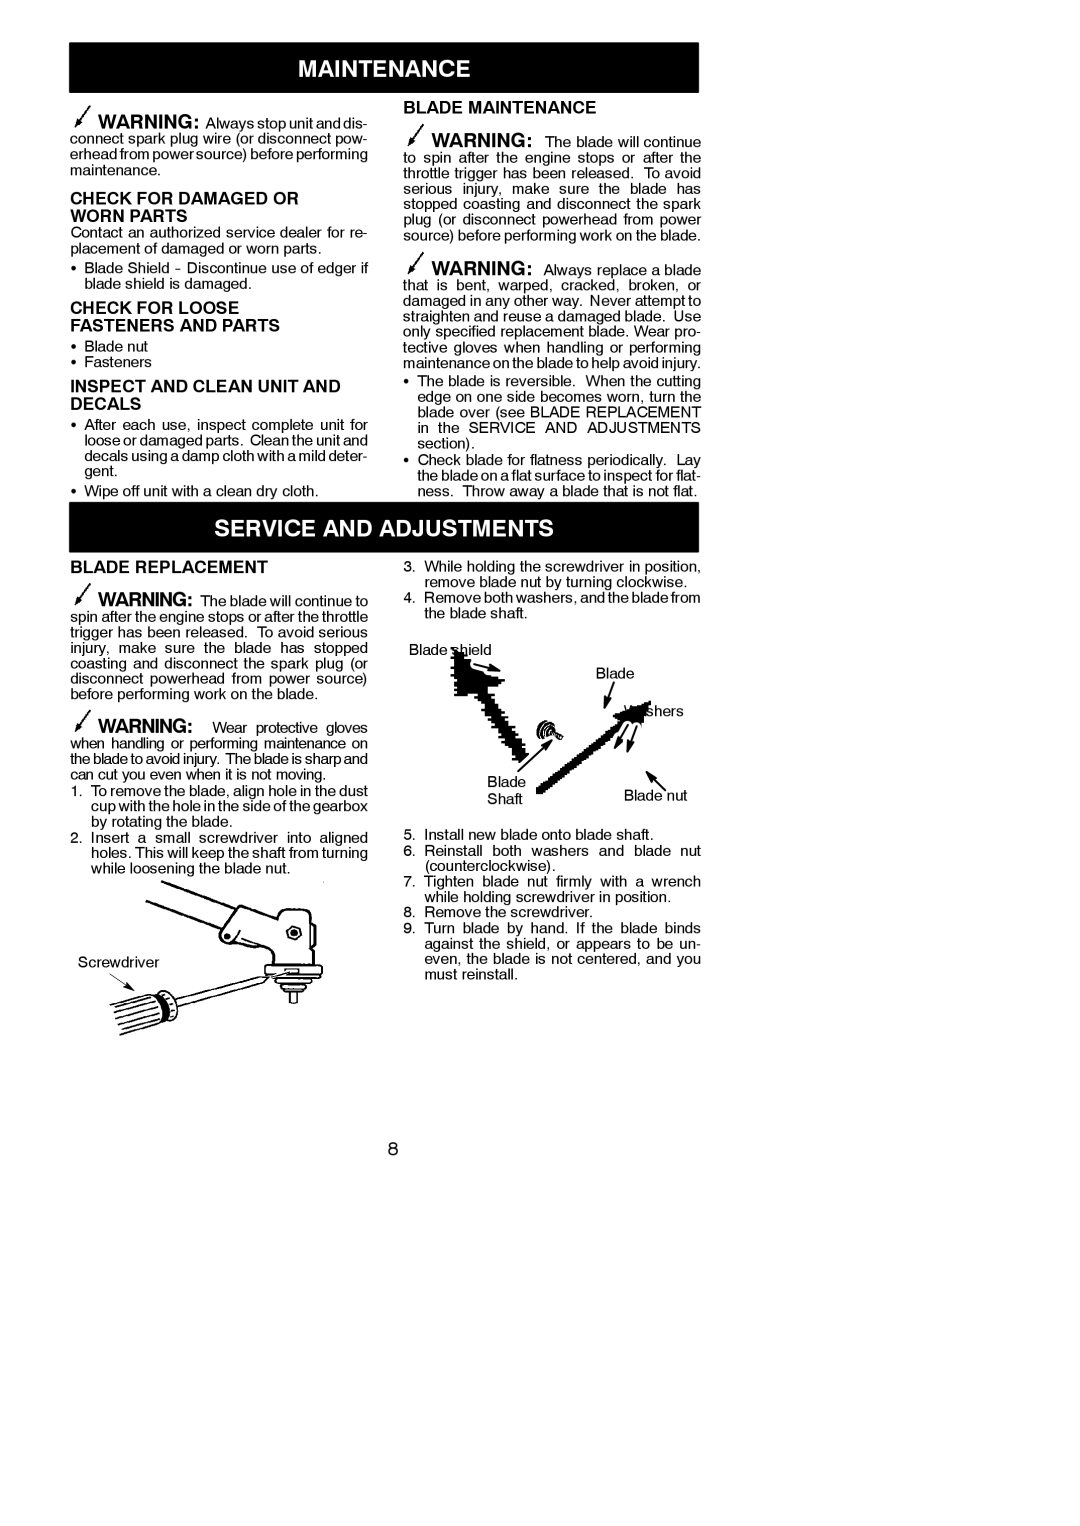
1.To remove the blade, align hole in the dust cup with the hole in the side of the gearbox by rotating the blade.

2.Insert a small screwdriver into aligned holes. This will keep the shaft from turning while loosening the blade nut.

Screwdriver

3.While holding the screwdriver in position, remove blade nut by turning clockwise.

4.Remove both washers, and the blade from the blade shaft.

Blade shield

Blade Washers

Blade

Blade nut

Shaft

5.Install new blade onto blade shaft.

6.Reinstall both washers and blade nut (counterclockwise).

7.Tighten blade nut firmly with a wrench while holding screwdriver in position.

8.Remove the screwdriver.

9.Turn blade by hand. If the blade binds against the shield, or appears to be un- even, the blade is not centered, and you must reinstall.

8

Page 8
Image 8
Weed Eater 1000E instruction manual Maintenance, Service and Adjustments

1000E specifications

The Weed Eater 1000E is a versatile and efficient tool designed for homeowners and landscaping professionals alike, making yard maintenance easier and more effective. This electric string trimmer brings together power, innovation, and convenience to help you achieve a pristine lawn and garden.

One of the most distinctive features of the 1000E is its lightweight design. Weighing in at just around 5 pounds, this trimmer provides the user with ease of movement without sacrificing performance. The ergonomic handle is designed to provide a comfortable grip, reducing fatigue during extended use, while the adjustable telescoping shaft allows users of all heights to trim with proper posture for maximum comfort and control.

The 1000E boasts a powerful 1000-watt motor which delivers strong cutting performance, making it capable of tackling tough weeds and overgrown areas with ease. The electrical power eliminates the hassle of fueling or oiling a gas-powered unit, making it an environmentally friendly option for yard work.

Another key feature is its advanced dual-line cutting system, which provides a wider cutting path of 14 inches. This not only makes the trimming process quicker but also ensures a clean and precise cut. The automatic line feed mechanism allows for seamless line advancement, meaning users won’t have to worry about manually adjusting the line during operation.

The Weed Eater 1000E is equipped with safety features such as a safety guard that protects the user from debris while trimming, ensuring a safer working environment. The electric motor operates quietly, making it suitable for residential use even in noise-sensitive neighborhoods.

Additionally, the design of the Weed Eater 1000E allows for easy maintenance. The trimmer head can be easily accessed for line replacement, and the overall construction is sturdy enough to withstand regular use while being simple to clean after each job.

Overall, the Weed Eater 1000E combines innovation, efficiency, and user-friendly characteristics, making it an excellent choice for anyone looking to maintain their yard effortlessly. Whether you are trimming along sidewalks, edges, or dealing with unruly patches of grass, the 1000E stands out as a reliable tool that gets the job done effectively.