Manuals
/
Weed Eater
/
Lawn and Garden
/
Trimmer
Weed Eater
530088848 Starting A Warm Engine, Operating Position, Advancing The Trimmer Line
Models:
530088848
1
7
11
11
Download
11 pages
26.06 Kb
4
5
6
7
8
9
10
11
Troubleshooting
Warranty
Carburetor Adjustment
How to
Safety
Page 7
Image 7
Page 6
Page 8
Page 7
Image 7
Page 6
Page 8
Contents
Please do not return unit to retailer
Operator’s Manual Manual del Operador
Manuel de L’utilisateur
BC2400 For Occasional Use Only
OPERATOR SAFETY
TRANSPORTING AND STORAGE
UNIT/MAINTENANCE SAFETY
FUEL SAFETY
CUTTING SAFETY
CONFIGURING YOUR UNIT
CARTON CONTENTS
ASSEMBLY
ASSEMBLY OF SHOULDER STRAP
ATTACHING THE PLASTIC SHIELD AND TRIMMER HEAD
ASSEMBLY INFORMATION - WEED BLADE
ATTACHING THE METAL SHIELD
HOW TO STOP YOUR UNIT
INSTALLATION OF THE METAL BLADE
HOW TO START YOUR UNIT
ADVANCING THE TRIMMER LINE
STARTING A WARM ENGINE
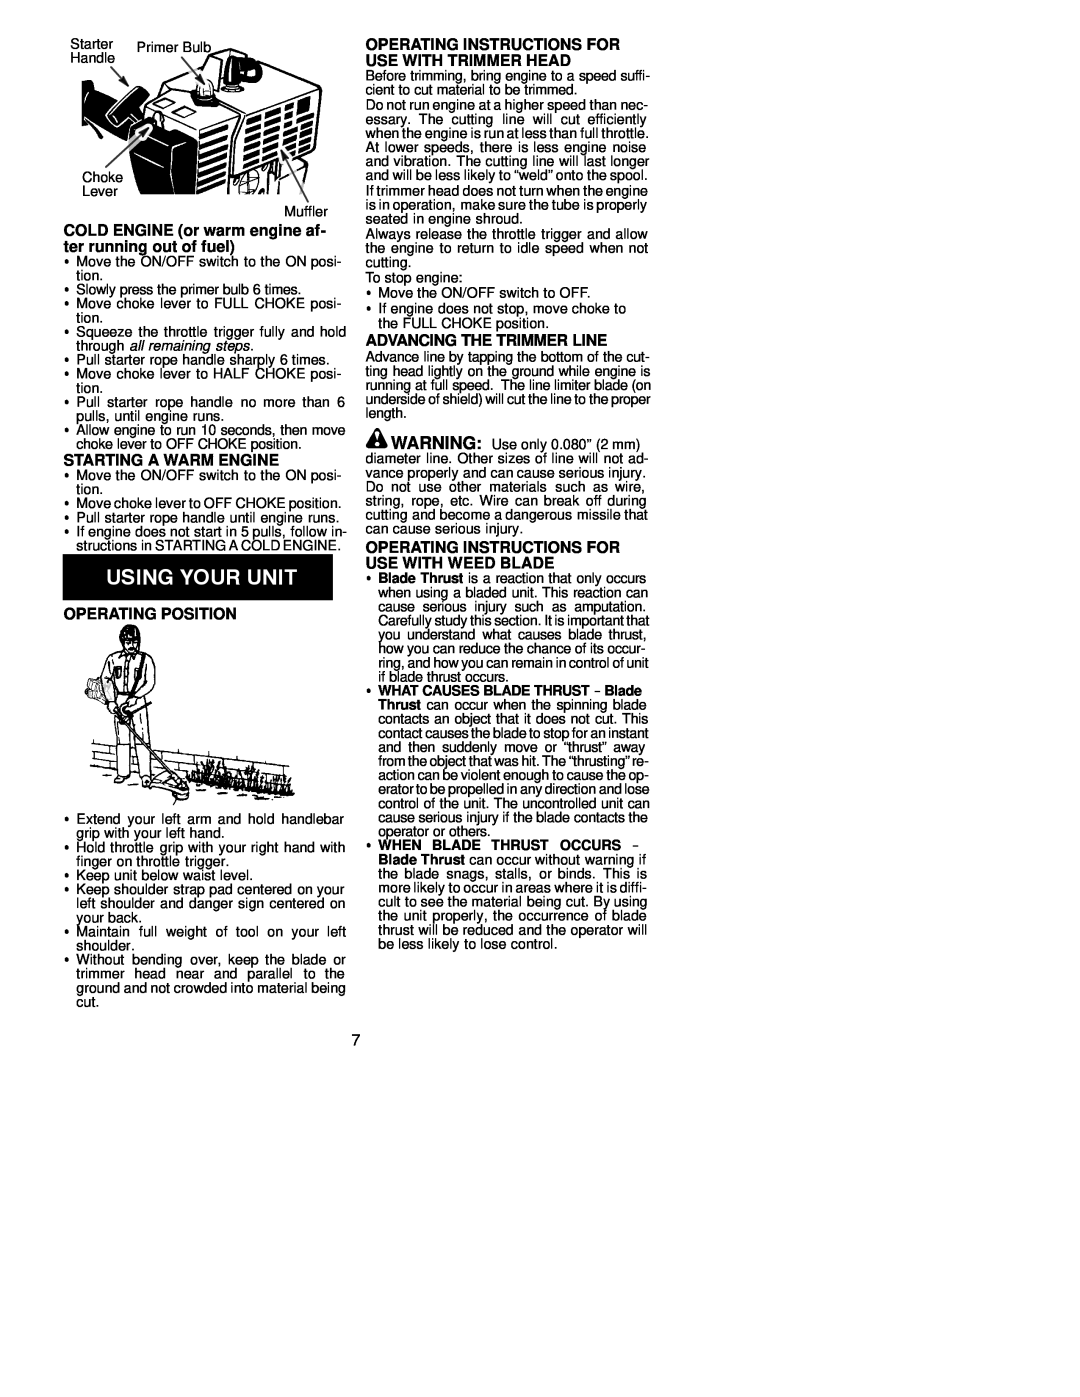
OPERATING POSITION
OPERATING INSTRUCTIONS FOR USE WITH TRIMMER HEAD
IGNITION TIMING
CARBURETOR ADJUSTMENT
REPLACING THE LINE
SPARK PLUG
CAUSE
TROUBLESHOOTING TABLE
NEED SERVICE PART?
TROUBLE
CONSEQUENTIAL DAMAGES POU
YOUR WARRANTY RIGHTS AND OB
OWNER’S WARRANTY RESPONSIBILI
REPAIR OR REPLACEMENT OF PARTS
owner if the part is under warranty. EMIS
Top
Page
Image
Contents