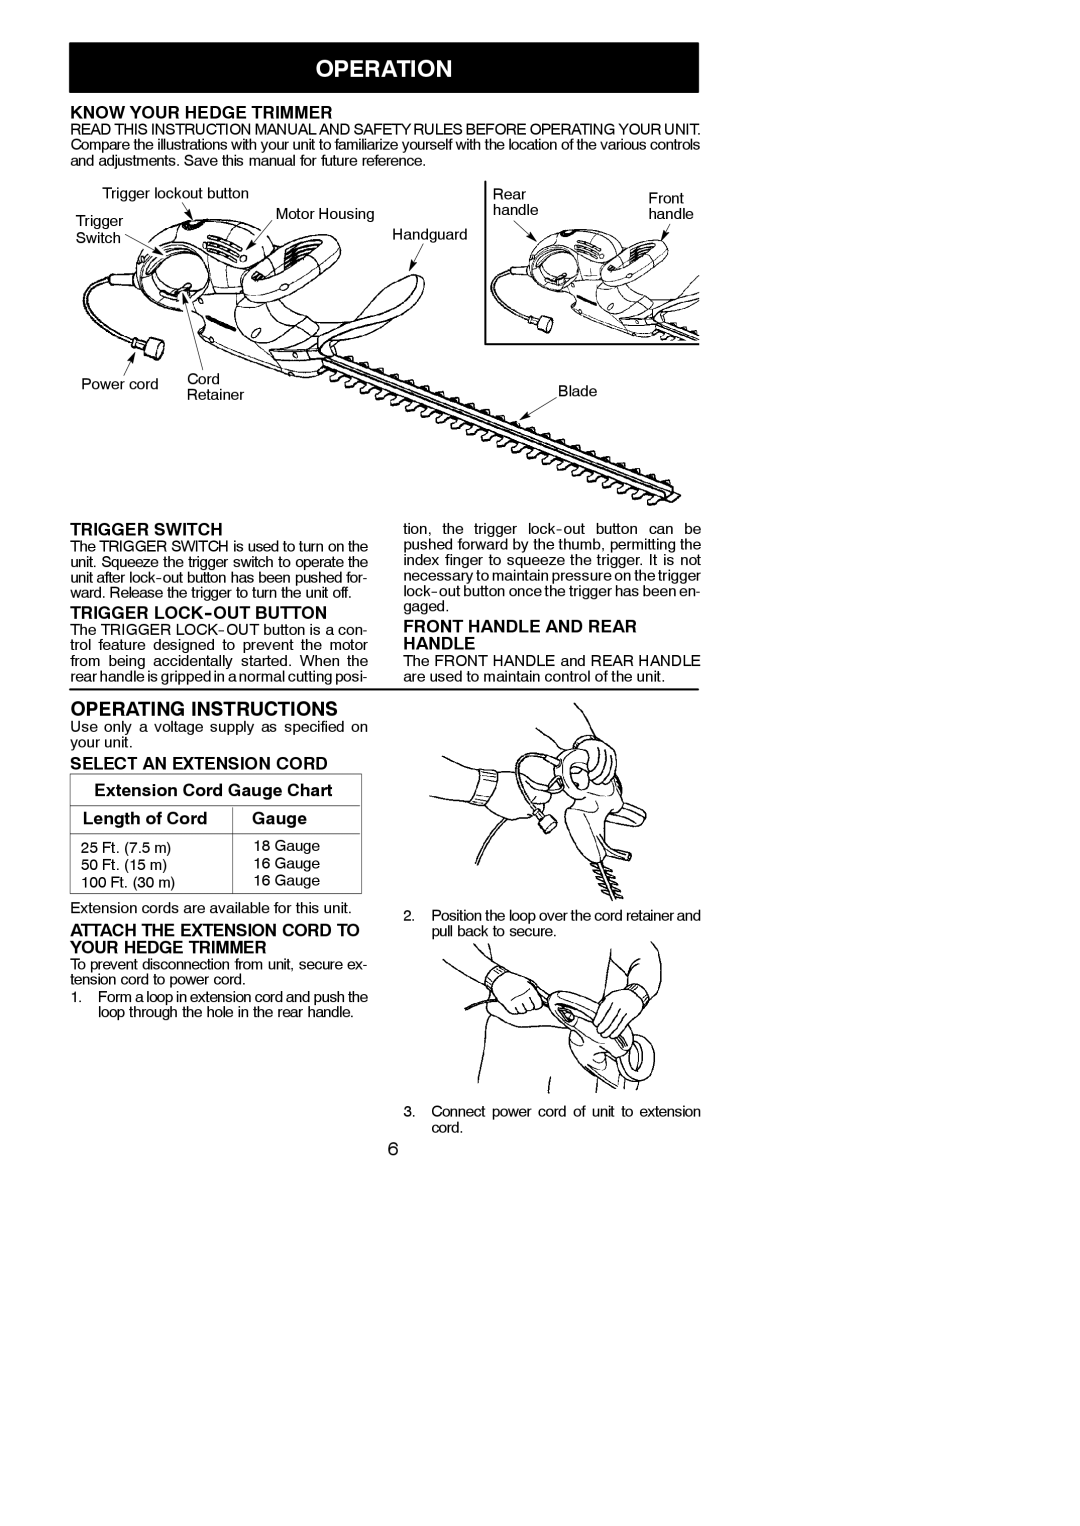
952711897, 952711898 specifications
The Weed Eater 952711897 and 952711898 are two highly regarded models in the world of outdoor power equipment, particularly among gardening enthusiasts and professional landscapers alike. Designed with precision and efficiency in mind, these trimmers offer a combination of power, performance, and convenience, making yard maintenance a much simpler task.One of the standout features of both models is their lightweight design. Weighing in at under 10 pounds, users can easily maneuver the trimmers around their lawns without discomfort. This is especially beneficial for extended use, as it minimizes strain on the arms and back. The ergonomic handle further enhances comfort, allowing for better grip and control, which is essential for achieving a clean cut in tight spots or uneven terrain.
Powering these trimmers is a robust two-cycle engine that delivers impressive cutting performance. The engines are designed for efficient fuel consumption, allowing users to tackle large areas without constant refueling. The reliable starting technology also ensures that both models start quickly and easily, sparing users the frustration often associated with outdoor power equipment.
Another key feature is the versatile cutting head. The Weed Eater models are compatible with a variety of attachments, allowing users to switch from trimming to edging or even brush cutting effortlessly. This adaptability makes them suitable for a wide range of gardening tasks, whether it's maintaining a manicured lawn or clearing away overgrown areas.
Both models incorporate innovative string advancement systems that eliminate the need for manual adjustments. This means users can focus on their work without interruption, enhancing productivity. Cleaning and maintaining the trimmers is straightforward, thanks to their user-friendly design.
Safety is also a priority with the Weed Eater 952711897 and 952711898. These trimmers come equipped with features like protective guards and safety switches, ensuring that users can operate them without unnecessary risk.
In conclusion, the Weed Eater 952711897 and 952711898 offer an exceptional blend of power, convenience, and safety, making them ideal for those looking to manage their outdoor spaces effectively. With their lightweight design, powerful engines, and versatile capabilities, these trimmers are poised to exceed the expectations of both casual gardeners and professional landscapers alike. Whether you're trimming borders, tackling weeds, or maintaining your garden, these models deliver the performance and reliability you need.