
RT110, RT112 specifications
The Weed Eater RT112 and RT110 are two significant models in the realm of outdoor power equipment, specifically designed for homeowners and gardening enthusiasts. These string trimmers have gained a reputation for their reliability, performance, and ease of use, making them ideal for tackling lawn maintenance tasks with efficiency.One of the standout features of the RT112 is its powerful engine. Equipped with a 25cc two-cycle engine, it provides the necessary power to handle tough grass and weeds. The RT110, while slightly less powerful, still boasts a robust 22cc engine that offers a perfect balance of performance and fuel efficiency for lighter tasks. Both models are designed for easy cold starting, allowing users to get to work quickly, even if the machine has been sitting for a while.
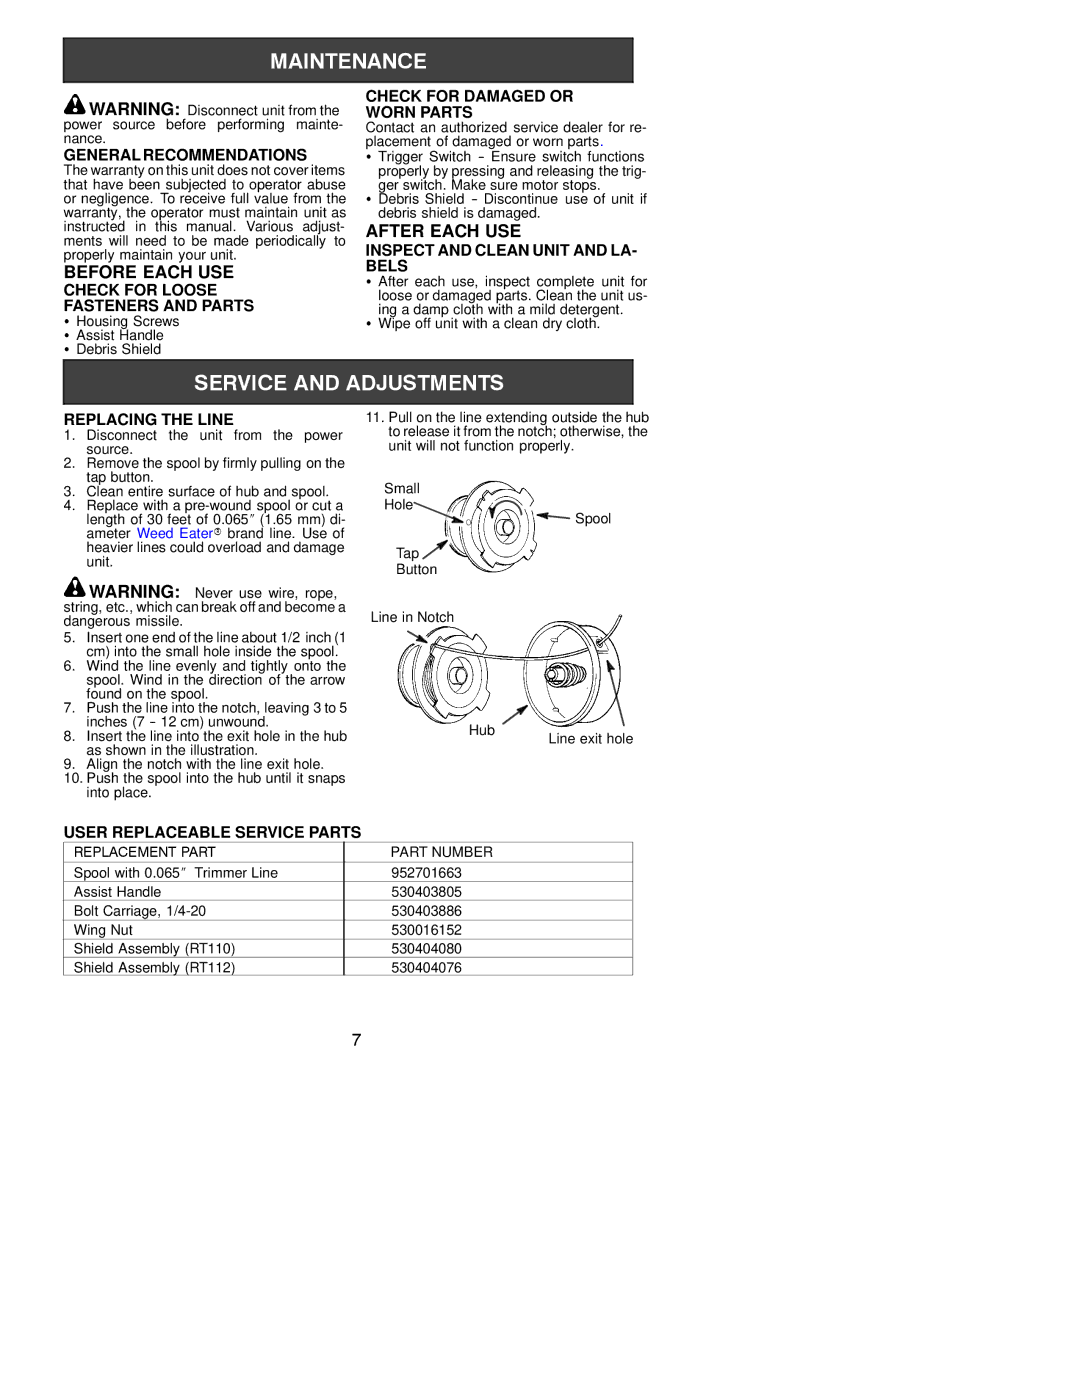
The line feed system is an essential characteristic of these trimmers. The RT112 and RT110 utilize a reliable, bump feed mechanism that allows users to easily advance the cutting line with a simple tap against the ground, making the trimming process more efficient and less interrupted. The cutting width of these models is around 16 inches, providing a perfect blend of productivity and maneuverability in tighter spaces.
Another notable technology in both the RT112 and RT110 is the lightweight design. Weighing less than 10 pounds, these trimmers are easy to handle and reduce user fatigue during extended periods of use. The ergonomic handle design improves comfort, while the adjustable shaft allows for customization to suit different user heights, enhancing overall ease of use.
Durability is another important feature of the RT112 and RT110. Constructed with high-quality materials, these trimmers are built to withstand the rigors of outdoor tasks. Additionally, the protective shield helps to deflect debris away from the user and the machine, ensuring safe operation.
The Weed Eater RT112 and RT110 are both designed with user convenience in mind. They feature easy-reach controls that allow for quick adjustments, making it simple to switch between various trimming tasks. Overall, the combination of power, comfort, and efficiency in these models makes them excellent choices for anyone looking to maintain their outdoor spaces effectively. Whether you're tackling tough weeds or simply shaping the edges of your lawn, the Weed Eater RT112 and RT110 deliver reliable performance for all your trimming needs.