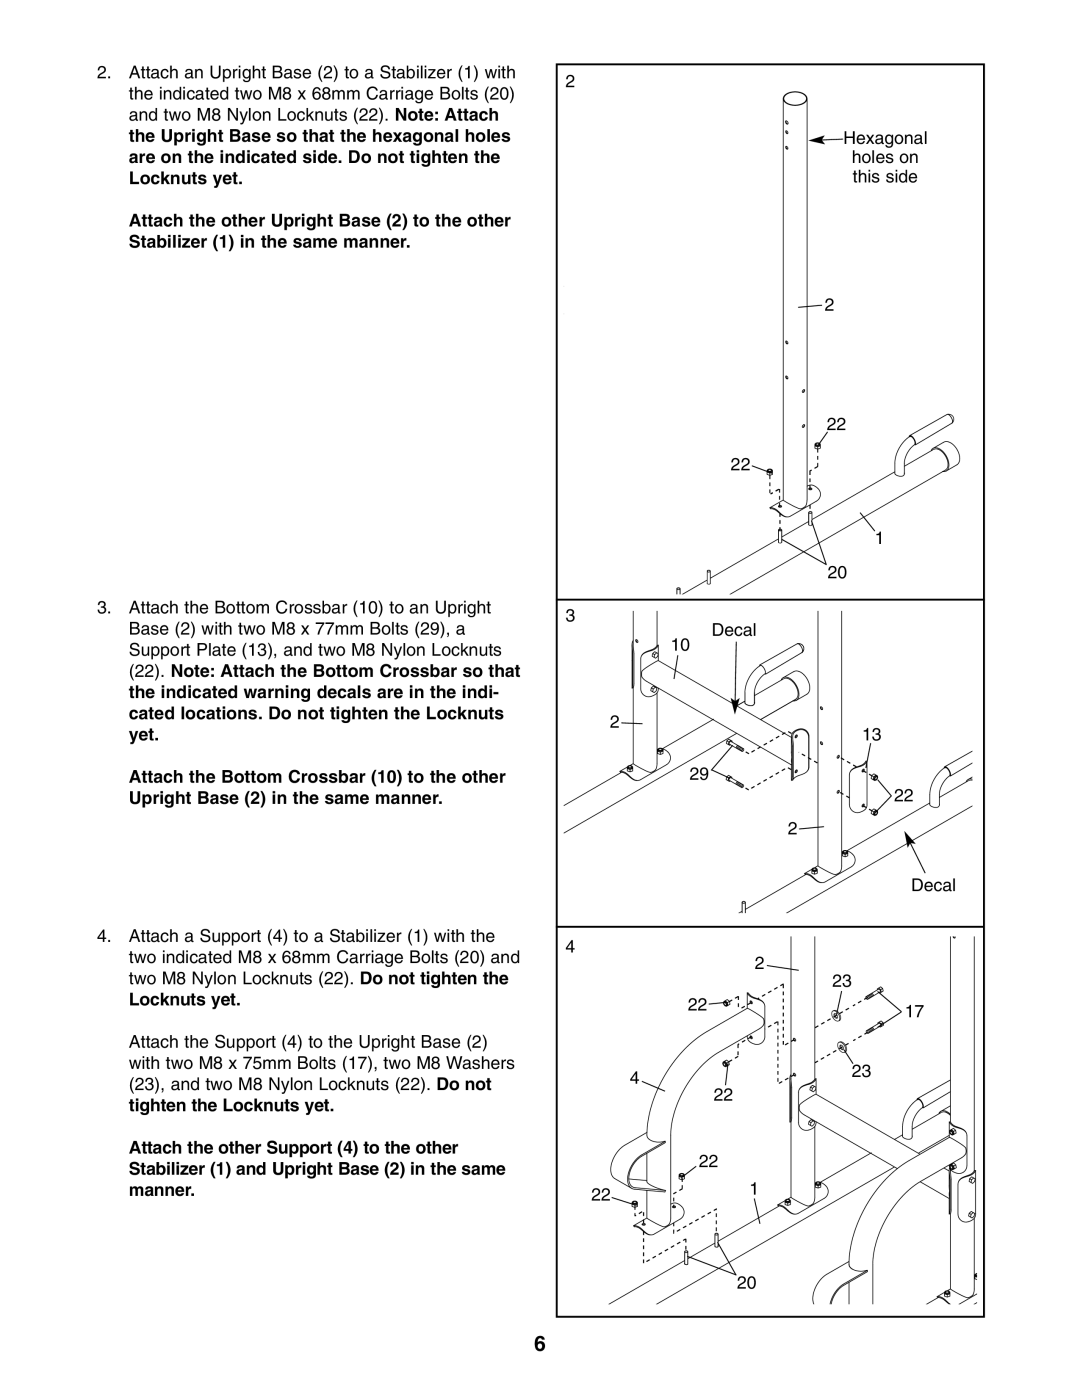
2.Attach an Upright Base (2) to a Stabilizer (1) with the indicated two M8 x 68mm Carriage Bolts (20) and two M8 Nylon Locknuts (22). Note: Attach the Upright Base so that the hexagonal holes are on the indicated side. Do not tighten the Locknuts yet.
Attach the other Upright Base (2) to the other Stabilizer (1) in the same manner.
3.Attach the Bottom Crossbar (10) to an Upright Base (2) with two M8 x 77mm Bolts (29), a Support Plate (13), and two M8 Nylon Locknuts (22). Note: Attach the Bottom Crossbar so that the indicated warning decals are in the indi- cated locations. Do not tighten the Locknuts yet.
Attach the Bottom Crossbar (10) to the other Upright Base (2) in the same manner.
4.Attach a Support (4) to a Stabilizer (1) with the two indicated M8 x 68mm Carriage Bolts (20) and two M8 Nylon Locknuts (22). Do not tighten the
Locknuts yet.
Attach the Support (4) to the Upright Base (2) with two M8 x 75mm Bolts (17), two M8 Washers (23), and two M8 Nylon Locknuts (22). Do not tighten the Locknuts yet.
Attach the other Support (4) to the other Stabilizer (1) and Upright Base (2) in the same manner.
6
2 |
|
|
|
|
|
| Hexagonal |
|
|
| holes on |
|
|
| this side |
|
|
| 2 |
|
|
| 22 |
|
| 22 |
|
|
|
| 1 |
|
|
| 20 |
3 |
| Decal |
|
|
|
| |
|
| 10 |
|
2 |
|
| 13 |
|
|
| |
|
| 29 |
|
|
|
| 22 |
|
|
| 2 |
|
|
| Decal |
4 |
| 2 |
|
|
| 23 | |
|
|
| |
|
| 22 | 17 |
|
|
| |
| 4 |
| 23 |
| 22 |
| |
|
|
| |
|
| 22 |
|
22 |
| 1 |
|
|
|
| |
|
| 20 |
|