Assembling Your Heater
Before beginning assembly, be sure to read and familiarize yourself with the overall assembly process and instructions in this manual. It may be helpful to have someone assist you with the assembly. You will need the following tools (NOT INCLUDED):
**#2 or #3 Philips Screwdriver (or standard slotted screwdriver)
**Adjustable Wrench.
Make sure you complete assembly on a clean, level, preferably carpeted location. A flat piece of cardboard will also work for assembly. Unpack and identify all components listed on page 3 of this manual and lay them out on the carpeted floor or piece of cardboard and then follow the steps below:
STEP 1
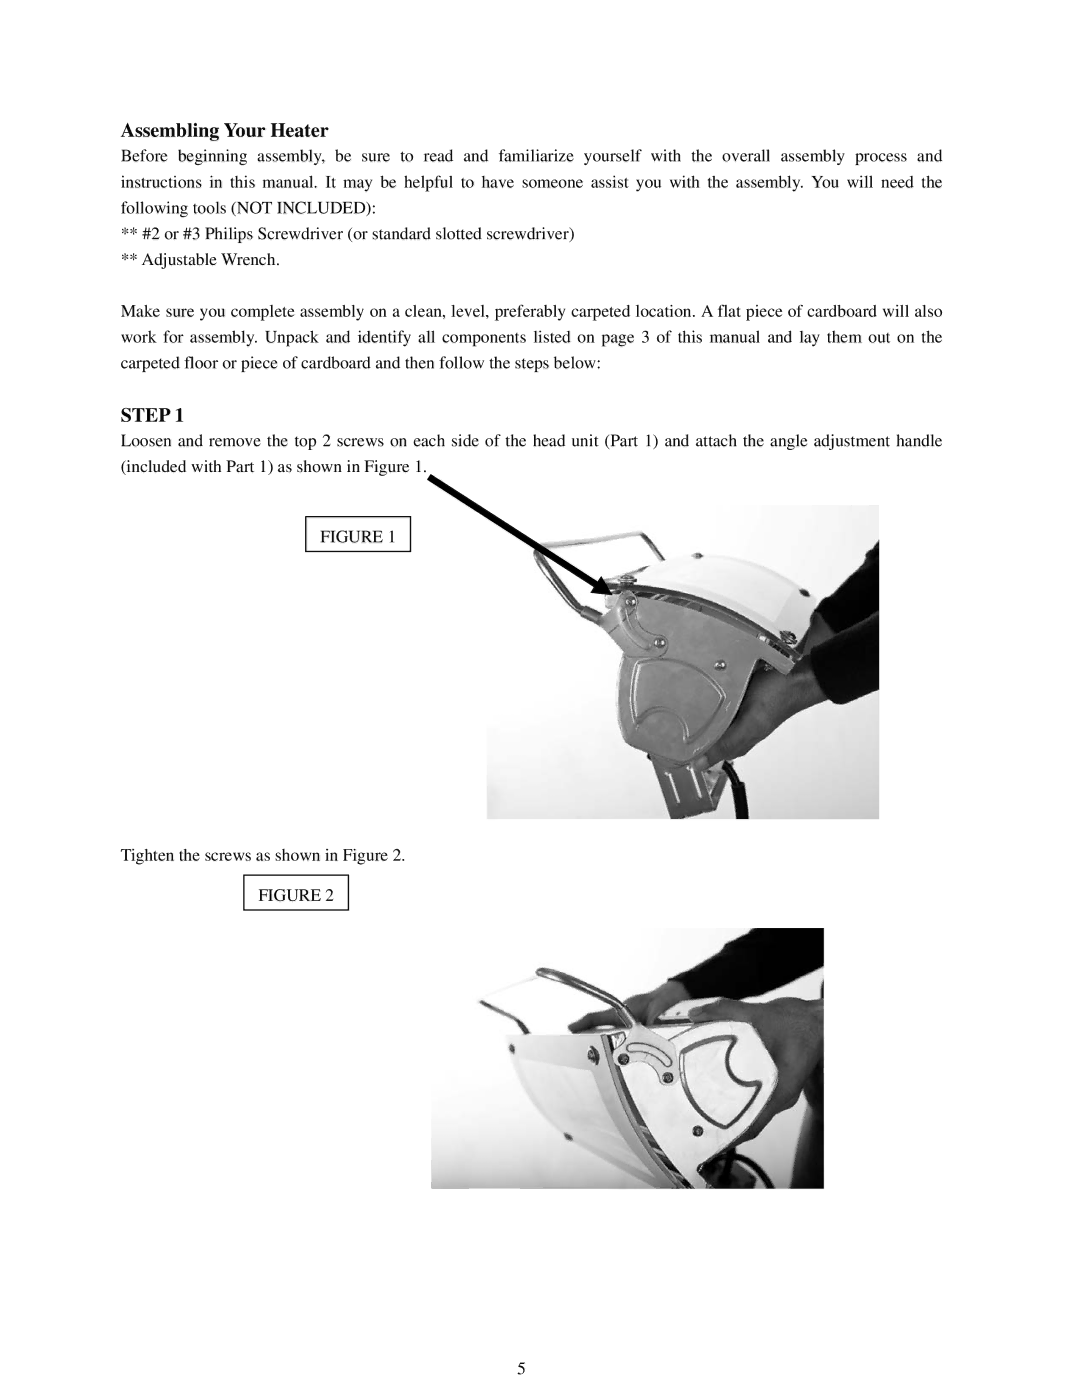
Loosen and remove the top 2 screws on each side of the head unit (Part 1) and attach the angle adjustment handle (included with Part 1) as shown in Figure 1.
FIGURE 1
Tighten the screws as shown in Figure 2.
FIGURE 2
5
