Manuals
/
Weslo
/
Fitness & Sports
/
Treadmill
Weslo
DX3
user manual
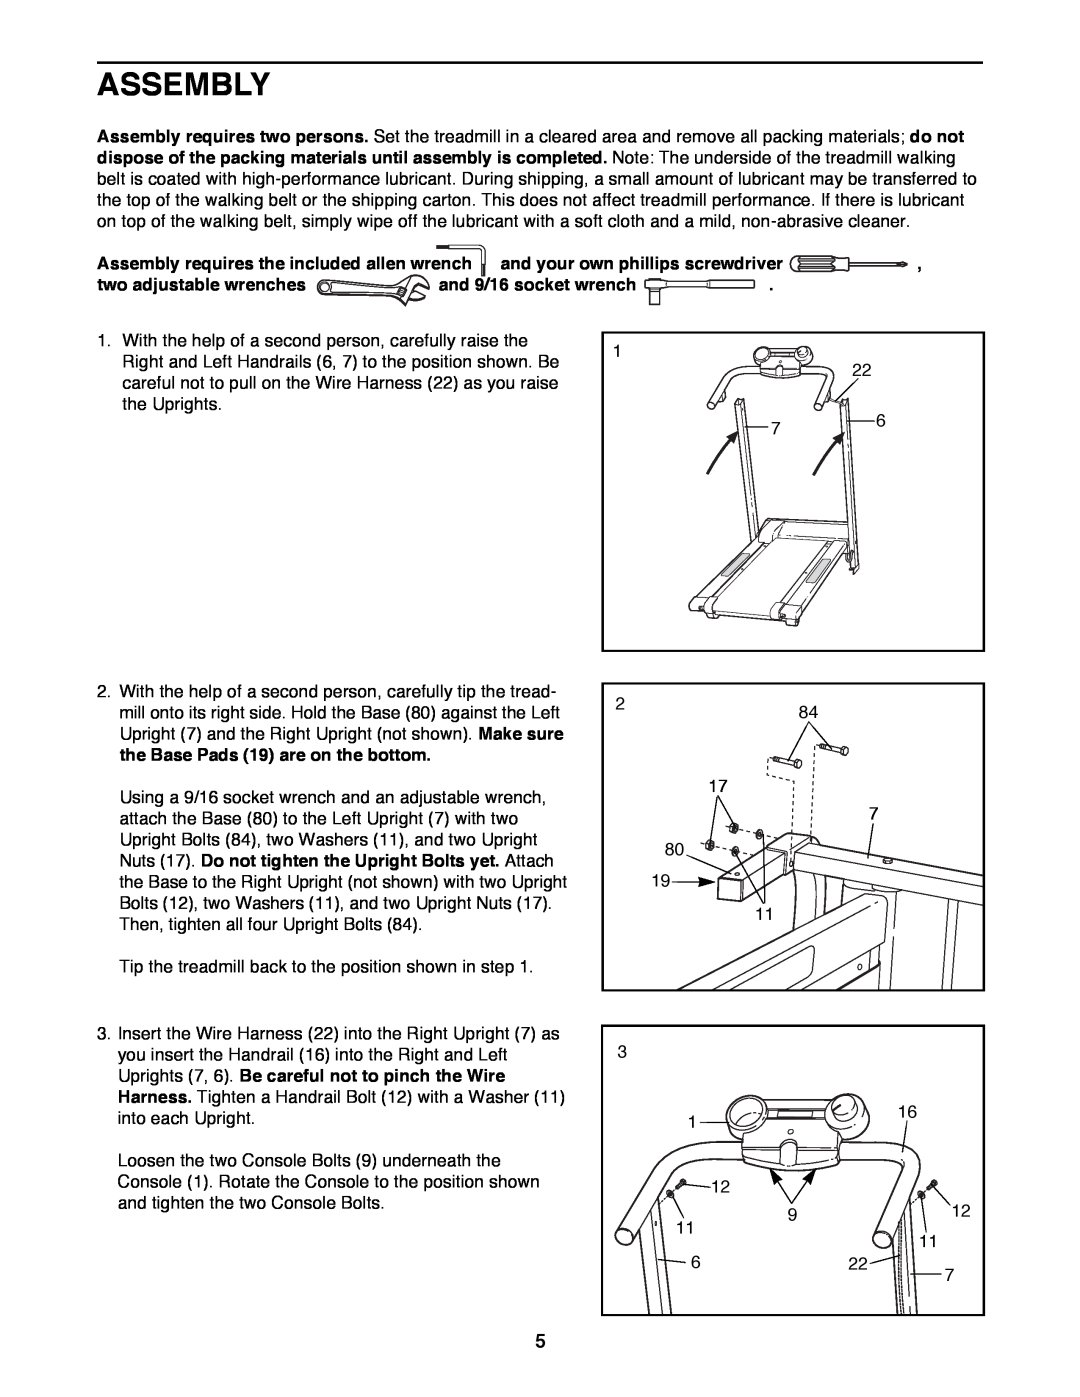
Assembly, two adjustable wrenches, and 9/16 socket wrench
Models:
DX3
1
5
18
18
Download
18 pages
20.45 Kb
1
2
3
4
5
6
7
8
Diagram Of The Console
Warranty
Assembly
Operation And Adjustment
How to
Page 5
Image 5
Page 4
Page 6
Page 5
Image 5
Page 4
Page 6
Contents
USERS MANUAL
QUESTIONS?
Visit our website at
new products, prizes fitness tips, and much more
IMPORTANT PRECAUTIONS
TABLE OF CONTENTS
SAVE THESE INSTRUCTIONS
RIGHT SIDE
BEFORE YOU BEGIN
LEFT SIDE
and 9/16 socket wrench
ASSEMBLY
two adjustable wrenches
Bolts. The Wheels should turn freely
OPERATION AND ADJUSTMENT
DIAGRAM OF THE CONSOLE
Frame
When the power is
Incline Leg
Incline
HOW TO MOVE THE TREADMILL
HOW TO FOLD AND MOVE THE TREADMILL
HOW TO FOLD THE TREADMILL FOR STORAGE
HOW TO LOWER THE TREADMILL FOR USE
PROBLEM The power does not turn on
MAINTENANCE AND TROUBLE-SHOOTING
PROBLEM The power turns off during use
PROBLEM The displays of the console do not function properly
PROBLEM The walking belt is off-center
CONDITIONING GUIDELINES
Cooling Down
Training Zone Exercise
Exercise Frequency
SUGGESTED STRETCHES
Description
PART LISTÑModel No. WLTL11090
WLTL11090
EXPLODED DRAWINGÑModel No
ICON HEALTH & FITNESS, INC., 1500 S. 1000 W., LOGAN, UT
ORDERING REPLACEMENT PARTS
LIMITED WARRANTY
Top
Page
Image
Contents