UL_industrial_J 5/23/05 9:57 AM Page 6
5 |
|
| 3 |
5 |
| 1 | |
|
|
| |
|
| 4 | 2 |
|
|
|
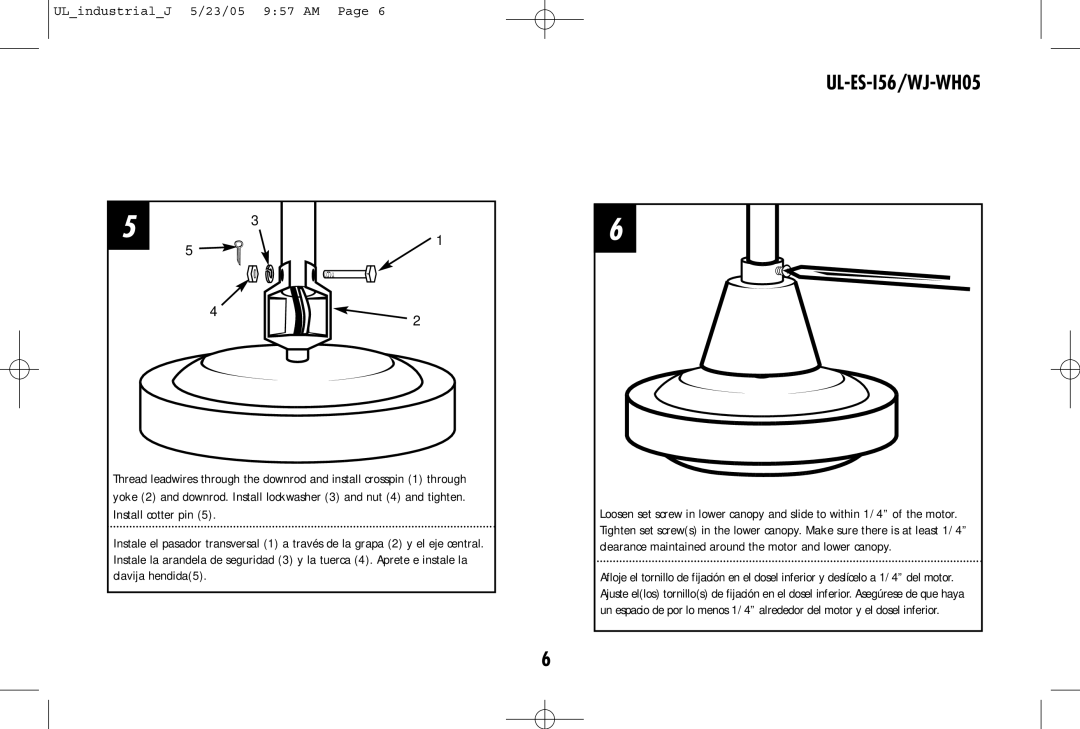
Thread leadwires through the downrod and install crosspin (1) through yoke (2) and downrod. Install lockwasher (3) and nut (4) and tighten. Install cotter pin (5).
Instale el pasador transversal (1) a través de la grapa (2) y el eje central. Instale la arandela de seguridad (3) y la tuerca (4). Aprete e instale la clavija hendida(5).
UL-ES-I56/WJ-WH05
63
Loosen set screw in lower canopy and slide to within 1/4” of the motor. Tighten set screw(s) in the lower canopy. Make sure there is at least 1/4” clearance maintained around the motor and lower canopy.
Afloje el tornillo de fijación en el dosel inferior y deslícelo a 1/4” del motor. Ajuste el(los) tornillo(s) de fijación en el dosel inferior. Asegúrese de que haya un espacio de por lo menos 1/4” alrededor del motor y el dosel inferior.
6