UL-ES-Xavier-WH05
EXTENDED DOWNROD OPTION | MOUNTING |
OPCIÓN CON VARILLA VERTICAL MÁS LARGA | MONTAJE |
13
PROCEED TO PAGE 9, STEP 9
Vuelva a instalar el pasador en la varilla vertical más larga y deslice la esfera de la varilla hasta e l extremo superior de la misma. Vuelva a insertar el tornillo de fijación para asegurar la esfera a la varilla vertical. Nota: Algunas varillas verticales más largas tienen un agujero previamente perforado para el tornillo. Si la varilla vertical más larga tiene un agujero previamente perforado, ajuste el tornillo en el agujero previamente perforado de la varilla vertical más larga. Si la varilla vertical más larga no tiene un agujero previamente perforado, ajuste el tornillo sobre la varilla vertical para asegurar la esfera de la misma. PROCEDA A LA PÁG. 9, PASO 9
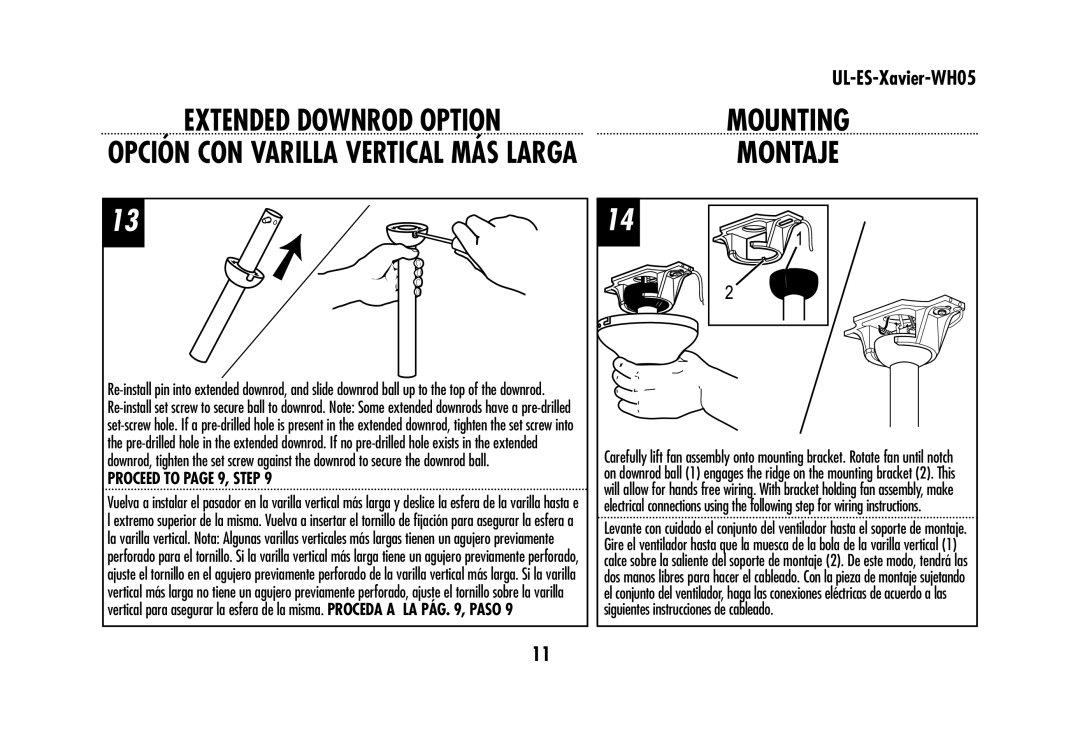
14
Carefully lift fan assembly onto mounting bracket. Rotate fan until notch on downrod ball (1) engages the ridge on the mounting bracket (2). This will allow for hands free wiring. With bracket holding fan assembly, make electrical connections using the following step for wiring instructions.
Levante con cuidado el conjunto del ventilador hasta el soporte de montaje. Gire el ventilador hasta que la muesca de la bola de la varilla vertical (1) calce sobre la saliente del soporte de montaje (2). De este modo, tendrá las dos manos libres para hacer el cableado. Con la pieza de montaje sujetando el conjunto del ventilador, haga las conexiones eléctricas de acuerdo a las siguientes instrucciones de cableado.
11