INSTALLATION INSTRUCTIONS
Tools and Parts
Gather the required tools and parts before starting installation. Read and follow the instructions provided with any tools listed here.
Tools needed:
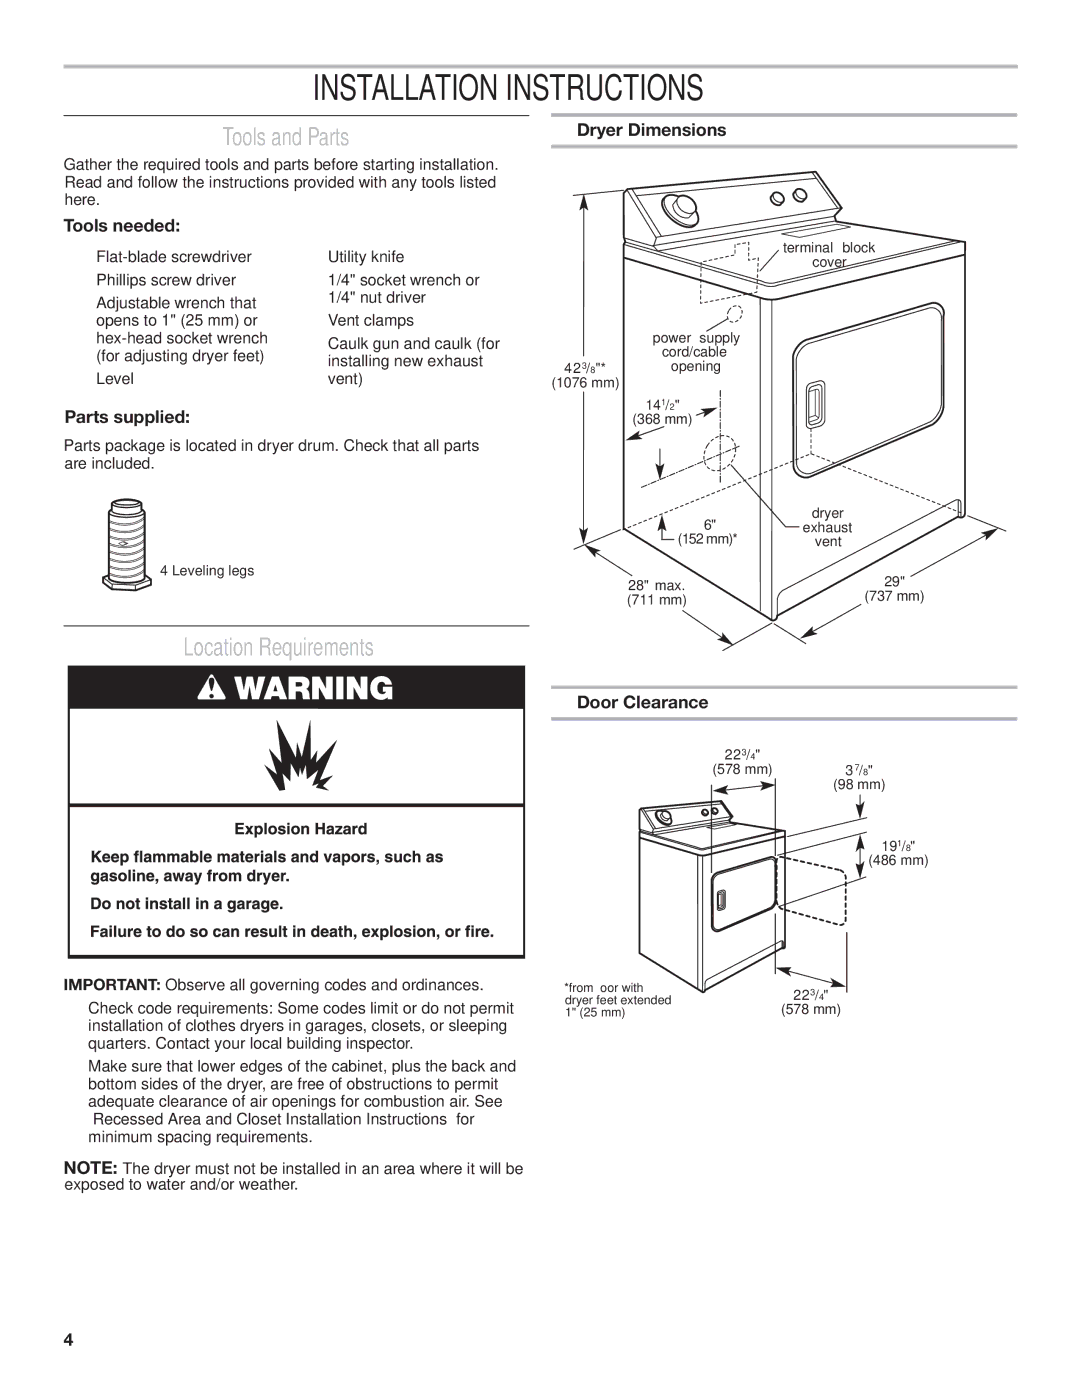
Dryer Dimensions
■■
■■ Adjustable wrench that opens to 1" (25 mm) or
■■ Level
■■ Utility knife
■■ 1/4" socket wrench or 1/4" nut driver
■■ Vent clamps
■■ Caulk gun and caulk (for installing new exhaust vent)
terminal block
cover
power supply
cord/cable
423/8"* opening
(1076 mm)
Parts supplied:
Parts package is located in dryer drum. Check that all parts are included.
![]() 4 Leveling legs
4 Leveling legs
Location Requirements
IMPORTANT: Observe all governing codes and ordinances.
■■ Check code requirements: Some codes limit or do not permit installation of clothes dryers in garages, closets, or sleeping quarters. Contact your local building inspector.
■■ Make sure that lower edges of the cabinet, plus the back and bottom sides of the dryer, are free of obstructions to permit adequate clearance of air openings for combustion air. See “Recessed Area and Closet Installation Instructions” for minimum spacing requirements.
NOTE: The dryer must not be installed in an area where it will be exposed to water and/or weather.
141/2"
(368 mm)
6" | dryer |
exhaust | |
(152 mm)* | vent |
28" max. | 29" |
(711 mm) | (737 mm) |
Door Clearance
223/4"
(578 mm) 37/8"
(98 mm)
191/8"
(486 mm)
*from floor | with | 223/4" | |
dryer feet extended | |||
(578 mm) | |||
1" (25 mm) |
| ||
4