
BHAC1000XS0 specifications
The Whirlpool BHAC1000XS0 is a highly efficient portable air conditioner designed to provide effective cooling in diverse indoor environments. With its sleek and modern design, this unit is not only functional but also aesthetically appealing, making it a suitable addition to any room in your home or office.One of the standout features of the BHAC1000XS0 is its impressive cooling capacity, which is designed to effectively chill spaces of up to 350 square feet. This makes it perfect for bedrooms, living rooms, or small office spaces. The unit utilizes a powerful compressor and fan system, ensuring that it can quickly lower the temperature in the chosen area, even during the hottest days of summer.
In terms of technology, the Whirlpool BHAC1000XS0 employs a 3-in-1 functionality that includes cooling, dehumidification, and fan modes. This versatility allows users to select the ideal mode based on their specific needs. The dehumidification function is particularly useful in humid climates, as it helps to reduce moisture levels in the air, improving overall comfort. Additionally, the fan mode is perfect for days when cooling isn't necessary but ventilation is still desired.
Energy efficiency is also a key characteristic of this portable air conditioner. The Whirlpool BHAC1000XS0 features an Energy Efficiency Ratio (EER) that meets and exceeds industry standards. This not only helps reduce energy consumption but also keeps electricity bills manageable. The unit is designed to operate quietly, which is a significant advantage for those who want to maintain a peaceful atmosphere while enjoying the cooling benefits.
User-friendly controls make the BHAC1000XS0 easy to operate. The digital display and remote control allow for seamless adjustments, while programmable timer settings enable users to set specific operating times to match their schedules. This feature aids in conserving energy and elevating home comfort.
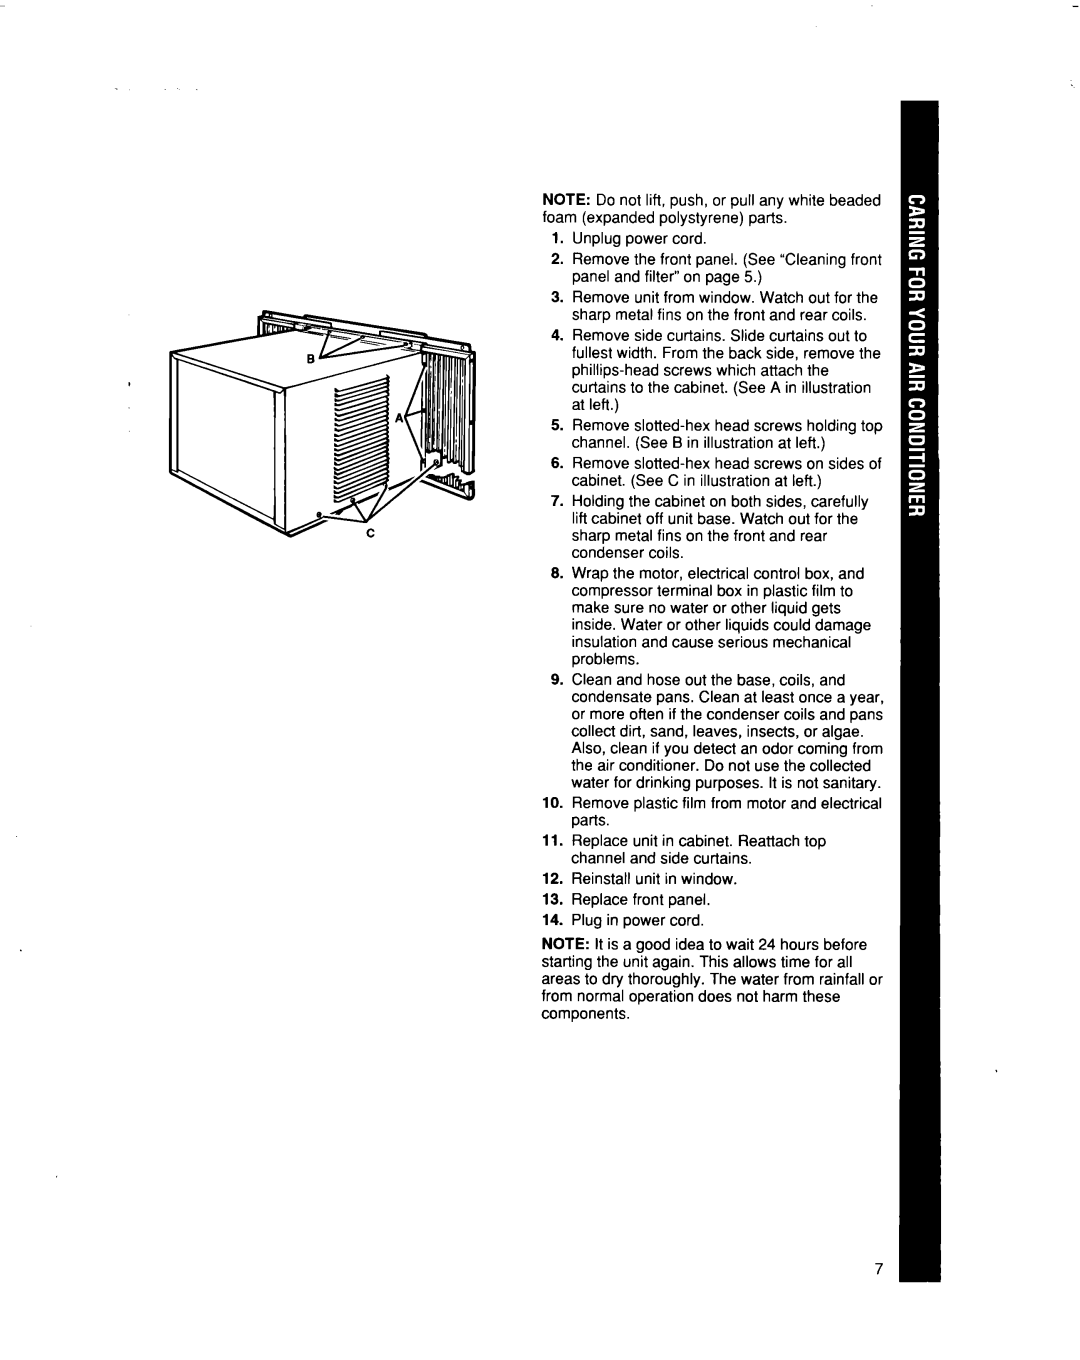
Lastly, the unit comes with a simple installation process, often requiring no permanent modifications to your living space. The portable design and included caster wheels allow for easy mobility between rooms, giving you the flexibility to deliver cool air where you need it most, when you need it. Overall, the Whirlpool BHAC1000XS0 combines functionality, efficiency, and convenience, making it a reliable choice for anyone seeking portable cooling solutions.