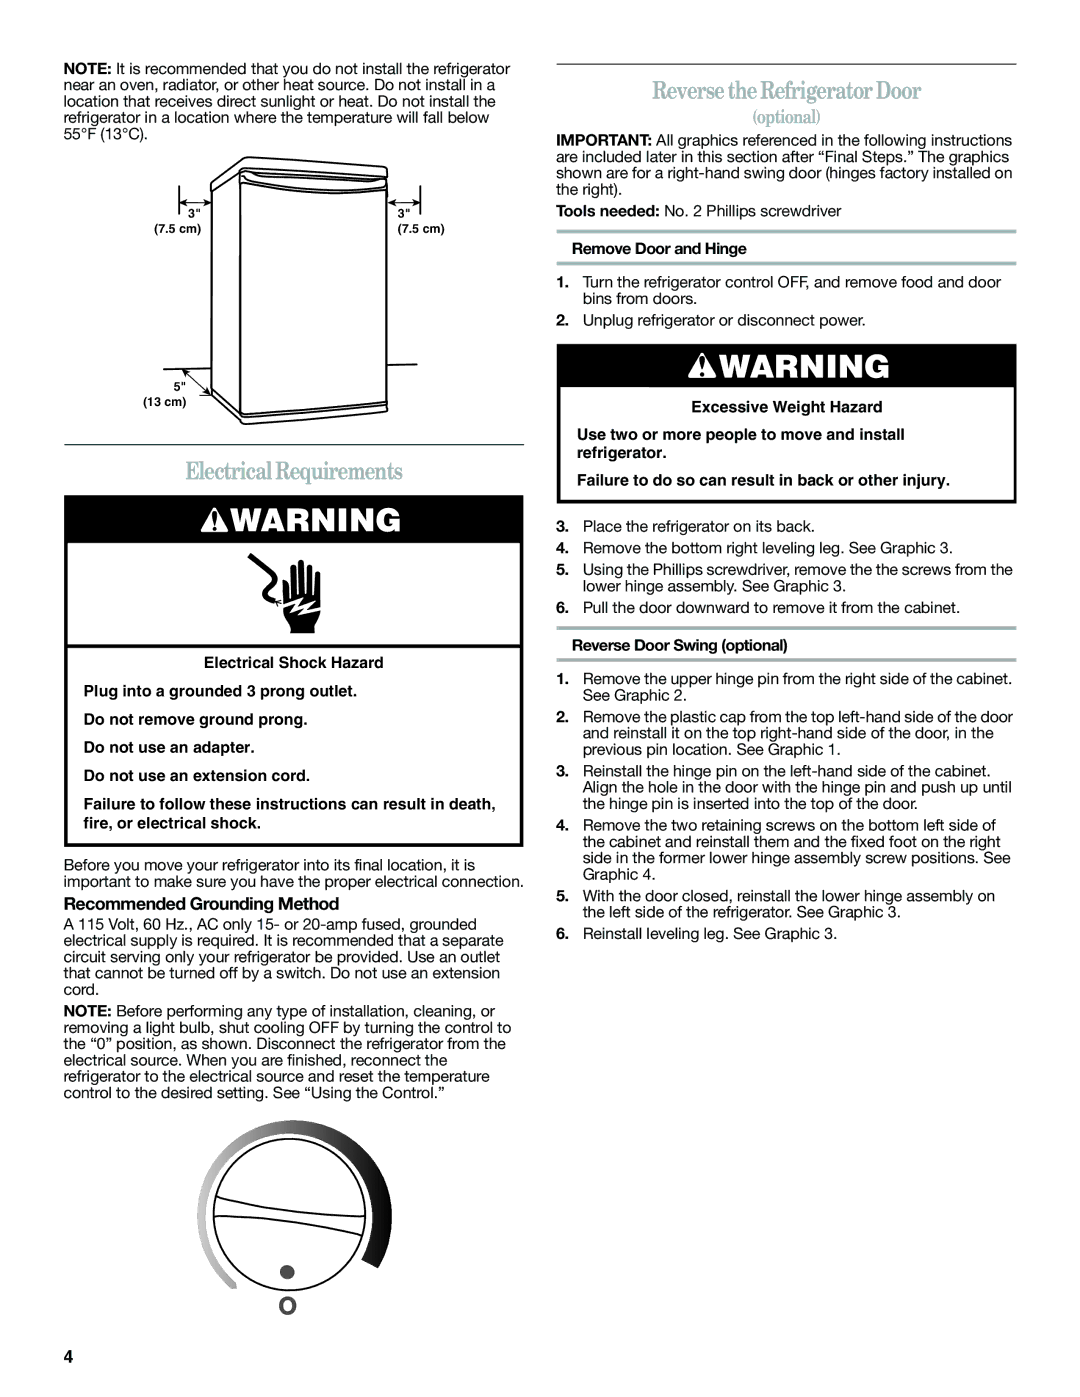
NOTE: It is recommended that you do not install the refrigerator near an oven, radiator, or other heat source. Do not install in a location that receives direct sunlight or heat. Do not install the refrigerator in a location where the temperature will fall below 55°F (13°C).

3"

3"

(7.5 cm)

(7.5 cm)

5"

(13 cm)

Electrical Requirements

WARNING

Electrical Shock Hazard

Plug into a grounded 3 prong outlet.

Do not remove ground prong.

Do not use an adapter.

Do not use an extension cord.

Failure to follow these instructions can result in death, fire, or electrical shock.

Before you move your refrigerator into its final location, it is important to make sure you have the proper electrical connection.

Recommended Grounding Method

A 115 Volt, 60 Hz., AC only 15- or 20-amp fused, grounded electrical supply is required. It is recommended that a separate circuit serving only your refrigerator be provided. Use an outlet that cannot be turned off by a switch. Do not use an extension cord.

NOTE: Before performing any type of installation, cleaning, or removing a light bulb, shut cooling OFF by turning the control to the “0” position, as shown. Disconnect the refrigerator from the electrical source. When you are finished, reconnect the refrigerator to the electrical source and reset the temperature control to the desired setting. See “Using the Control.”

Reverse the Refrigerator Door

(optional)

IMPORTANT: All graphics referenced in the following instructions are included later in this section after “Final Steps.” The graphics shown are for a right-hand swing door (hinges factory installed on the right).

Tools needed: No. 2 Phillips screwdriver

Remove Door and Hinge

1.Turn the refrigerator control OFF, and remove food and door bins from doors.

2.Unplug refrigerator or disconnect power.

WARNING

Excessive Weight Hazard

Use two or more people to move and install refrigerator.

Failure to do so can result in back or other injury.

3.Place the refrigerator on its back.

4.Remove the bottom right leveling leg. See Graphic 3.

5.Using the Phillips screwdriver, remove the the screws from the lower hinge assembly. See Graphic 3.

6.Pull the door downward to remove it from the cabinet.

Reverse Door Swing (optional)

1.Remove the upper hinge pin from the right side of the cabinet. See Graphic 2.

2.Remove the plastic cap from the top left-hand side of the door and reinstall it on the top right-hand side of the door, in the previous pin location. See Graphic 1.

3.Reinstall the hinge pin on the left-hand side of the cabinet. Align the hole in the door with the hinge pin and push up until the hinge pin is inserted into the top of the door.

4.Remove the two retaining screws on the bottom left side of the cabinet and reinstall them and the fixed foot on the right side in the former lower hinge assembly screw positions. See Graphic 4.

5.With the door closed, reinstall the lower hinge assembly on the left side of the refrigerator. See Graphic 3.

6.Reinstall leveling leg. See Graphic 3.

4

Page 4
Image 4
Whirlpool WAR449W manual Electrical Requirements, Reverse the Refrigerator Door, Recommended Grounding Method

WAR449W specifications

The Whirlpool WAR449W is a strategically designed washing machine that addresses the needs of modern households, combining efficiency, cutting-edge technology, and user-friendly features. As part of Whirlpool's commitment to delivering exceptional laundry solutions, this model stands out for its reliable performance and versatility.

One of the standout features of the WAR449W is its generous capacity, accommodating up to 4.9 cubic feet of laundry. This means that users can wash more clothes in a single load, making it ideal for families or individuals with busy lifestyles. The ample space ensures that larger items, such as comforters and blankets, can also be easily laundered without any compromise on cleanliness.

The WAR449W incorporates a range of wash cycles, each designed to tackle specific fabric types and soil levels. Whether dealing with delicate garments or heavily soiled work clothes, users can select from options such as Normal, Heavy Duty, and Delicate cycles. This versatility helps preserve the integrity of fabrics while ensuring optimal cleaning results.

Energy efficiency is a hallmark of the Whirlpool WAR449W, featuring advanced technologies that contribute to reduced water and energy consumption. Equipped with a high-efficiency motor and a state-of-the-art sensing system, this washing machine automatically adjusts the wash cycle based on the load size and type, which not only saves resources but also enhances wash performance. The ENERGY STAR certification is a testament to its environmentally friendly operation.

In addition to its performance capabilities, the WAR449W boasts user-friendly features that enhance the overall laundry experience. An intuitive control panel allows for easy cycle selection and customization. The machine also includes a delay start option, which enables users to schedule their laundry to fit their routines.

The machine's durability is supported by its robust construction, featuring high-quality materials that are designed to withstand regular use while maintaining aesthetic appeal. Its sleek and modern design allows it to seamlessly blend into any laundry room decor.

With its combination of efficiency, advanced features, and user-centric design, the Whirlpool WAR449W is a trustworthy choice for anyone looking to elevate their laundry experience, making it a valuable addition to any home.