
WRT111SFAF specifications
The Whirlpool WRT111SFAF is an ideal choice for those seeking a reliable and efficient refrigerator that balances practicality with modern convenience. This top-freezer model has become a favorite among homeowners due to its thoughtful design and array of features.One of the standout characteristics of the WRT111SFAF is its capacity. With a generous storage space, this refrigerator allows users to store a significant amount of food and beverages, accommodating the needs of families and individuals alike. The top-freezer design provides easy access to frequently used items in the fresh food compartment while also offering ample frozen storage below.
Energy efficiency is a priority in today’s appliances, and the Whirlpool WRT111SFAF does not disappoint. It is designed to minimize energy consumption, often qualifying for energy-saving programs. This not only reduces the environmental impact but also results in lower utility bills, making it an economical option over time.
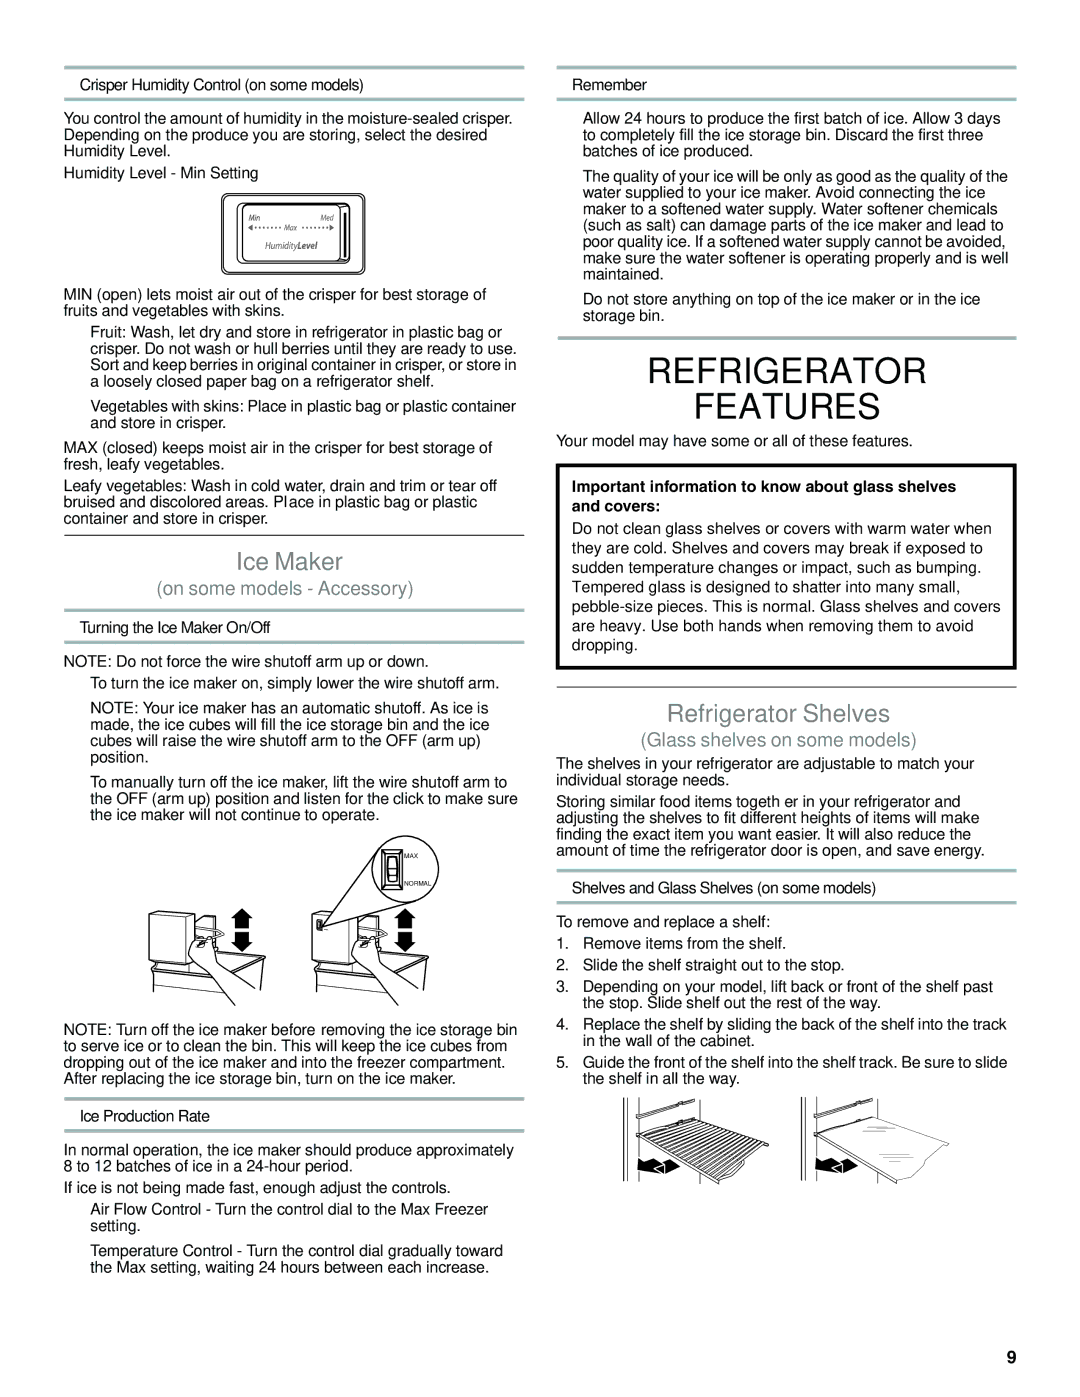
The interior of the refrigerator is designed to enhance organization and accessibility. It features adjustable shelves that can be moved to accommodate taller items, providing flexible storage options. Additionally, the door bins can hold gallon-sized containers, ensuring that frequently used beverages are easily accessible.
Whirlpool's adjustable temperature control allows users to set the optimal temperature for their food, ensuring items are kept fresh longer. The crisper drawers are designed specifically for fruits and vegetables, helping maintain their freshness by controlling humidity levels.
Innovative technologies are also a key aspect of the WRT111SFAF. The exterior features of this model include textured finishes that resist fingerprints and smudges, making maintenance a breeze. The unit operates quietly, thanks to Whirlpool's commitment to producing appliances that run smoothly without disrupting the home environment.
Overall, the Whirlpool WRT111SFAF is a well-rounded refrigerator that embodies efficiency, flexibility, and convenience. Its combination of smart design, energy savings, and functional features make it a worthwhile addition to any home. Whether you need extra storage for a growing family or simply want to keep your groceries organized, this refrigerator stands out as a dependable choice.