INSTALLATION REQUIREMENTS
ToolsandParts
Gather the required tools and parts before starting installation. Read and follow the instructions provided with any tools listed here.
Tools Required
■ | Phillips screwdriver | ■ | Level |
■ | ⁹⁄₁₆" (14 mm) | ■ | Measuring tape |
| wrench (for leveling leg |
|
|
| locknuts) |
|
|
Parts Supplied:
■ Console | ■ Brackets (2) |
■Screws (2)
AB
A.Console
B.Bracket
LocationRequirements
Your laundry tower can be installed freestanding or between your washer and dryer. Proper installation is your responsibility.
Installation Clearances
■The location must be large enough to allow the drawers to be fully opened.
■When installing your laundry tower between or next to your washer and dryer, a spacing of 1" (2.5 cm) on the sides of the laundry tower is recommended to reduce noise transfer.
■Additional spacing should be considered for ease of installation and servicing.
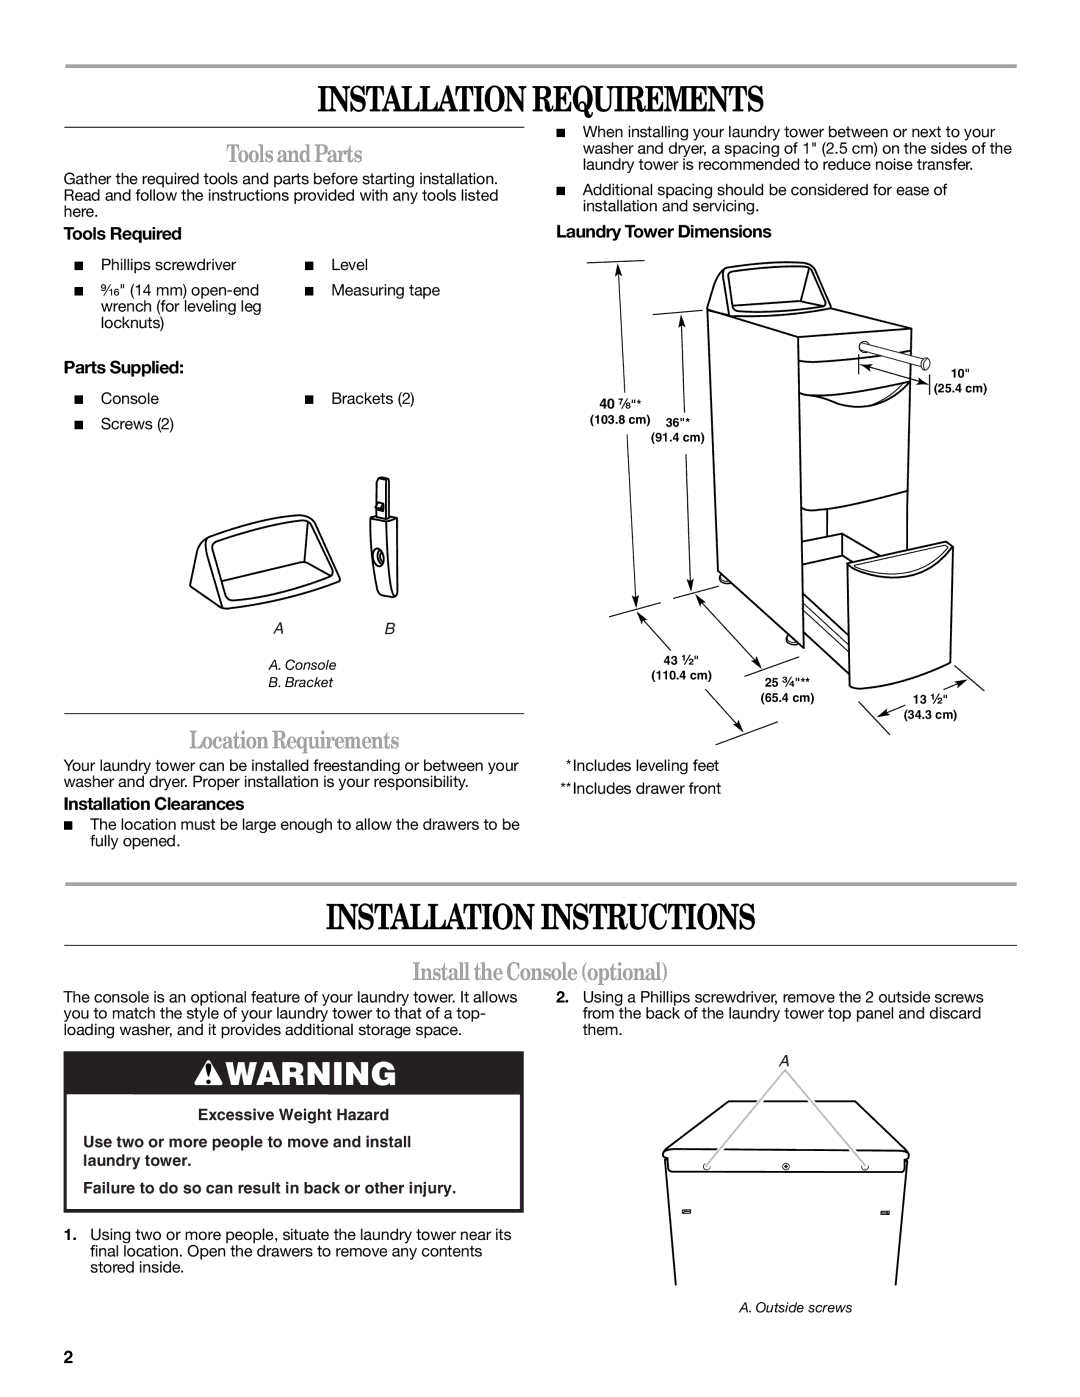
Laundry Tower Dimensions
10"
(25.4 cm)
40⁷⁄₈"*
(103.8 cm) 36"*
(91.4 cm)
43 ¹⁄₂" |
|
|
|
|
(110.4 cm) |
|
|
|
|
25 | ³⁄₄"** |
| ||
|
|
| ||
|
| (65.4 cm) | 13 ¹⁄₂" | |
(34.3 cm)
*Includes leveling feet
**Includes drawer front
INSTALLATION INSTRUCTIONS
Install theConsole(optional)
The console is an optional feature of your laundry tower. It allows you to match the style of your laundry tower to that of a top- loading washer, and it provides additional storage space.
![]() WARNING
WARNING
Excessive Weight Hazard
Use two or more people to move and install laundry tower.
Failure to do so can result in back or other injury.
1.Using two or more people, situate the laundry tower near its final location. Open the drawers to remove any contents stored inside.
2.Using a Phillips screwdriver, remove the 2 outside screws from the back of the laundry tower top panel and discard them.
A
A. Outside screws
2