FORK INSTALLATION
White Brothers forks feature a
1.Remove your old fork from the bicycle. Measure the diameter and length of your old forks steerer tube to ensure that the White Brothers steerer tube is the correct diameter and sufficient length for the installation.
2.Remove the crown race from your old fork.
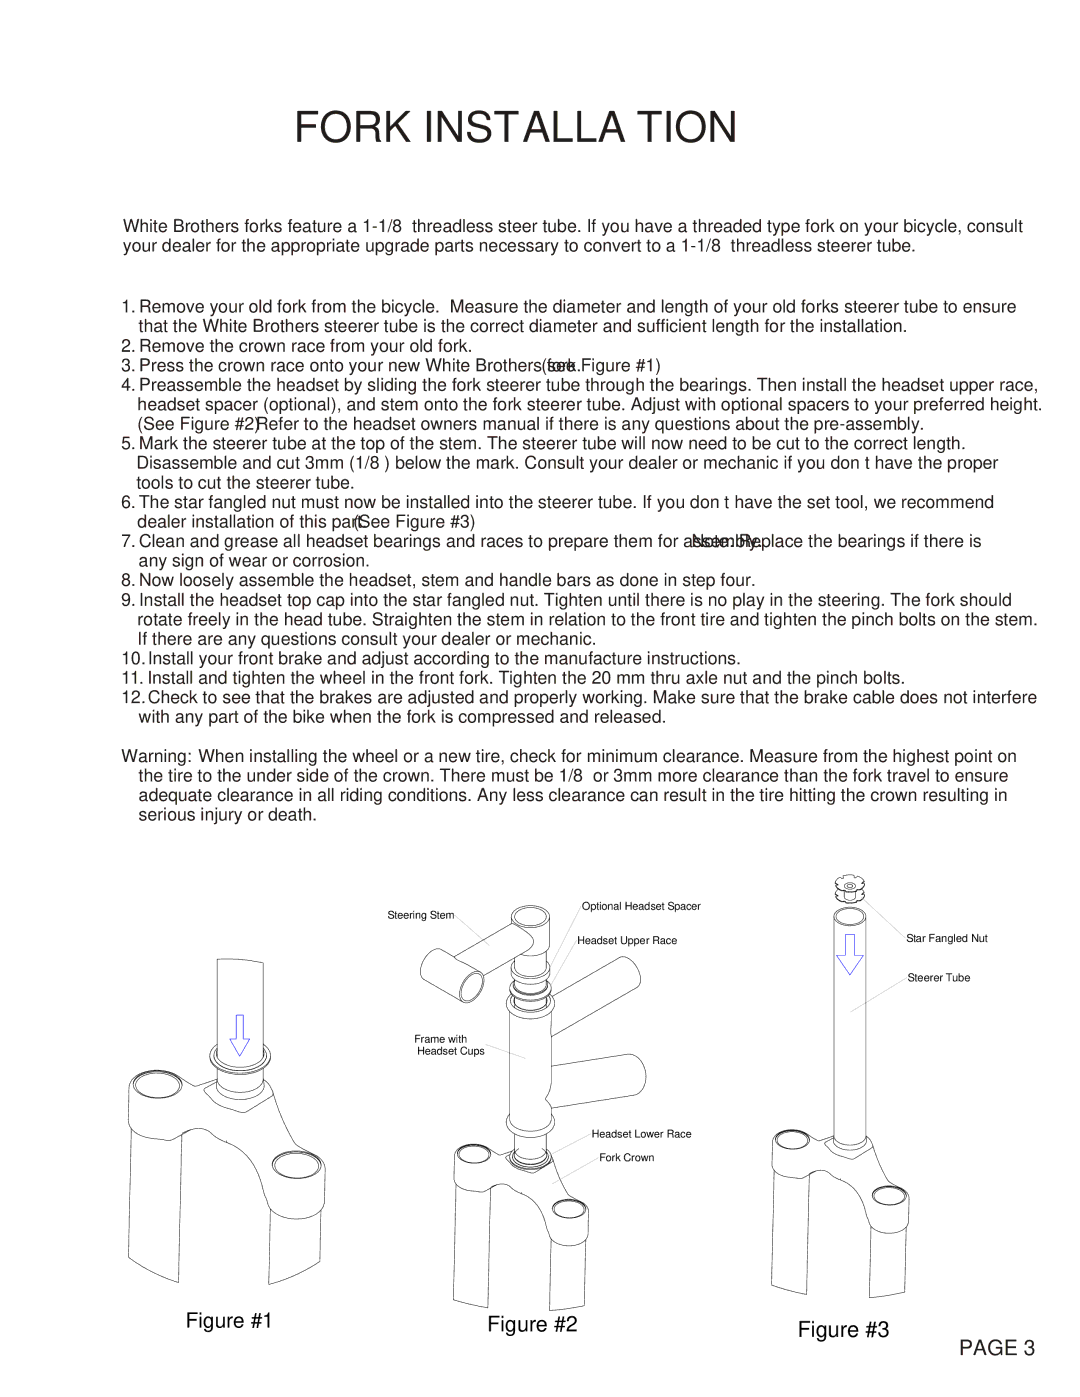
3.Press the crown race onto your new White Brothers fork.(see Figure #1)
4.Preassemble the headset by sliding the fork steerer tube through the bearings. Then install the headset upper race, headset spacer (optional), and stem onto the fork steerer tube. Adjust with optional spacers to your preferred height. (See Figure #2) Refer to the headset owners manual if there is any questions about the
5.Mark the steerer tube at the top of the stem. The steerer tube will now need to be cut to the correct length. Disassemble and cut 3mm (1/8”) below the mark. Consult your dealer or mechanic if you don’t have the proper tools to cut the steerer tube.
6.The star fangled nut must now be installed into the steerer tube. If you don’t have the set tool, we recommend dealer installation of this part. (See Figure #3)
7.Clean and grease all headset bearings and races to prepare them for assembly. Note: Replace the bearings if there is any sign of wear or corrosion.
8.Now loosely assemble the headset, stem and handle bars as done in step four.
9.Install the headset top cap into the star fangled nut. Tighten until there is no play in the steering. The fork should rotate freely in the head tube. Straighten the stem in relation to the front tire and tighten the pinch bolts on the stem. If there are any questions consult your dealer or mechanic.
10.Install your front brake and adjust according to the manufacture instructions.
11.Install and tighten the wheel in the front fork. Tighten the 20 mm thru axle nut and the pinch bolts.
12.Check to see that the brakes are adjusted and properly working. Make sure that the brake cable does not interfere with any part of the bike when the fork is compressed and released.
Warning: When installing the wheel or a new tire, check for minimum clearance. Measure from the highest point on the tire to the under side of the crown. There must be 1/8” or 3mm more clearance than the fork travel to ensure adequate clearance in all riding conditions. Any less clearance can result in the tire hitting the crown resulting in serious injury or death.
Optional Headset Spacer |
|
Steering Stem |
|
Headset Upper Race | Star Fangled Nut |
| Steerer Tube |
Frame with
Headset Cups![]()
Headset Lower Race
Fork Crown
Figure #1 | Figure #2 | Figure #3 |
PAGE 3
