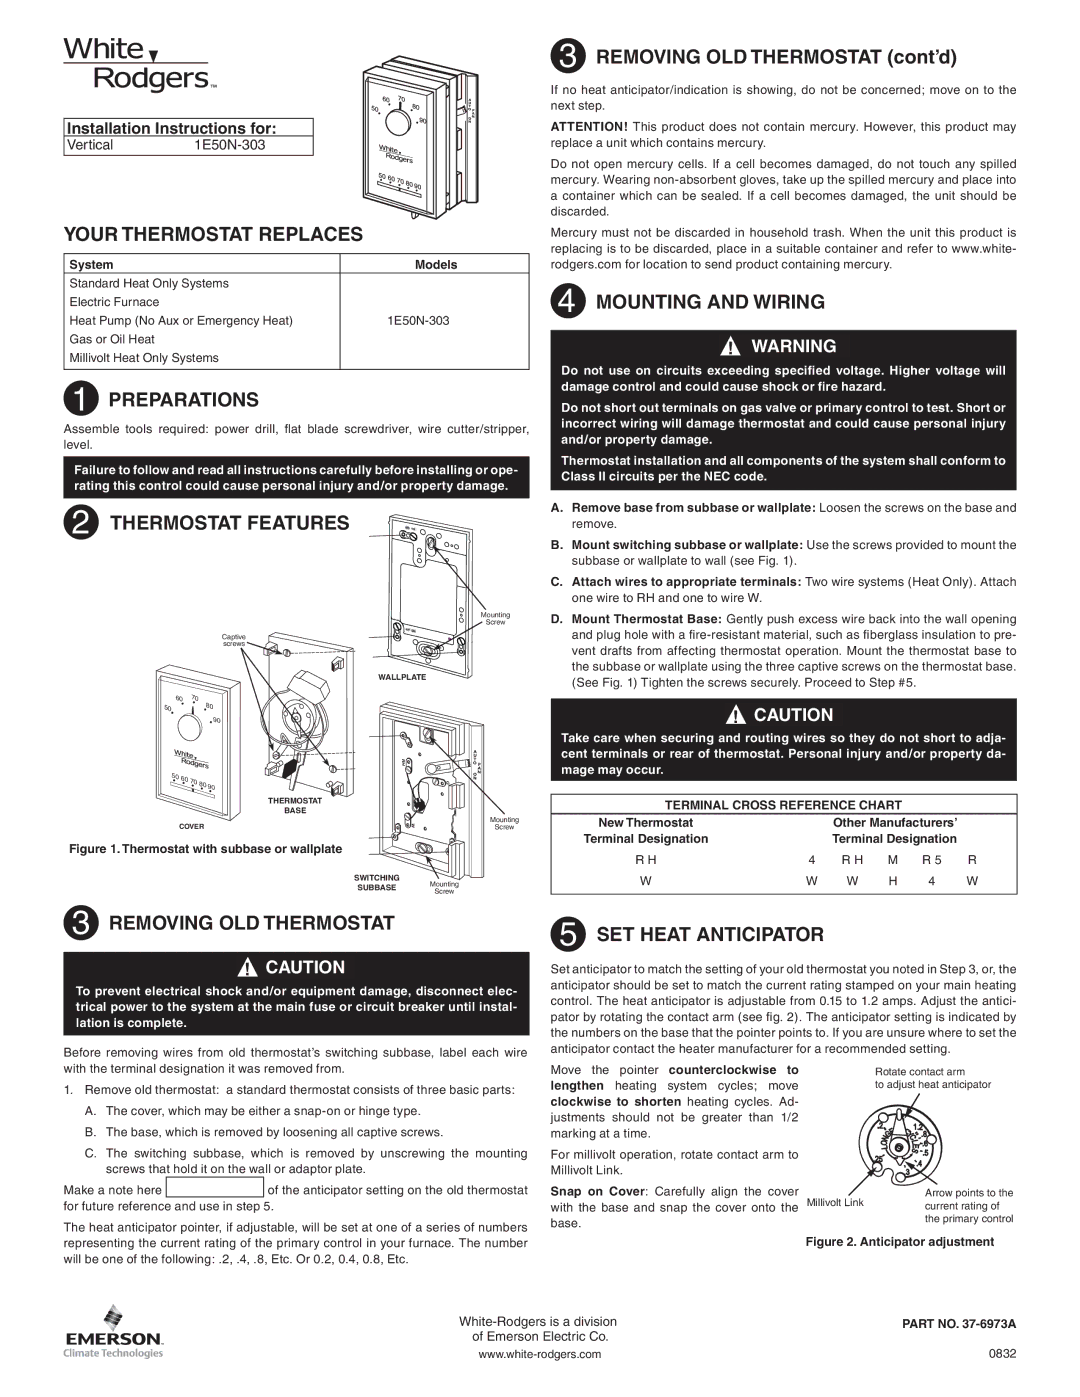
Installation Instructions for:

Vertical1E50N-303

YOUR THERMOSTAT REPLACES

System

Models

Standard Heat Only Systems


Electric Furnace


Heat Pump (No Aux or Emergency Heat)

1E50N-303

Gas or Oil Heat


Millivolt Heat Only Systems


1 PREPARATIONS

Assemble tools required: power drill, fl at blade screwdriver, wire cutter/stripper, level.

Failure to follow and read all instructions carefully before installing or ope- rating this control could cause personal injury and/or property damage.

2 THERMOSTAT FEATURES

3 REMOVING OLD THERMOSTAT (cont’d)

If no heat anticipator/indication is showing, do not be concerned; move on to the next step.

ATTENTION! This product does not contain mercury. However, this product may replace a unit which contains mercury.

Do not open mercury cells. If a cell becomes damaged, do not touch any spilled mercury. Wearing non-absorbent gloves, take up the spilled mercury and place into a container which can be sealed. If a cell becomes damaged, the unit should be discarded.

Mercury must not be discarded in household trash. When the unit this product is replacing is to be discarded, place in a suitable container and refer to www.white- rodgers.com for location to send product containing mercury.

4 MOUNTING AND WIRING

!WARNING

Do not use on circuits exceeding specified voltage. Higher voltage will damage control and could cause shock or fire hazard.

Do not short out terminals on gas valve or primary control to test. Short or incorrect wiring will damage thermostat and could cause personal injury and/or property damage.

Thermostat installation and all components of the system shall conform to Class II circuits per the NEC code.

A. Remove base from subbase or wallplate: Loosen the screws on the base and

remove.

B. Mount switching subbase or wallplate: Use the screws provided to mount the

subbase or wallplate to wall (see Fig. 1).

C. Attach wires to appropriate terminals: Two wire systems (Heat Only). Attach

one wire to RH and one to wire W.

Captive

4

screws


WALLPLATE

60

70

80


50


90


RH


50

60

70

80


G


90


THERMOSTAT


BASE


COVER


W


Figure 1. Thermostat with subbase or wallplate

SWITCHING

SUBBASE Mounting

Screw

Mounting

Screw

Mounting

Screw

D. Mount Thermostat Base: Gently push excess wire back into the wall opening

and plug hole with a fi re-resistant material, such as fi berglass insulation to pre-

vent drafts from affecting thermostat operation. Mount the thermostat base to

the subbase or wallplate using the three captive screws on the thermostat base.

(See Fig. 1) Tighten the screws securely. Proceed to Step #5.

!CAUTION

Take care when securing and routing wires so they do not short to adja- cent terminals or rear of thermostat. Personal injury and/or property da- mage may occur.

TERMINAL CROSS REFERENCE CHART

New Thermostat


Other Manufacturers’


Terminal Designation


Terminal Designation


R H

4

R H

M

R 5

R

W

W

W

H

4

W

3 REMOVING OLD THERMOSTAT

!CAUTION

To prevent electrical shock and/or equipment damage, disconnect elec- trical power to the system at the main fuse or circuit breaker until instal- lation is complete.

Before removing wires from old thermostat’s switching subbase, label each wire

5 SET HEAT ANTICIPATOR

Set anticipator to match the setting of your old thermostat you noted in Step 3, or, the anticipator should be set to match the current rating stamped on your main heating control. The heat anticipator is adjustable from 0.15 to 1.2 amps. Adjust the antici- pator by rotating the contact arm (see fi g. 2). The anticipator setting is indicated by the numbers on the base that the pointer points to. If you are unsure where to set the anticipator contact the heater manufacturer for a recommended setting.

with the terminal designation it was removed from.

1.Remove old thermostat: a standard thermostat consists of three basic parts:

A.The cover, which may be either a snap-on or hinge type.

B.The base, which is removed by loosening all captive screws.

C.The switching subbase, which is removed by unscrewing the mounting screws that hold it on the wall or adaptor plate.

Make a note here


of the anticipator setting on the old thermostat

for future reference and use in step 5.

The heat anticipator pointer, if adjustable, will be set at one of a series of numbers representing the current rating of the primary control in your furnace. The number will be one of the following: .2, .4, .8, Etc. Or 0.2, 0.4, 0.8, Etc.

Move the pointer counterclockwise to lengthen heating system cycles; move clockwise to shorten heating cycles. Ad- justments should not be greater than 1/2 marking at a time.

For millivolt operation, rotate contact arm to Millivolt Link.

Snap on Cover: Carefully align the cover with the base and snap the cover onto the base.

Rotate contact arm

to adjust heat anticipator

Arrow points to the

Millivolt Linkcurrent rating of the primary control

Figure 2. Anticipator adjustment

White-Rodgers is a division

PART NO. 37-6973A

of Emerson Electric Co.


www.white-rodgers.com

0832

Page 1
Image 1
White Rodgers 1E50N-303 installation instructions Your Thermostat Replaces, Preparations, Thermostat Features

1E50N-303 specifications

The White Rodgers 1E50N-303 is a versatile and reliable thermostat designed for both residential and commercial HVAC systems. This device features advanced technologies that improve energy efficiency and enhance temperature control, making it a popular choice among homeowners and HVAC professionals alike.

One of the main features of the 1E50N-303 is its user-friendly interface. The thermostat is equipped with a large display that clearly shows the current temperature, set point, and system status, allowing users to easily monitor and adjust their heating or cooling settings. The intuitive navigation buttons make programming straightforward, catering to a wide range of user needs.

The 1E50N-303 utilizes a digital electronic control system that ensures precise temperature regulation. This technology allows users to set their desired temperature with accuracy, leading to improved comfort levels and reduced energy consumption. Additionally, the thermostat includes a seven-day programmable feature, enabling users to customize their temperature settings for different days of the week. This adaptability ensures efficient energy usage, as the system can lower heating or cooling when occupants are away from home.

Another notable characteristic of the White Rodgers 1E50N-303 is its compatibility with various heating and cooling systems, including gas, oil, and electric units. This versatility makes it suitable for a wide range of applications, accommodating users with different setup requirements.

The 1E50N-303 is also equipped with a built-in filter change reminder, which promotes regular maintenance and ensures optimal system performance. By reminding users to replace or clean their filters, the thermostat helps prolong the lifespan of HVAC systems and maintain energy efficiency.

In terms of design, the White Rodgers 1E50N-303 boasts a sleek and modern appearance that fits well into any interior decor. Its compact size allows for easy installation, and it can be mounted on walls or utilized as part of a smart home system.

Overall, the White Rodgers 1E50N-303 thermostat combines essential features and advanced technologies to deliver exceptional temperature control and energy efficiency. Its user-friendly design, compatibility with various HVAC systems, and focus on maintenance make it a top choice for those looking to enhance comfort and reduce energy costs in their homes or businesses.