TEMPERATURE DISPLAY ADJUSTMENT — Your new thermostat has been accurately set in our factory. However, if you wish, you may adjust your new thermostat temperature

display to match your old thermostat. This can be accom- plished (within a ± 3° range) as follows:

1.Press PRGM and RUN buttons at the same time.

2.Press or to adjust the displayed temperature to your desired setting.

3.Press RUN to resume normal program operation.

Display Backlight — (Not available on earlier models.) The display backlight improves display contrast in low lighting conditions. Selecting backlight ON will turn the light on for a short period of time after any button is pressed. Selecting backlight OFF (default) will keep the light off. Turn the display backlight feature ON as follows:

1.Press TIME and RUN buttons at the same time. The display will show “d-L”and “OFF” alternately.

2.Press or to change “OFF” to “ON”

6 PROGRAMMING YOUR THERMOSTAT

This section will help you plan your thermostat’s program to meet your needs. For maximum comfort and efficiency, keep the following guidelines in mind when planning your program.

When heating (cooling) your building, program the tempera- tures to be cooler (warmer) when the building is vacant or during periods of low activity.

During early morning hours, the need for cooling is usually minimal.

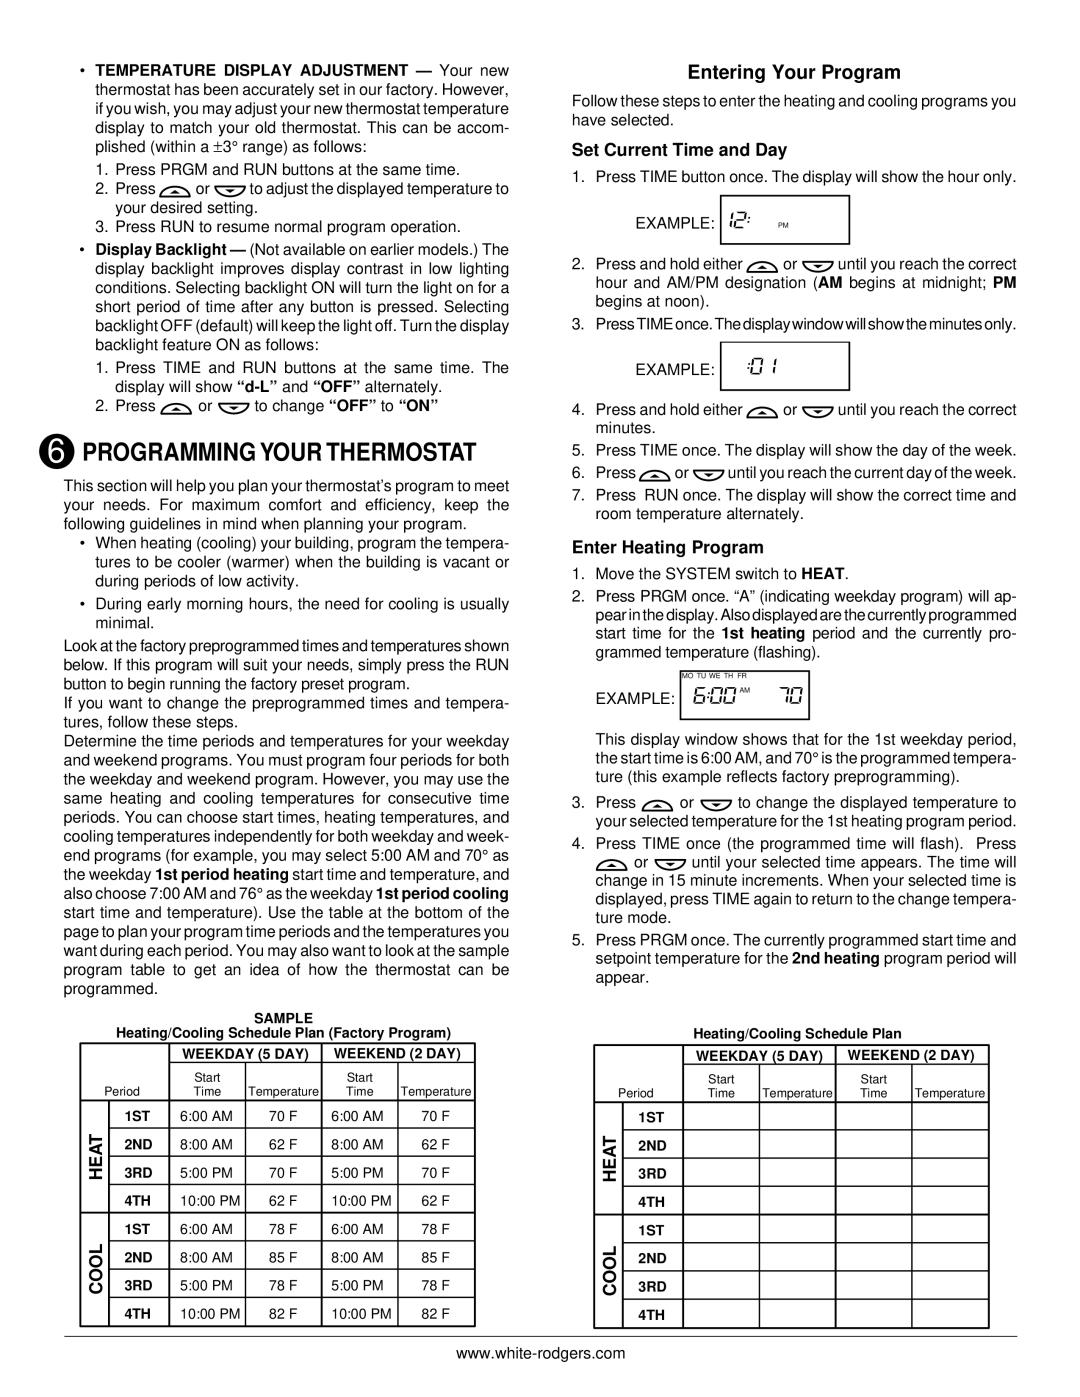
Look at the factory preprogrammed times and temperatures shown below. If this program will suit your needs, simply press the RUN button to begin running the factory preset program.

Entering Your Program

Follow these steps to enter the heating and cooling programs you have selected.

Set Current Time and Day

1. Press TIME button once. The display will show the hour only.

EXAMPLE:

PM

2.Press and hold either or until you reach the correct hour and AM/PM designation (AM begins at midnight; PM begins at noon).

3.Press TIME once. The display window will show the minutes only.

EXAMPLE:

4.Press and hold either or until you reach the correct minutes.

5.Press TIME once. The display will show the day of the week.

6.Press or until you reach the current day of the week.

7.Press RUN once. The display will show the correct time and room temperature alternately.

Enter Heating Program

1.Move the SYSTEM switch to HEAT.

2.Press PRGM once. “A” (indicating weekday program) will ap- pear in the display. Also displayed are the currently programmed start time for the 1st heating period and the currently pro- grammed temperature (flashing).

MO TU WE TH FR

If you want to change the preprogrammed times and tempera- tures, follow these steps.

EXAMPLE:

AM

Determine the time periods and temperatures for your weekday and weekend programs. You must program four periods for both the weekday and weekend program. However, you may use the same heating and cooling temperatures for consecutive time periods. You can choose start times, heating temperatures, and cooling temperatures independently for both weekday and week- end programs (for example, you may select 5:00 AM and 70° as the weekday 1st period heating start time and temperature, and also choose 7:00 AM and 76° as the weekday 1st period cooling start time and temperature). Use the table at the bottom of the page to plan your program time periods and the temperatures you want during each period. You may also want to look at the sample program table to get an idea of how the thermostat can be programmed.

SAMPLE

Heating/Cooling Schedule Plan (Factory Program)


WEEKDAY (5 DAY)

WEEKEND (2 DAY)


Start


Start


Period

Time

Temperature

Time

Temperature


1ST

6:00 AM

70 F

6:00 AM

70 F

HEAT


2ND

8:00 AM

62 F

8:00 AM

62 F


3RD

5:00 PM

70 F

5:00 PM

70 F


4TH

10:00 PM

62 F

10:00 PM

62 F


1ST

6:00 AM

78 F

6:00 AM

78 F

COOL


2ND

8:00 AM

85 F

8:00 AM

85 F


3RD

5:00 PM

78 F

5:00 PM

78 F


4TH

10:00 PM

82 F

10:00 PM

82 F


This display window shows that for the 1st weekday period, the start time is 6:00 AM, and 70° is the programmed tempera- ture (this example reflects factory preprogramming).

3.Press or to change the displayed temperature to your selected temperature for the 1st heating program period.

4.Press TIME once (the programmed time will flash). Press

or until your selected time appears. The time will change in 15 minute increments. When your selected time is displayed, press TIME again to return to the change tempera- ture mode.

5.Press PRGM once. The currently programmed start time and setpoint temperature for the 2nd heating program period will appear.


Heating/Cooling Schedule Plan


WEEKDAY (5 DAY)

WEEKEND (2 DAY)


Start


Start


Period

Time

Temperature

Time

Temperature


1ST


HEAT


3RD


2ND


4TH


1ST


COOL

COOL


3RD


2ND


4TH


www.white-rodgers.com

Page 5
Image 5
White Rodgers 750 Programming Your Thermostat, Entering Your Program, Set Current Time and Day, Enter Heating Program

750, 750 specifications

The Emerson 750,750 is a cutting-edge solution in the field of automation and control systems designed to streamline industrial processes and enhance operational efficiency. This advanced control platform integrates a wide array of features and technologies that cater to the diverse needs of modern industries, including oil and gas, pharmaceuticals, power generation, and water treatment.

One of the major highlights of the Emerson 750,750 is its modular design. This architecture allows users to configure the system according to their specific requirements, promoting flexibility and scalability. The modular components can be easily upgraded or replaced as technology evolves or operational needs change, ensuring that businesses can keep pace with advancements in the industry without massive overhauls of their existing systems.

The 750,750 also boasts an intuitive user interface, enabling operators to interact with the system seamlessly. The interface is built on advanced software technologies that provide real-time data visualization and analytics, empowering users to monitor their processes effectively. The integration of advanced graphical displays improves the decision-making process by allowing users to quickly interpret data and respond proactively to any anomalies.

In terms of communication capabilities, the Emerson 750,750 supports a wide range of protocols, such as Ethernet/IP, Modbus, and Hart, ensuring compatibility with various devices and systems. This connectivity simplifies the integration of the control system into existing infrastructures, allowing for streamlined operations and data sharing across different platforms.

Safety and reliability are also paramount in the design of the Emerson 750,750. The system incorporates features such as redundant power supplies and fault tolerance, providing uninterrupted service and minimizing the risk of downtime. These qualities make the 750,750 a reliable choice for critical applications where safety and continuity of operations are essential.

Furthermore, Emerson's commitment to sustainability is evident in the energy-efficient design of the 750,750. The system is engineered to minimize energy consumption while maximizing performance, thus supporting organizations' efforts to reduce their environmental footprint.

In summary, the Emerson 750,750 is a versatile and powerful automation platform that aligns with the evolving demands of industrial operations. With its modular design, user-friendly interface, robust communication capabilities, and focus on safety and sustainability, it represents a significant advancement in control technology, empowering industries to enhance efficiency and drive innovation.