
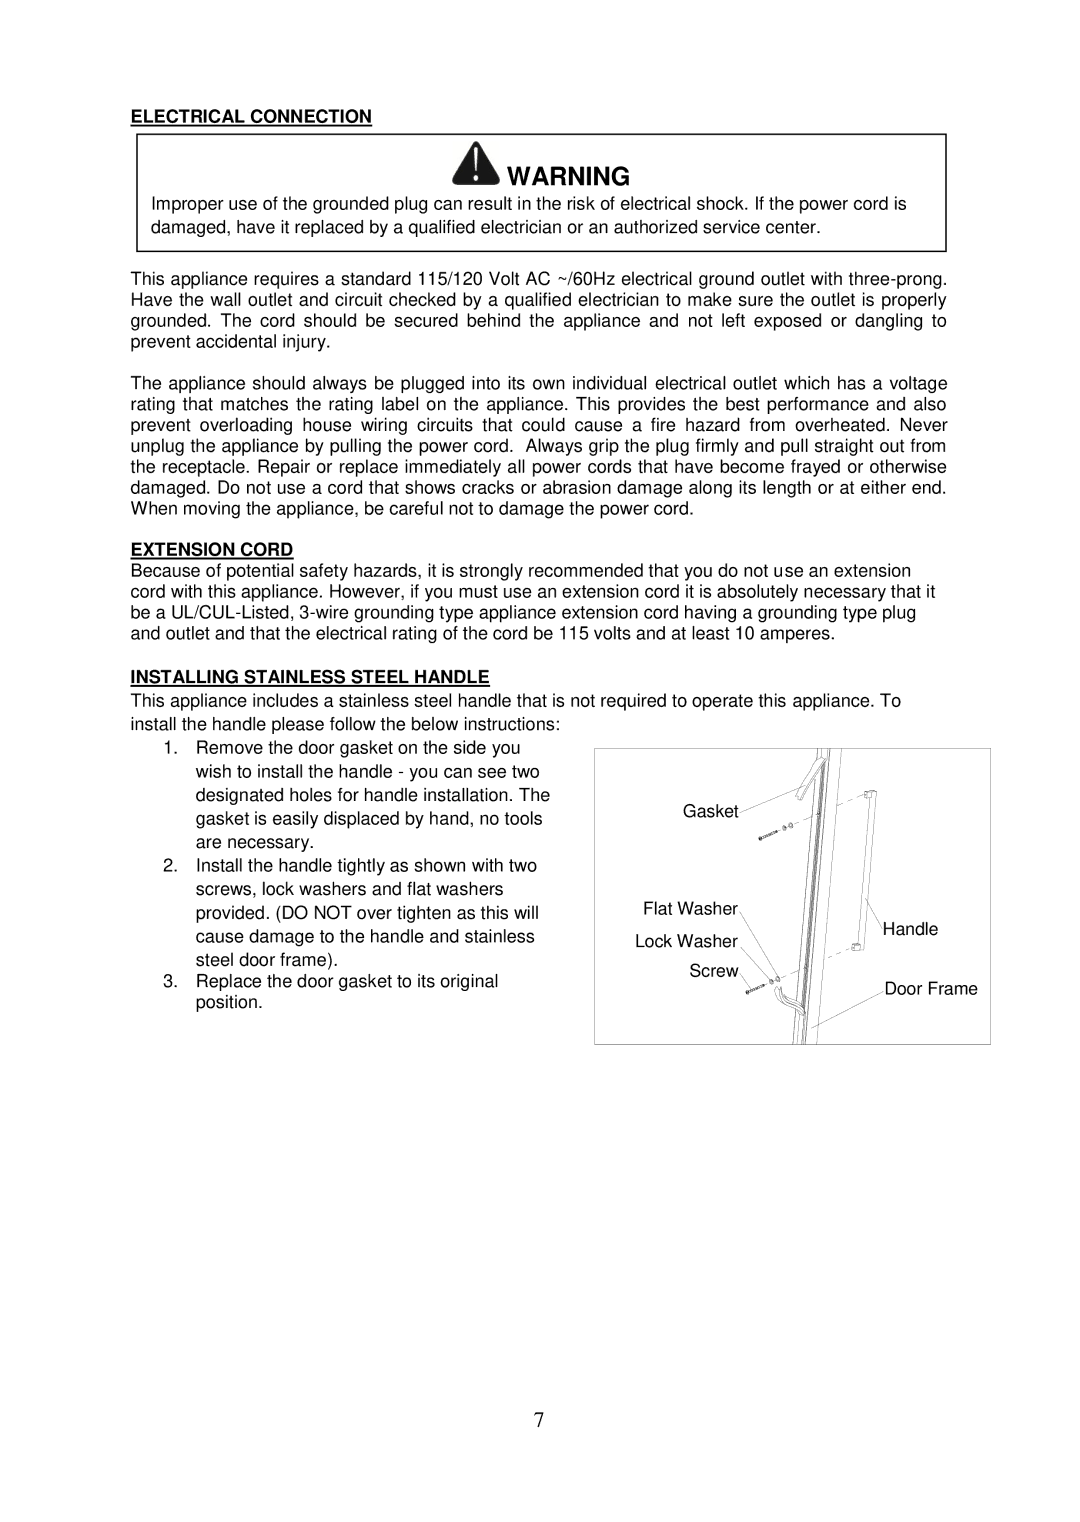
BR-125SD specifications
The Whynter BR-125SD stands out as a versatile and innovative solution in the world of portable refrigeration. Designed primarily for those who require a refrigerator/freezer that can efficiently manage temperature settings, this model shines with its advanced features and technologies.One of the most impressive aspects of the Whynter BR-125SD is its dual temperature zones. Users can set the temperature between 0°F to 50°F, allowing for versatile storage options. The upper section functions as a refrigerator, while the lower section can be used as a freezer. This dual functionality makes it ideal for camping trips, road trips, or even as an extra fridge for tailgating events.
The BR-125SD boasts a powerful compressor cooling system, ensuring that your food and beverages stay at the desired temperature consistently. The unit can cool down rapidly, making it an efficient and reliable option for keeping perishables fresh over extended periods. Furthermore, the adjustable temperature control equipped with both digital LED display and an easy-to-use interface allows for precise temperature management.
Portability is another key feature of the Whynter BR-125SD. With a lightweight design and built-in handles, it can be transported effortlessly to various locations. Whether you're going on a camping adventure, picnic, or simply need extra storage at home, this refrigerator/freezer combo is crafted for convenience.
Additionally, this model is designed with energy efficiency in mind. It incorporates an eco-friendly refrigerant, ensuring a minimal environmental impact while still delivering powerful performance. The unit operates quietly, which is a significant consideration for users who need a discreet appliance.
Durability is another hallmark of the Whynter BR-125SD. Constructed with robust materials, it can withstand the rigors of outdoor use without compromising performance. The lid is designed to seal tightly, minimizing cold air loss and ultimately contributing to energy savings.
In summary, the Whynter BR-125SD unites functionality, portability, and energy efficiency into a compact design. Its dual temperature zones, rapid cooling capabilities, user-friendly controls, and robust construction make it an excellent choice for anyone in need of reliable refrigeration on the go. Whether for outdoor adventures or extra home storage, the Whynter BR-125SD promises to meet diverse refrigeration needs efficiently.