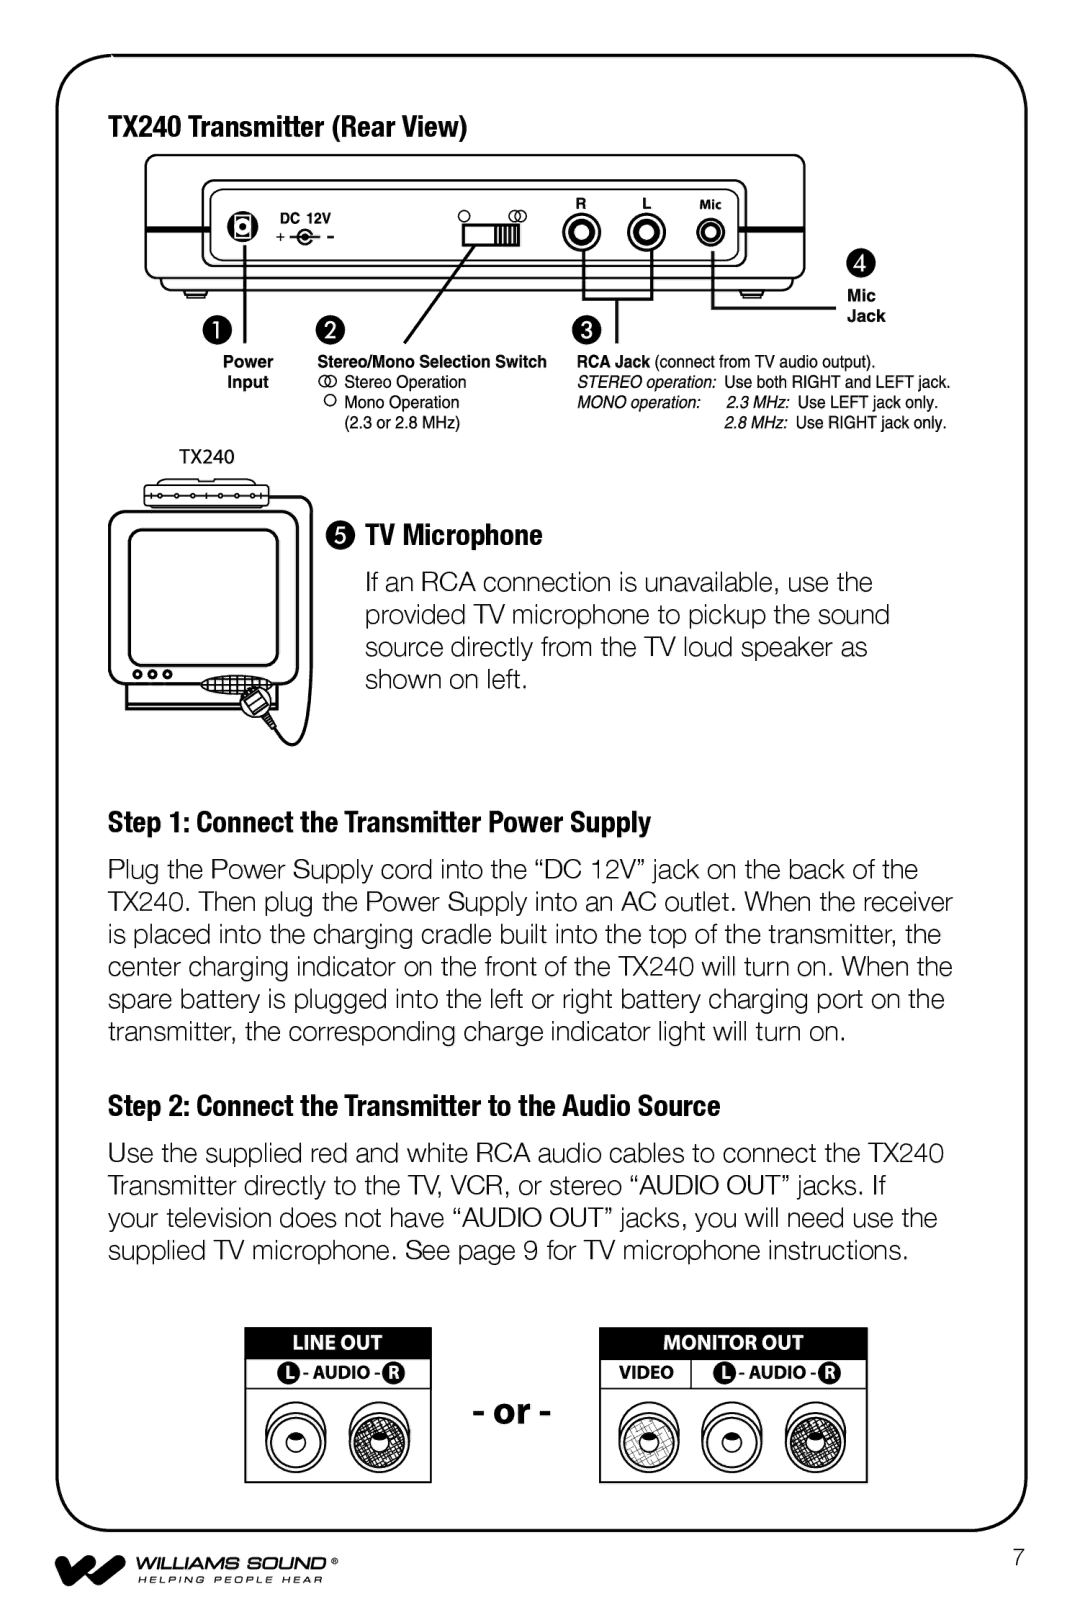
TX240 Transmitter (Rear View)
❹
❶ ❷ | ❸ |
❺TV Microphone
If an RCA connection is unavailable, use the
provided TV microphone to pickup the sound source directly from the TV loud speaker as shown on left.
Step 1: Connect the Transmitter Power Supply
Plug the Power Supply cord into the “DC 12V” jack on the back of the TX240. Then plug the Power Supply into an AC outlet. When the receiver is placed into the charging cradle built into the top of the transmitter, the center charging indicator on the front of the TX240 will turn on. When the spare battery is plugged into the left or right battery charging port on the transmitter, the corresponding charge indicator light will turn on.
Step 2: Connect the Transmitter to the Audio Source
Use the supplied red and white RCA audio cables to connect the TX240 Transmitter directly to the TV, VCR, or stereo “AUDIO OUT” jacks. If your television does not have “AUDIO OUT” jacks, you will need use the supplied TV microphone. See page 9 for TV microphone instructions.
7