HSN_PaniniManual 3/20/07 10:12 PM Page 5
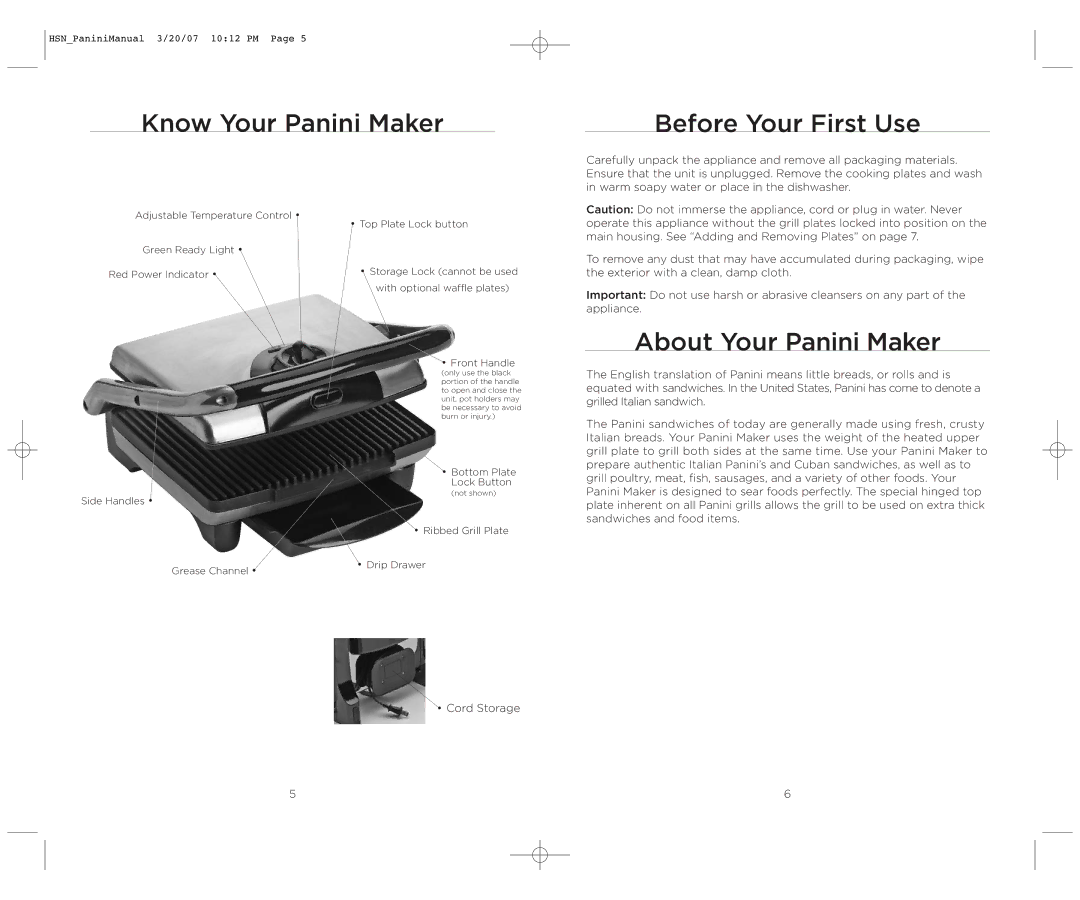
Know Your Panini Maker
Before Your First Use
Carefully unpack the appliance and remove all packaging materials. Ensure that the unit is unplugged. Remove the cooking plates and wash in warm soapy water or place in the dishwasher.
Adjustable Temperature Control •
Green Ready Light •
Red Power Indicator •
Side Handles •
Grease Channel •
•Top Plate Lock button
•Storage Lock (cannot be used with optional waffle plates)
•Front Handle
(only use the black portion of the handle to open and close the unit, pot holders may be necessary to avoid burn or injury.)
• Bottom Plate
Lock Button
(not shown)
•Ribbed Grill Plate
•Drip Drawer
Caution: Do not immerse the appliance, cord or plug in water. Never operate this appliance without the grill plates locked into position on the main housing. See “Adding and Removing Plates” on page 7.
To remove any dust that may have accumulated during packaging, wipe the exterior with a clean, damp cloth.
Important: Do not use harsh or abrasive cleansers on any part of the appliance.
About Your Panini Maker
The English translation of Panini means little breads, or rolls and is equated with sandwiches. In the United States, Panini has come to denote a grilled Italian sandwich.
The Panini sandwiches of today are generally made using fresh, crusty Italian breads. Your Panini Maker uses the weight of the heated upper grill plate to grill both sides at the same time. Use your Panini Maker to prepare authentic Italian Panini’s and Cuban sandwiches, as well as to grill poultry, meat, fish, sausages, and a variety of other foods. Your Panini Maker is designed to sear foods perfectly. The special hinged top plate inherent on all Panini grills allows the grill to be used on extra thick sandwiches and food items.
• Cord Storage
5 | 6 |
