Know Your Immersion Blender/Chopper
Assembly and Use of
8
3 12
211
1
6
4
5
9
13
10
7
14
15
16 ![]()
![]()
![]()
![]()
![]()
![]()
![]()
![]()
![]()
![]()
Hand Blender Attachment
1.Ensure the motor base is unplugged. Attach hand blender rod to motor base by lining up the two separate parts. Turn clockwise to lock in place.
2.Place one of the small metal attachments in the shaft of the mixing
rod. Make sure that the pin located on the shaft fits into the slot of the attachment. Press down until attachment locks in place.
Caution: Blades are sharp. Handle with care.
3.Place food in suitable container for mixing (beaker, bowl, pan). For best results, solid foods should be no larger than 1/4" or 1/2” cubes.
4.Plug into
5.Place the hand blender attachment into your ingredients.
Turn the speed selector to LO first. Press the ON/OFF switch to begin blending; then gradually increase speed, as needed. Slowly move the blade up, down and sideways through the food . Note: Never lift the hand blender attachment out of your ingredients while the unit is running.
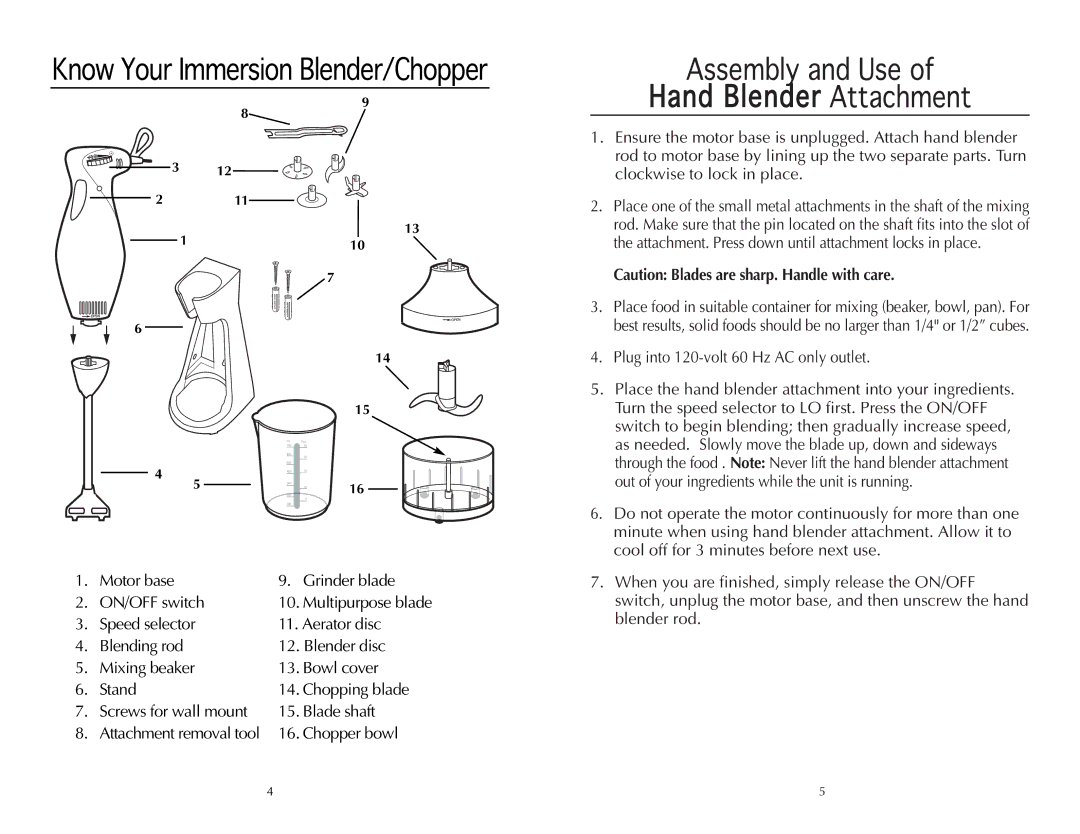
1. | Motor base | 9. Grinder blade |
2. | ON/OFF switch | 10. Multipurpose blade |
3. | Speed selector | 11. Aerator disc |
4. | Blending rod | 12. Blender disc |
5. | Mixing beaker | 13. Bowl cover |
6. | Stand | 14. Chopping blade |
7. | Screws for wall mount | 15. Blade shaft |
8. | Attachment removal tool | 16. Chopper bowl |
6.Do not operate the motor continuously for more than one minute when using hand blender attachment. Allow it to cool off for 3 minutes before next use.
7.When you are finished, simply release the ON/OFF switch, unplug the motor base, and then unscrew the hand blender rod.
4 | 5 |