BACKHOE 3-POINT MOUNT INSTALLATION
TRACTOR PREPARATION
NOTE: For installing this
NOTE: Leave all hardware loose until mounting kit has been fit up.
1.Refer to the WOODS BH70X/BH80X Backhoe Operator’s Manual for backhoe assembly instruc- tions.
2.Remove the tractor top link and top link storage bracket, if equipped.
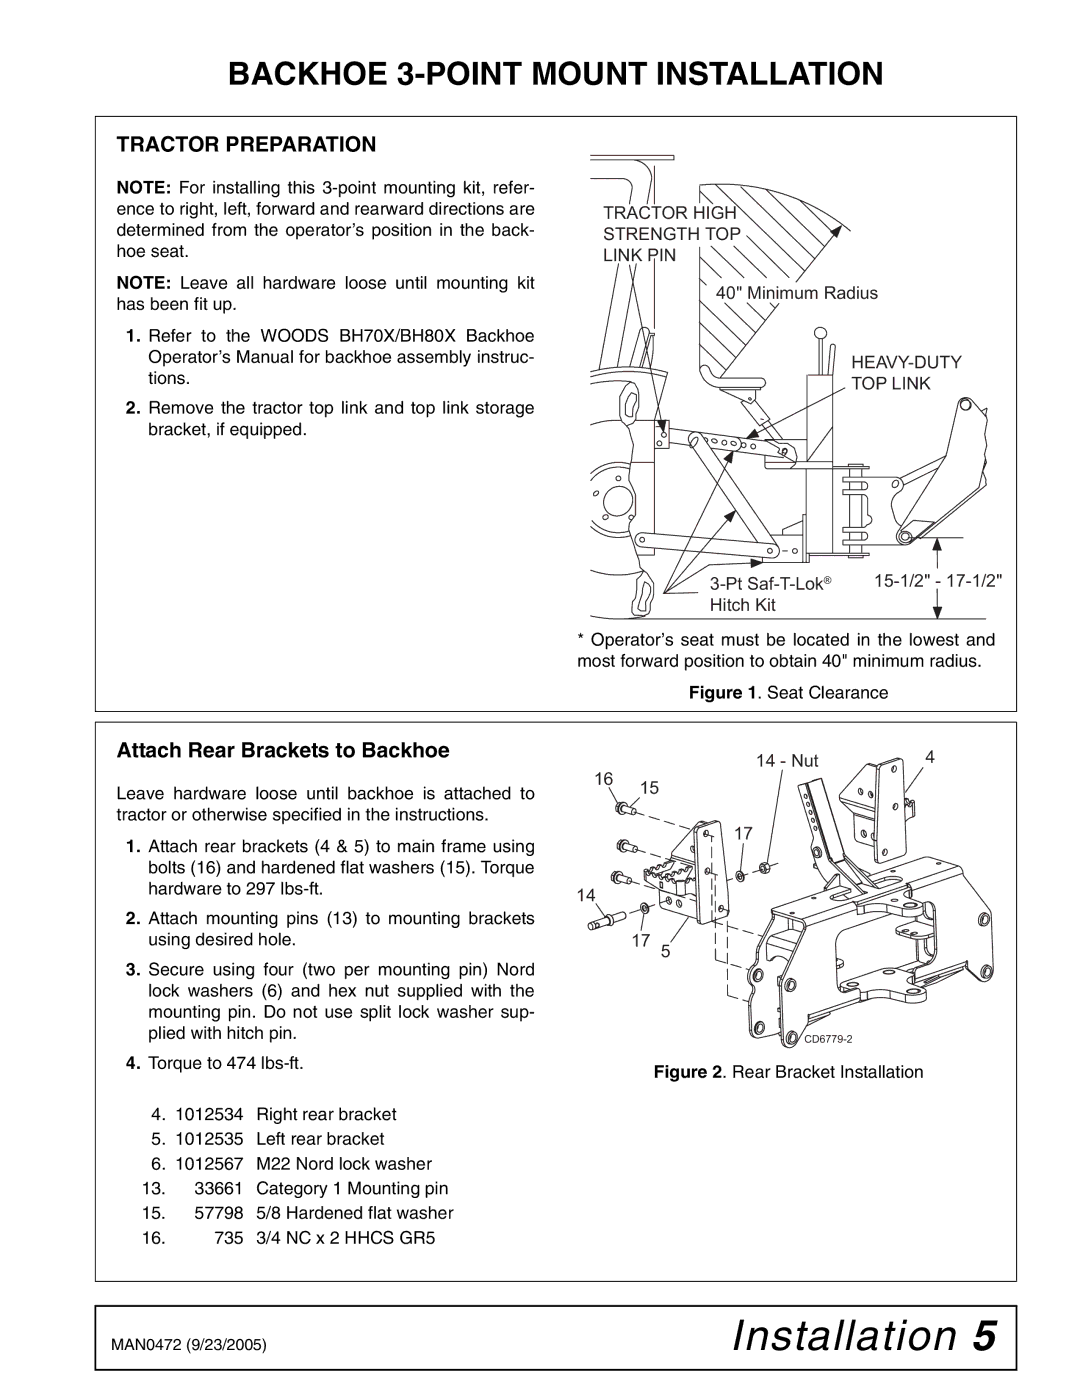
TRACTOR HIGH
STRENGTH TOP
LINK PIN
40" Minimum Radius
HEAVY-DUTY
TOP LINK
|
|
Hitch Kit |
|
*Operator’s seat must be located in the lowest and most forward position to obtain 40" minimum radius.
Figure 1. Seat Clearance
Attach Rear Brackets to Backhoe
Leave hardware loose until backhoe is attached to tractor or otherwise specified in the instructions.
14 - Nut4
16 15
1. | Attach rear brackets (4 & 5) to main frame using |
| bolts (16) and hardened flat washers (15). Torque |
| hardware to 297 |
2. | Attach mounting pins (13) to mounting brackets |
| using desired hole. |
3. | Secure using four (two per mounting pin) Nord |
| lock washers (6) and hex nut supplied with the |
| mounting pin. Do not use split lock washer sup- |
| plied with hitch pin. |
4. | Torque to 474 |
14
17
17
5
4. | 1012534 | Right rear bracket |
5. | 1012535 | Left rear bracket |
6. | 1012567 | M22 Nord lock washer |
13. | 33661 | Category 1 Mounting pin |
15. | 57798 | 5/8 Hardened flat washer |
16. | 735 | 3/4 NC x 2 HHCS GR5 |
Figure 2. Rear Bracket Installation
MAN0472 (9/23/2005) | Installation 5 |
|
|