
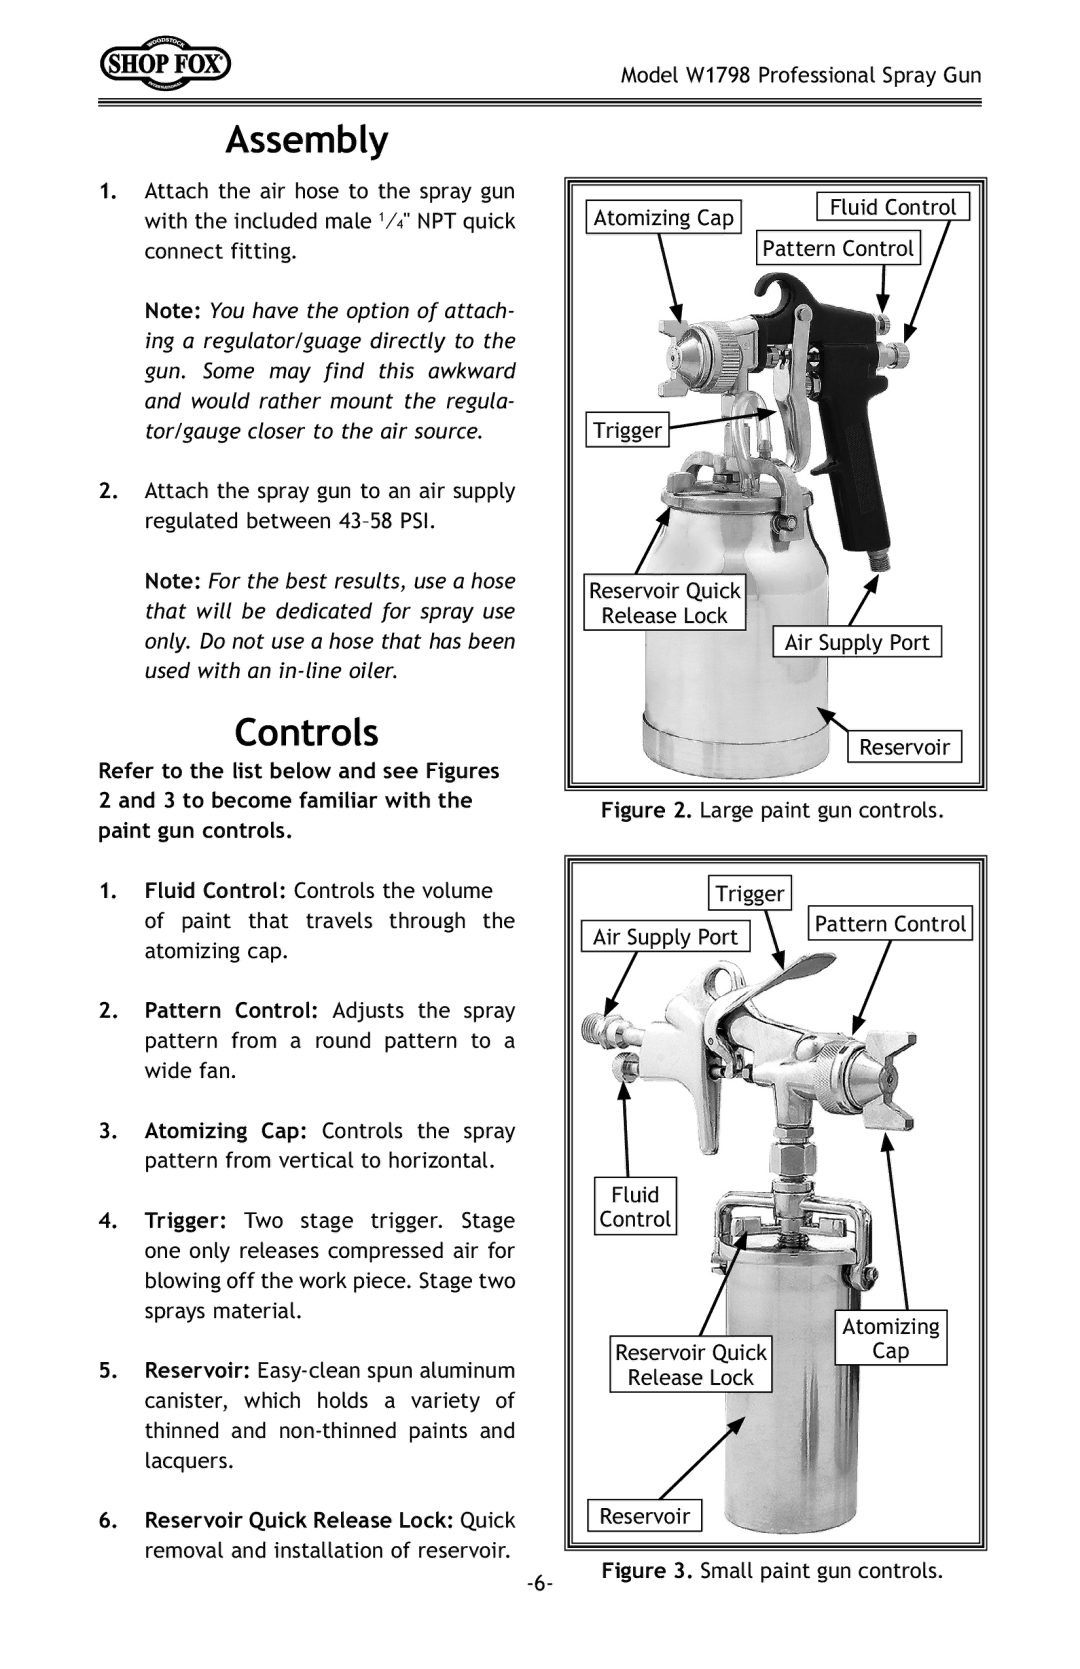
W1798 specifications
Woodstock W1798 is an innovative and versatile piece of technology designed to enhance modern living and streamline everyday tasks. This advanced device integrates seamlessly into home and office environments, showcasing a blend of user-centric design, cutting-edge features, and robust performance capabilities.One of the standout characteristics of the Woodstock W1798 is its intuitive interface. The device boasts a highly responsive touchscreen that allows users to interact with its functions effortlessly. This interface is designed to be user-friendly, ensuring that individuals of all technical backgrounds can access and navigate its features with ease. Enhanced by a vibrant display, the W1798 provides clear visuals and sharp graphics, improving the overall user experience.
In terms of connectivity, the Woodstock W1798 excels with support for both wired and wireless communication options. Its compatibility with Wi-Fi, Bluetooth, and various IoT protocols ensures that users can easily connect their devices and integrate them into their smart home ecosystems. This capability facilitates seamless data sharing and contributes to a streamlined digital environment.
The Woodstock W1798 is powered by an efficient processor that delivers impressive performance. Users will appreciate the device’s ability to multitask without lag, making it suitable for both personal and professional use. Whether it’s managing schedules, controlling home automation systems, or working on projects, the W1798 handles it all with speed and efficiency.
Another notable feature is its vast array of built-in applications and tools, designed to cater to various needs. From task management and communication tools to entertainment applications, the W1798 offers something for everyone. Additionally, it supports various third-party applications, allowing users to customize their experience and enhance functionality.
Security is also a paramount concern for Woodstock. The W1798 incorporates advanced encryption protocols and biometric authentication features to protect user data and privacy. This added layer of security reassures users that their information is safe from unauthorized access.
In summary, the Woodstock W1798 stands out as a powerful and adaptable device that marries functionality with user-friendly features. With its vibrant display, robust connectivity options, efficient processing power, and focus on security, it represents a step forward in technology aimed at enhancing everyday life. Whether in a home or office setting, the W1798 is designed to meet the demands of modern users, making it a valuable addition to any tech-savvy environment.