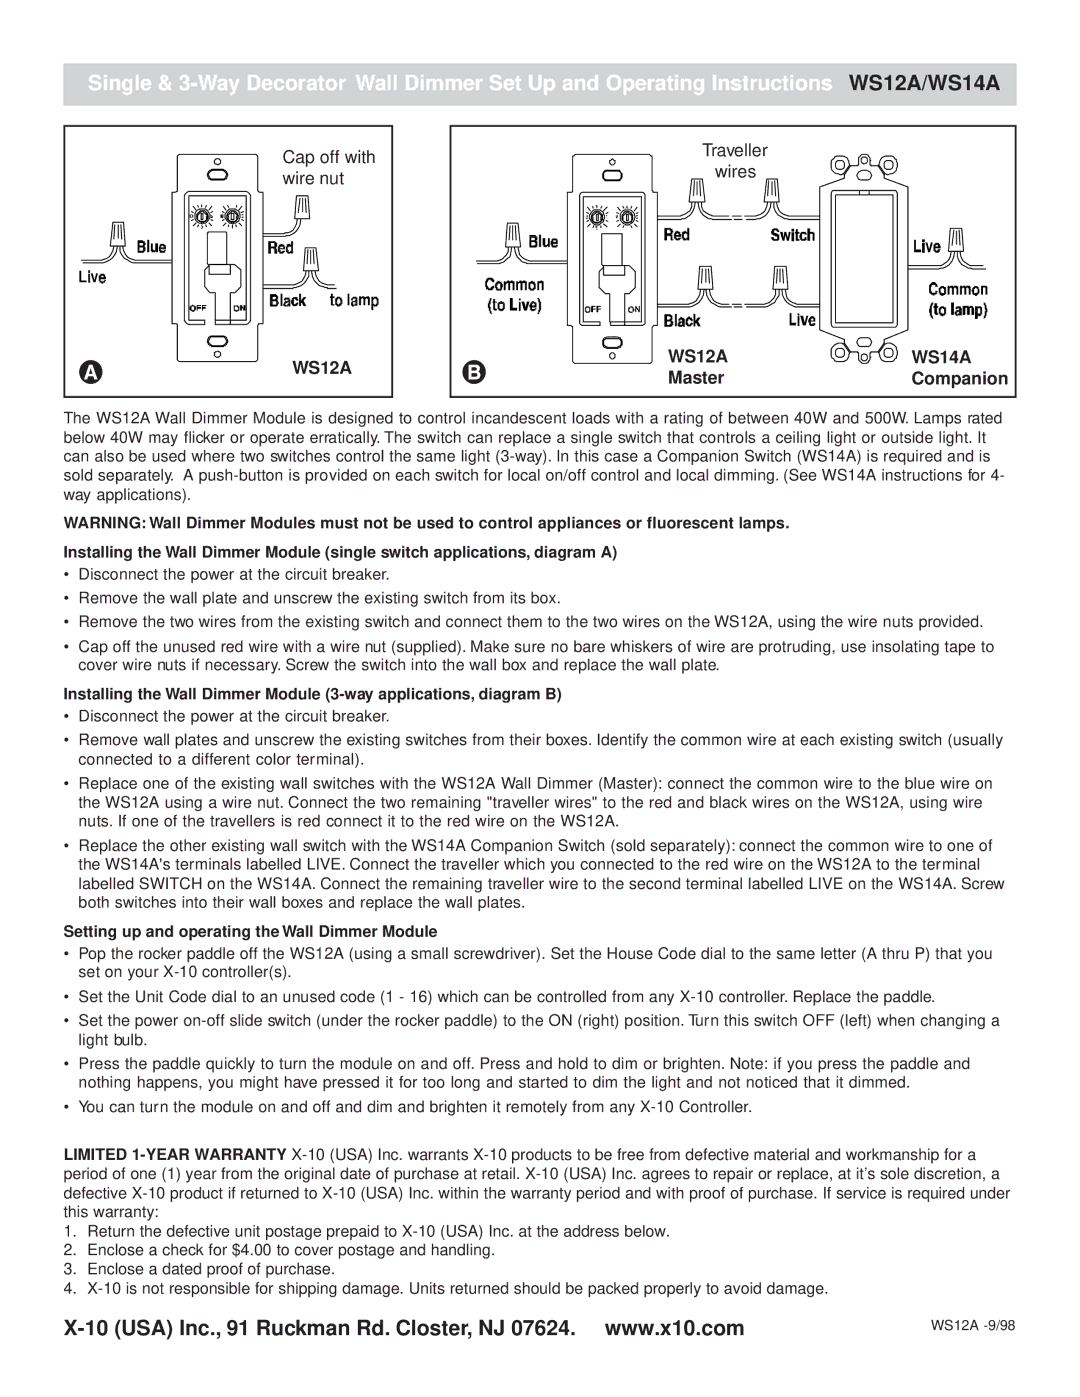
SW-C-LAI358 specifications
X10 Wireless Technology SW-C-LAI358 is a remarkable device designed to enhance home automation systems. With a focus on ease of use and flexibility, this product stands out in the market for those looking to modernize their living spaces. The SW-C-LAI358 is particularly popular among DIY enthusiasts and tech-savvy homeowners who appreciate the benefits of wireless communication in managing their home devices.One of the key features of the SW-C-LAI358 is its compatibility with various X10 modules, allowing users to control lights, appliances, and security systems effortlessly. This integration makes it a versatile option for creating a smart home environment. By utilizing power line communication, the SW-C-LAI358 enables seamless interactions between devices without the need for extensive rewiring or complicated setups.
The device operates on 433 MHz frequency, which contributes to its reliable performance. This frequency band is known for its stability and ability to penetrate walls and obstacles, ensuring that signals reach their intended destinations within the home. This characteristic is especially important in larger residences, where wireless communication may be hindered.
In terms of control, the SW-C-LAI358 offers both manual and remote operation options. Users can program timed events, allowing them to set schedules for various devices. For example, lights can be programmed to turn on and off at specific times, adding an extra layer of security and convenience. Additionally, the device can be paired with mobile applications, providing users with on-the-go access to their home automation systems.
A standout characteristic of the SW-C-LAI358 is its ease of installation. The plug-and-play design ensures that even those with minimal technical knowledge can successfully integrate this technology into their existing systems. The user-friendly interface further streamlines the process, letting homeowners customize their settings without any hassle.
Moreover, the SW-C-LAI358 is built with energy efficiency in mind. By optimizing the use of household devices, users can reduce their energy consumption and save on utility bills. This feature aligns with the growing trend of sustainable living and highlights the role of technology in promoting environmentally conscious practices.
In summary, the X10 Wireless Technology SW-C-LAI358 is a robust tool for anyone looking to enhance their home automation experience. With its compatibility with various devices, reliable frequency operation, easy installation, and focus on energy efficiency, it presents a compelling option for modern homeowners seeking convenience and control in their living spaces.

