Location of the Stacker Serial Number
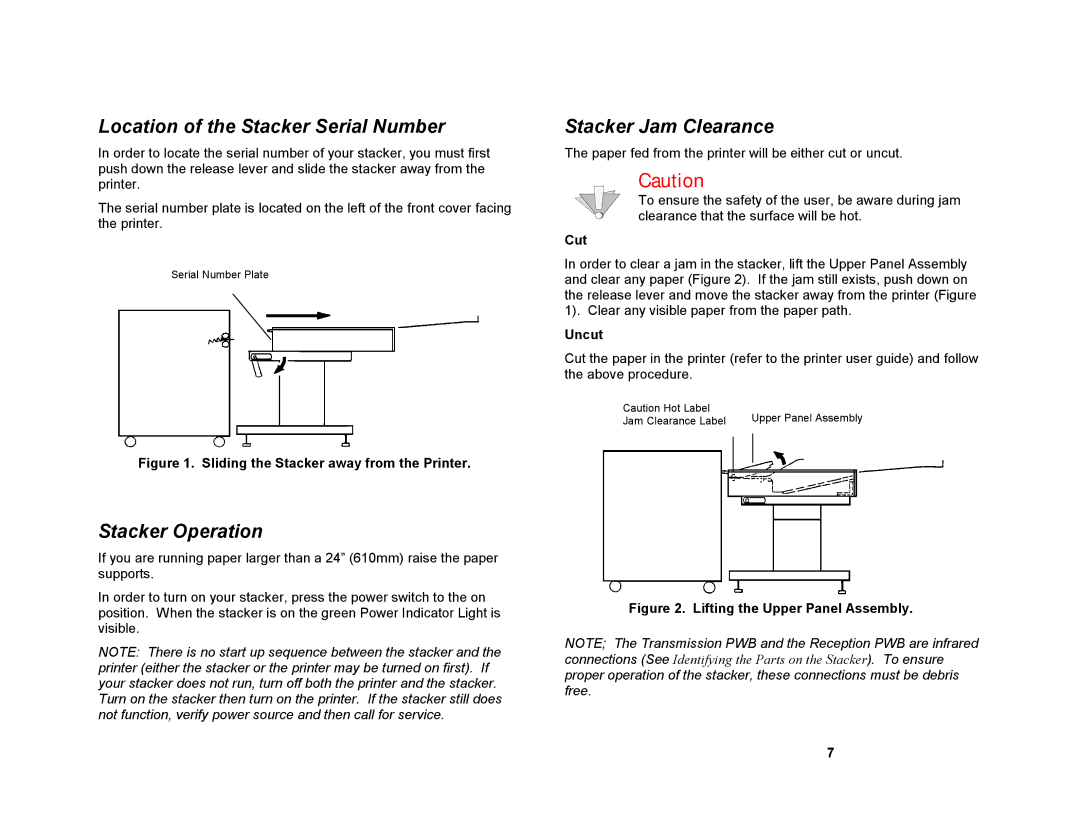
In order to locate the serial number of your stacker, you must first push down the release lever and slide the stacker away from the printer.
The serial number plate is located on the left of the front cover facing the printer.
Serial Number Plate
Figure 1. Sliding the Stacker away from the Printer.
Stacker Operation
If you are running paper larger than a 24” (610mm) raise the paper supports.
In order to turn on your stacker, press the power switch to the on position. When the stacker is on the green Power Indicator Light is visible.
NOTE: There is no start up sequence between the stacker and the printer (either the stacker or the printer may be turned on first). If your stacker does not run, turn off both the printer and the stacker. Turn on the stacker then turn on the printer. If the stacker still does not function, verify power source and then call for service.
Stacker Jam Clearance
The paper fed from the printer will be either cut or uncut.
Caution
To ensure the safety of the user, be aware during jam clearance that the surface will be hot.
Cut
In order to clear a jam in the stacker, lift the Upper Panel Assembly and clear any paper (Figure 2). If the jam still exists, push down on the release lever and move the stacker away from the printer (Figure 1). Clear any visible paper from the paper path.
Uncut
Cut the paper in the printer (refer to the printer user guide) and follow the above procedure.
Caution Hot Label | Upper Panel Assembly |
Jam Clearance Label |
Figure 2. Lifting the Upper Panel Assembly.
NOTE; The Transmission PWB and the Reception PWB are infrared connections (See Identifying the Parts on the Stacker). To ensure proper operation of the stacker, these connections must be debris free.
7
