
11B-106C401, 11B-106C701 specifications
The Yard-Man 11B-106C701 and 11B-106C401 are two robust outdoor power equipment models designed for homeowners who demand efficiency and durability in their lawn maintenance. Manufactured by Yard-Man, a brand known for its commitment to quality and innovation, these models are perfect for tackling medium to large yards with ease.One of the key features of both models is their powerful engine. The Yard-Man 11B-106C701 is equipped with a reliable gas engine that provides ample power for cutting through thick grass, weeds, and other tough terrain. The 11B-106C401, on the other hand, boasts a slightly more compact engine, making it an excellent choice for those who prefer a lighter machine without sacrificing performance. Both engines are engineered for fuel efficiency, ensuring longer runtime and decreased operational costs.
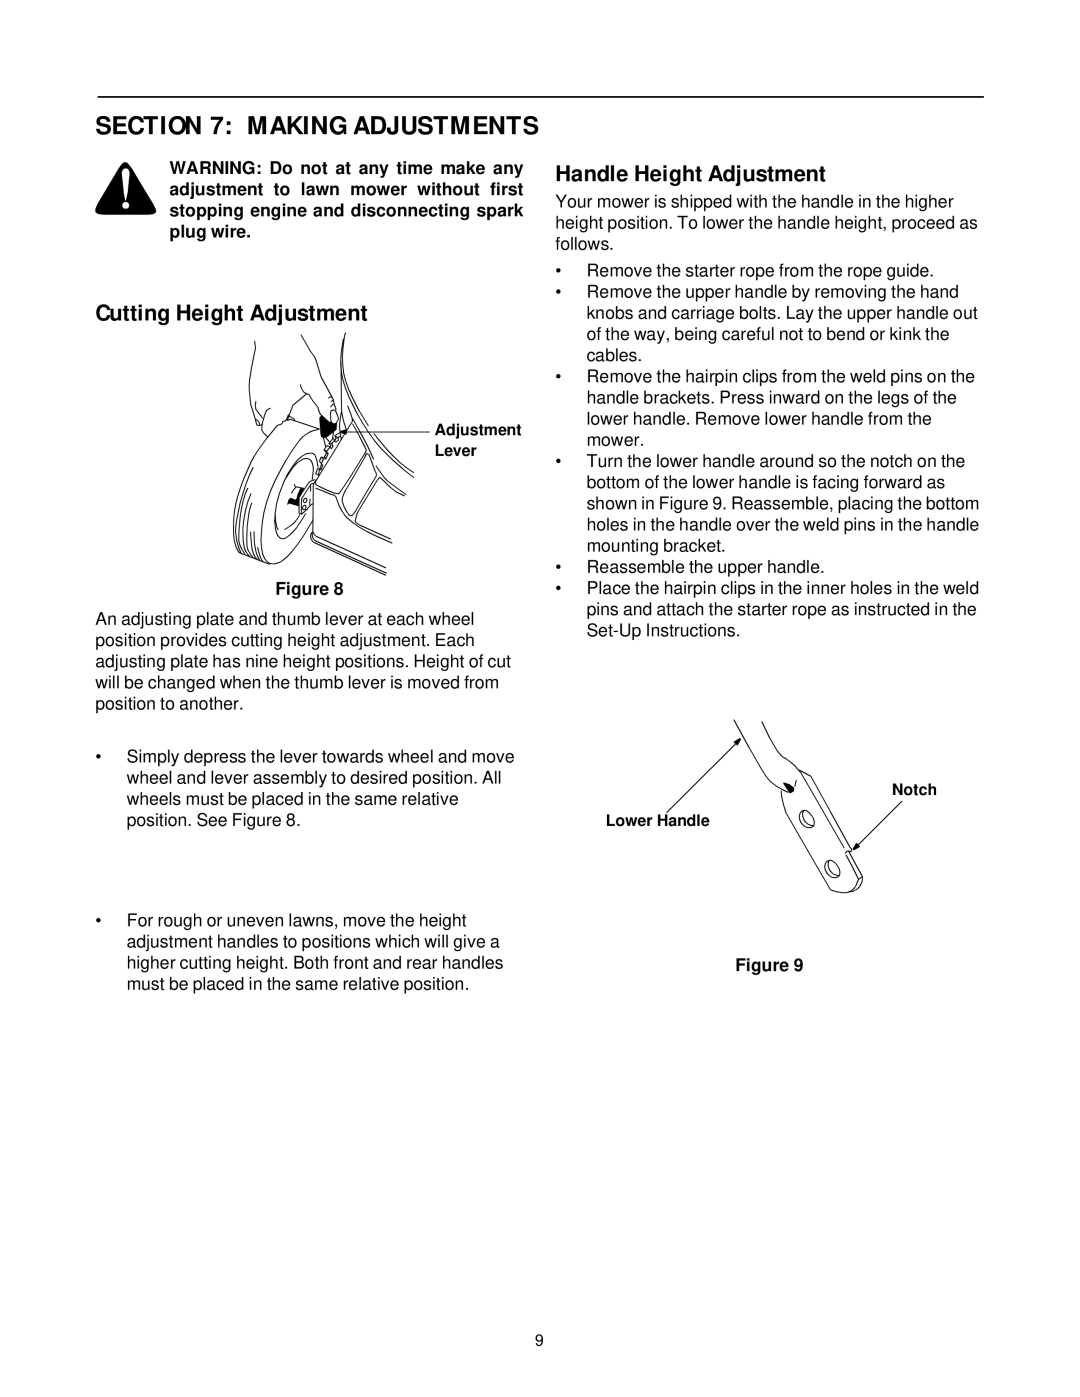
The cutting deck is another significant aspect of these models. The Yard-Man 11B-106C701 features a robust steel deck that measures 21 inches, allowing for a wide cutting path that reduces mowing time. Similarly, the 11B-106C401 offers a versatile cutting width, making it capable of maneuvering through tight spaces. Each model includes several cutting height adjustments, making it easy for users to achieve their desired grass length, whether they prefer a short, manicured look or a longer, more natural setting.
Technologically, both models come equipped with advanced features to enhance user experience. The self-propelling system on the Yard-Man 11B-106C701 allows for ease of use on uneven terrain, allowing the mower to adjust its speed to the user's pace. Meanwhile, the 11B-106C401 is designed with an easy-start mechanism, making it user-friendly even for those who may be new to lawn maintenance.
Another noteworthy characteristic is the ergonomic design of both mowers. They are equipped with padded handles that reduce fatigue during extended use and provide a comfortable grip. The compact and lightweight frame ensures that both models are easy to maneuver around landscape features such as gardens and trees.
In conclusion, the Yard-Man 11B-106C701 and 11B-106C401 blend power, efficiency, and innovative features for a great lawn care experience. With their durable engines and user-friendly technologies, these mowers are excellent choices for homeowners looking to invest in dependable outdoor equipment that delivers exceptional performance year after year.