WARNING - YOUR RESPONSIBILITY: Restrict the use of this power machine to persons who read, understand and follow the warnings and instructions in this manual and on the machine.
NOTE: Not all safety labels shown may apply to your chipper shredder vacuum.
SECTION 2: ASSEMBLING YOUR CHIPPER SHREDDER VACUUM
IMPORTANT: This unit is shipped without gasoline or oil in the engine. Be certain to service engine with gasoline and oil as instructed in the separate engine manual before operating your machine.
NOTE: Reference to right or left hand side of the chipper shredder vacuum is observed from the operating position.
Removing Unit From Carton
•Remove staples, break glue on top flaps, or cut tape at carton end and peel along top flap to open carton.
•Remove loose parts if included with unit (i.e., operator’s manual, etc.)
•Cut along corners, lay carton down flat, and remove packing material.
•Roll or slide unit out of carton and check carton thoroughly for loose parts.
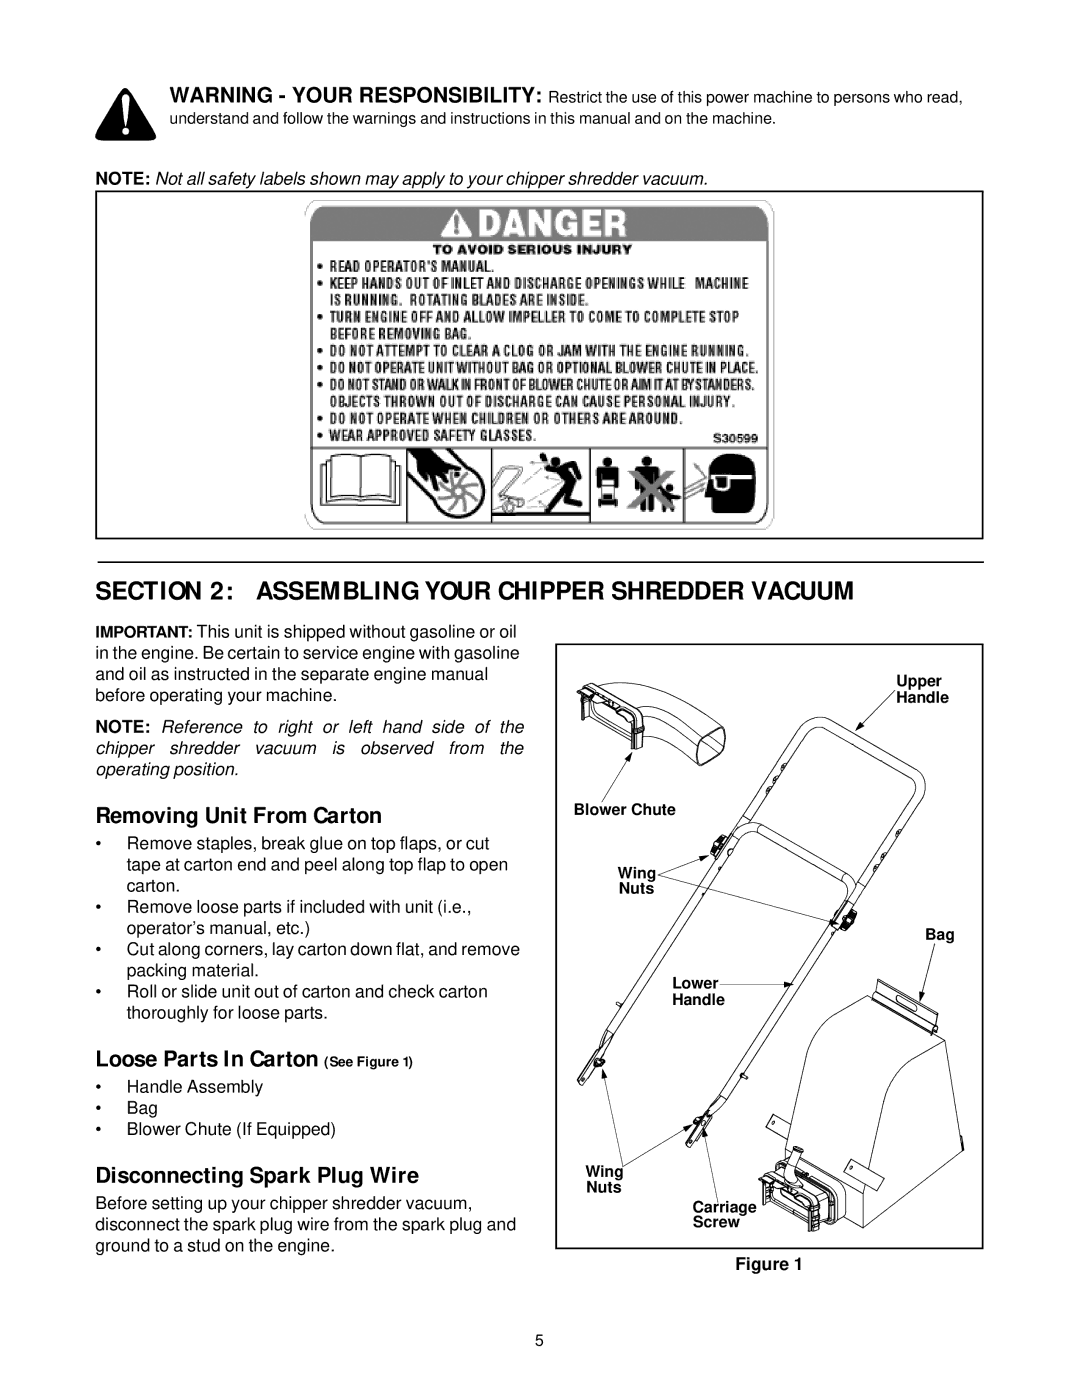
Loose Parts In Carton (See Figure 1)
•Handle Assembly
•Bag
•Blower Chute (If Equipped)
Disconnecting Spark Plug Wire
Before setting up your chipper shredder vacuum, disconnect the spark plug wire from the spark plug and ground to a stud on the engine.
Upper |
Handle |
Blower Chute |
Wing |
Nuts |
Bag |
Lower |
Handle |
Wing |
Nuts |
Carriage |
Screw |
Figure 1
5
