
589 specifications
The Yard-Man 589 is a robust piece of garden equipment designed to make yard maintenance more efficient and user-friendly. This machine is particularly well-regarded for its blend of power and versatility, catering to both homeowners and landscaping professionals alike.One of the main features of the Yard-Man 589 is its powerful engine. Equipped with a 190cc engine, it delivers sufficient strength to tackle a variety of grasses and terrain. This substantial power allows the mower to cut through thick, overgrown areas, making it an excellent choice for those with larger properties or untamed gardens.
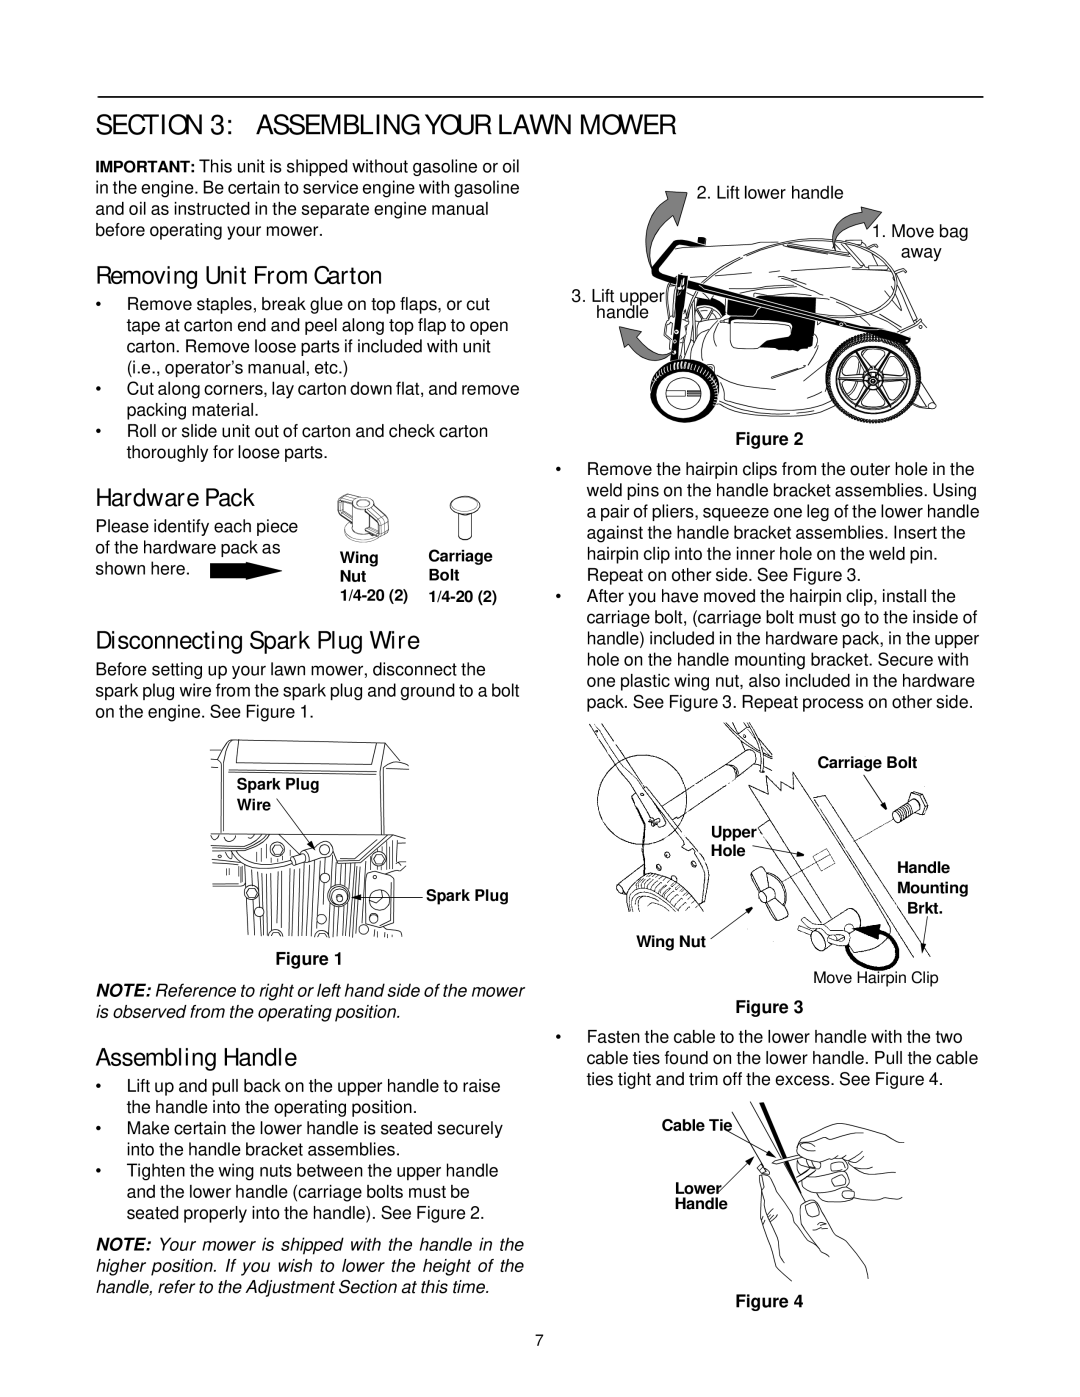
Another notable feature is its cutting deck, which measures 21 inches. This size strikes a balance between maneuverability and effective coverage, enabling the user to cut a wider area without sacrificing the ability to navigate around obstacles like trees and flower beds. The cutting height is adjustable, providing users with the option to customize the length of grass left after mowing, which is beneficial for promoting healthy grass growth and aesthetics.
The Yard-Man 589 also boasts advanced technology that enhances its performance and ease of use. One such technology is the self-propelled drive system, which considerably reduces the physical effort required to operate the mower. Users can choose their preferred pace, making it easier to manage lawns of varying sizes and slopes. Additionally, the mower’s ergonomic handle design reduces operator fatigue, allowing for longer mowing sessions with less discomfort.
Another characteristic that sets the Yard-Man 589 apart is its multi-functionality. The mower offers options for mulching, side-discharge, and bagging clippings, providing flexibility based on the user's preferred lawn care routine. The mulching feature finely cuts grass clippings that can then return nutrients to the soil, promoting a healthier lawn.
In terms of maintenance, the Yard-Man 589 is designed for easy access to its engine and components, making routine checks and repairs simpler for users. Its durable construction ensures longevity, making it a reliable addition to any homeowner’s lawn care arsenal.
Overall, the Yard-Man 589 stands out for its powerful engine, adjustable features, innovative technology, and user-friendly design, making it a preferred choice for those seeking a high-quality lawn mower that effectively meets their needs. Whether maintaining a picturesque lawn or managing a more rugged landscape, this mower impresses with its capability and ease of use.