
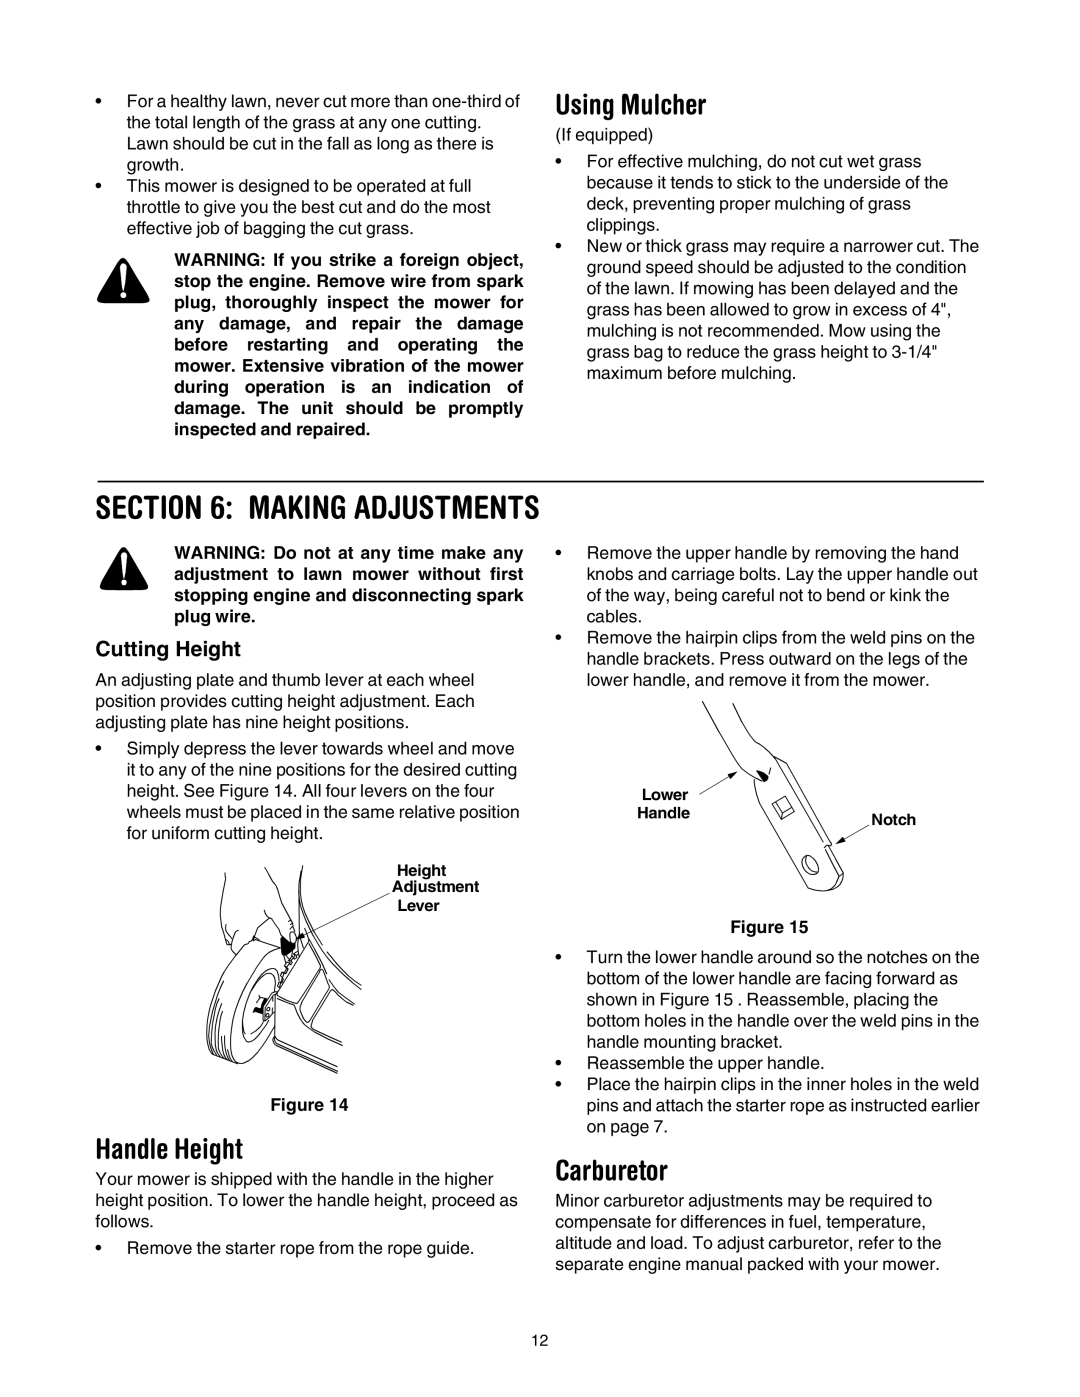
21" Rear Discharge Push Mower, through 429, 410 specifications
The Yard Machines 410 through 429, 21" Rear Discharge Push Mower is a robust and versatile lawn care solution designed for homeowners who prioritize efficiency and convenience. This highly regarded mower stands out in the market thanks to its state-of-the-art features and technology that enhance mowing performance.One of the main features of the Yard Machines push mower is its 21-inch cutting deck, specifically designed for optimal maneuverability and efficiency in both small and medium-sized yards. The rear discharge functionality allows for a clean and controlled cut, ensuring grass clippings are evenly distributed behind the mower, which helps to improve the lawn's overall health by returning nutrients to the soil.
Equipped with a powerful 140cc engine, the Yard Machines mower provides reliable performance for tackling various grass types and yard conditions. The engine's design prioritizes fuel efficiency, allowing homeowners to mow larger areas without frequently stopping for refueling. The easy-start mechanism enhances user experience, ensuring that the mower starts quickly with minimal hassle.
Another key characteristic is the adjustable cutting height feature, which offers six different settings, ranging from 1.25 inches to 3.75 inches. This versatility allows users to customize their mowing experience based on the specific needs of their lawn and prevailing weather conditions. Whether you need a close cut for a formal look or a higher cut for more foliage, this mower can accommodate your preferences.
The Yard Machines 410 through 429 models also excel in user comfort and ease of use. The lightweight design ensures that even less experienced operators can maneuver the mower effortlessly. Additionally, the ergonomic handlebar provides a comfortable grip and helps to reduce fatigue during extended mowing sessions.
Durability is another standout aspect of this mower, as it features a sturdy steel deck that can withstand the rigors of regular use, ensuring longevity and reliability. Furthermore, the mower's compact size allows for easy storage, even in tight spaces.
Overall, the Yard Machines 410 through 429, 21" Rear Discharge Push Mower is an excellent choice for homeowners seeking a reliable, efficient, and user-friendly option for maintaining their lawns. With its combination of powerful performance, adjustable features, and durability, this mower is designed to make lawn care an effortless and enjoyable task.