
ZCE 8021 specifications
The Zanussi ZCE 8021 is a standout model in the realm of freestanding cookers, designed to seamlessly integrate style and functionality into any kitchen space. This appliance is a perfect blend of efficiency, modern technology, and user-friendly features, making it an excellent choice for both novice cooks and seasoned chefs alike.One of the primary attractions of the Zanussi ZCE 8021 is its spacious capacity. The traditional oven boasts a generous 70 liters of space, allowing users to cook large dishes, roast meats, or bake multiple trays of cookies simultaneously. The oven's versatility is further enhanced with multiple cooking functions, including conventional cooking, grill, and fan-forced heat, enabling diverse culinary styles and techniques.
The included ceramic hob features four cooking zones that provide even heat distribution, ensuring that food is cooked thoroughly and efficiently. The easy-to-clean surface is a major plus, reducing the time and effort needed for maintenance after cooking.
Zanussi is known for its commitment to energy efficiency, and the ZCE 8021 is no exception. It operates with an energy rating of A, which not only helps in reducing electricity costs but also contributes to a more environmentally friendly household.
In terms of safety, this cooker is designed with user comfort in mind. The oven door features triple-glazed glass that stays cool to the touch, ensuring that the heat is contained within while reducing the risk of burns. The cooker also has a child lock, providing peace of mind for families with young children.
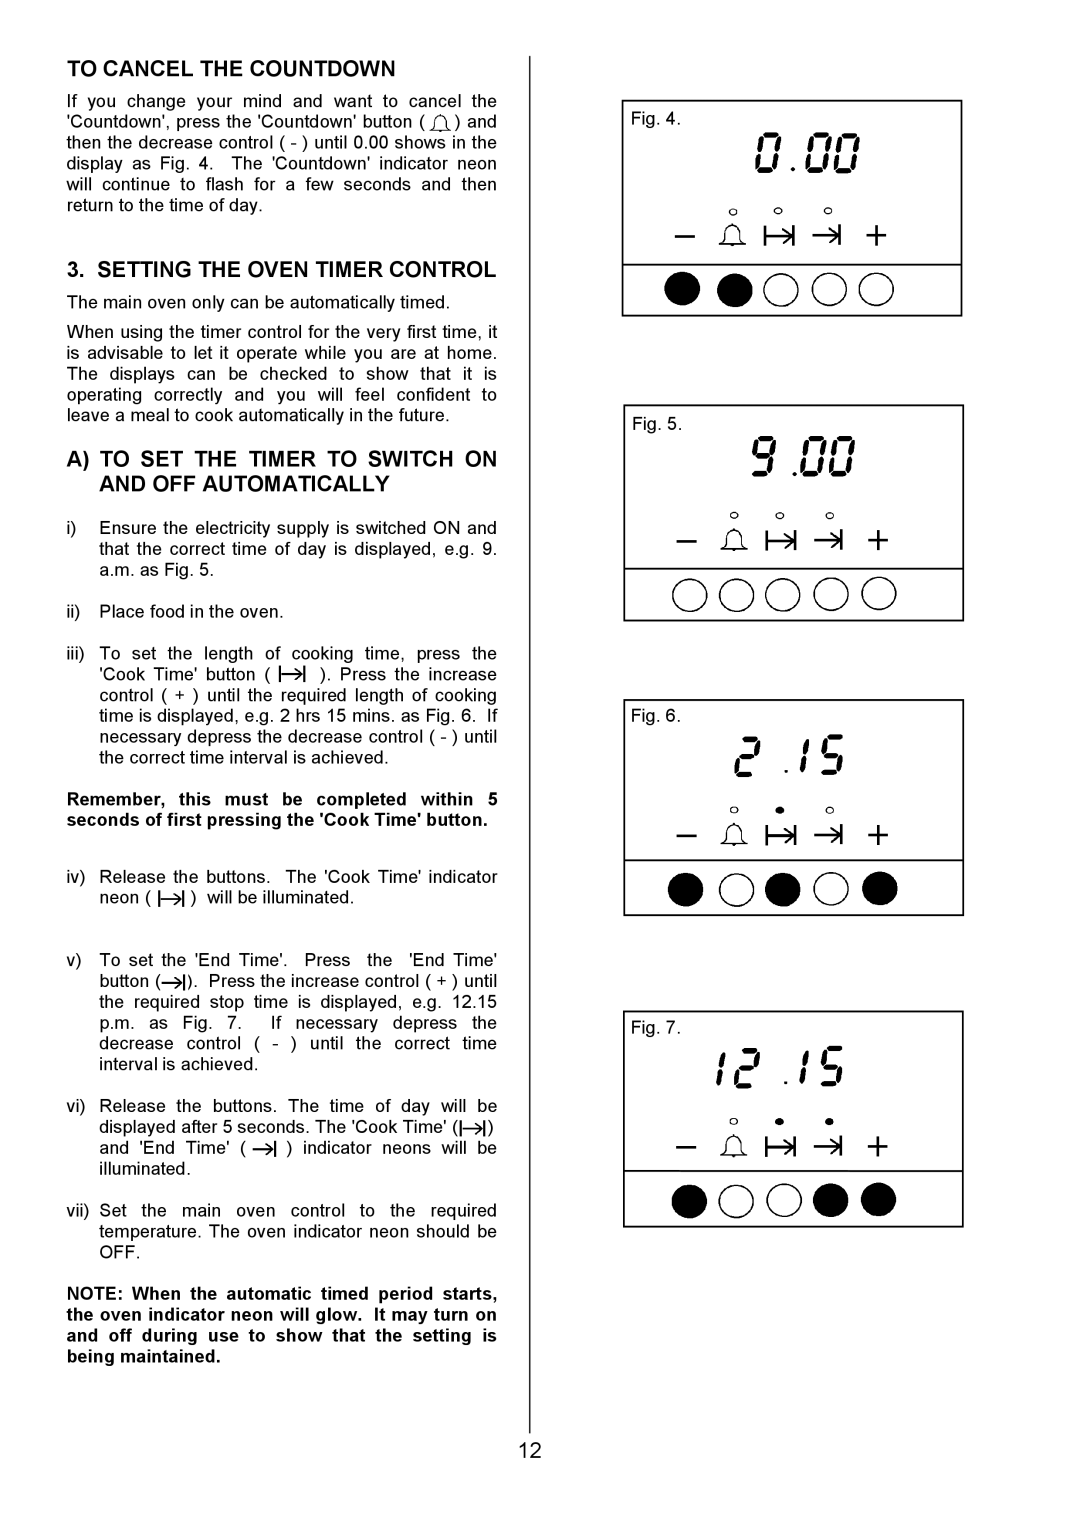
Furthermore, the ZCE 8021 is equipped with a programmable timer. This feature allows users to set cooking times and temperatures in advance, ensuring that meals are cooked to perfection and preventing overcooking or burning.
Overall, the Zanussi ZCE 8021 represents a blend of practicality and modern design. Its robust features, energy efficiency, and user-friendly operation make it an ideal choice for anyone looking to enhance their cooking experience while enjoying the benefits of a stylish kitchen appliance. Whether it’s for daily meals or special occasions, the Zanussi ZCE 8021 is a worthy addition to any culinary enthusiast's kitchen.