Installation
•Cut out worktop to prescribed measurements of templates (saw exactly along the scribing).
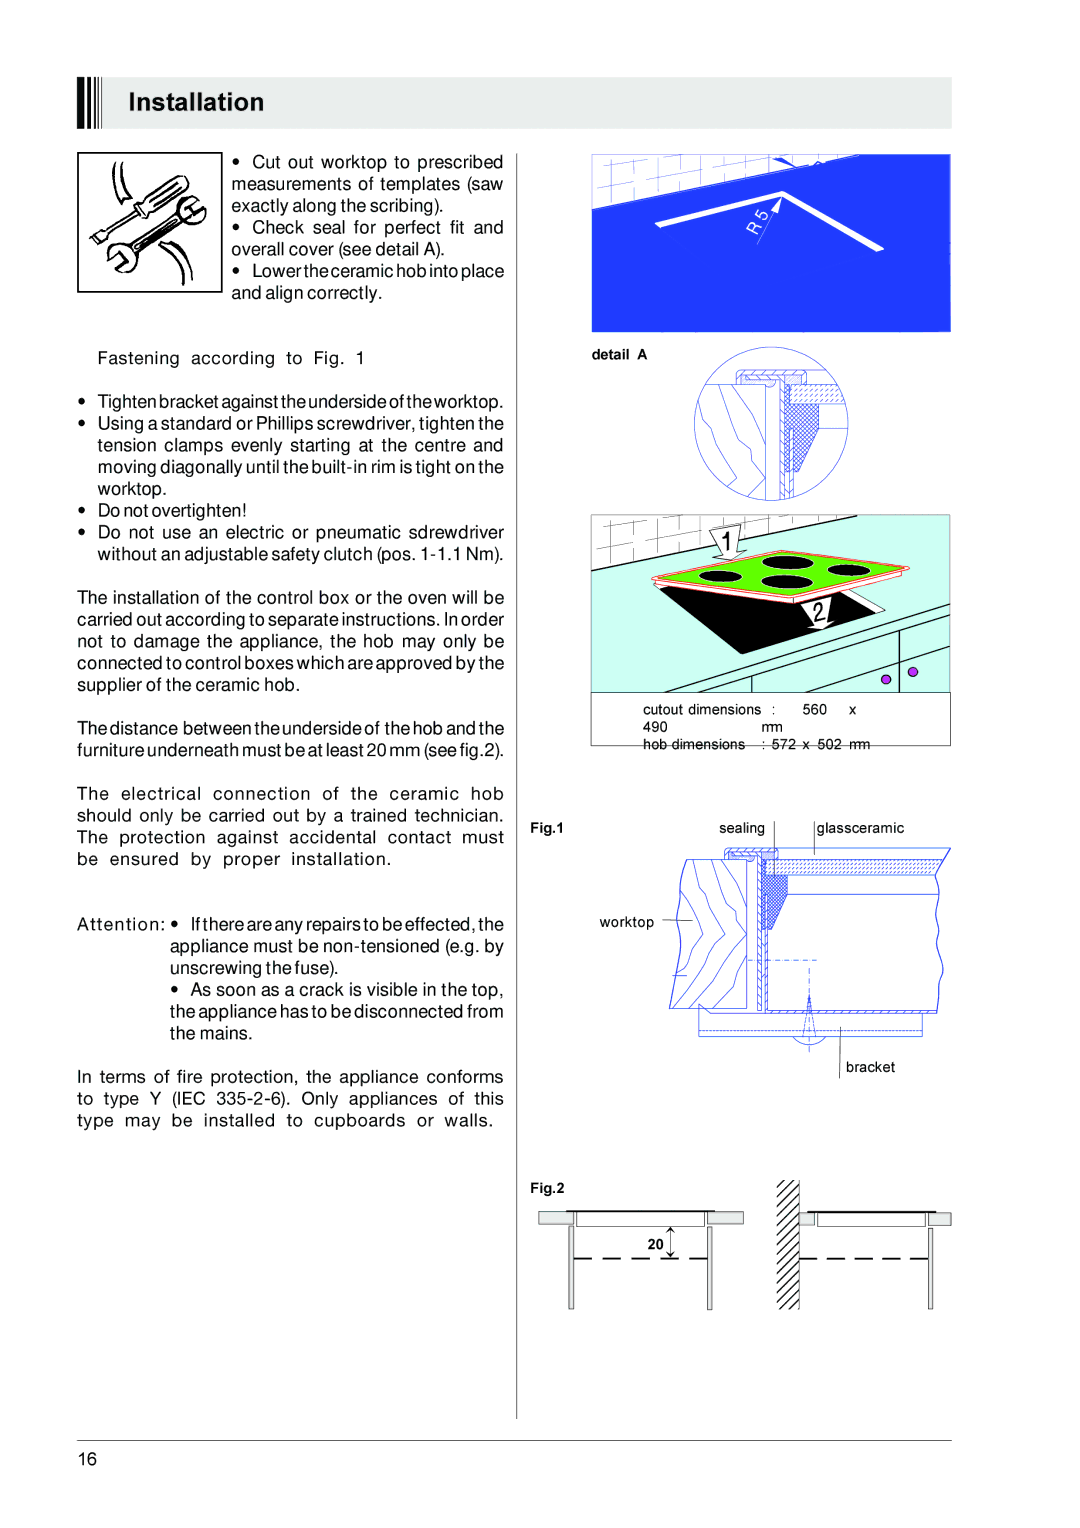
•Check seal for perfect fit and overall cover (see detail A).
•Lower the ceramic hob into place and align correctly.
Fastening according to Fig. 1
•Tighten bracket against the underside of the worktop.
•Using a standard or Phillips screwdriver, tighten the tension clamps evenly starting at the centre and moving diagonally until the
•Do not overtighten!
•Do not use an electric or pneumatic sdrewdriver without an adjustable safety clutch (pos.
The installation of the control box or the oven will be carried out according to separate instructions. In order not to damage the appliance, the hob may only be connected to control boxes which are approved by the supplier of the ceramic hob.
The distance between the underside of the hob and the furniture underneath must be at least 20 mm (see fig.2).
The electrical connection of the ceramic hob should only be carried out by a trained technician. The protection against accidental contact must be ensured by proper installation.
Attention: • If there are any repairs to be effected, the appliance must be
•As soon as a crack is visible in the top, the appliance has to be disconnected from the mains.
In terms of fire protection, the appliance conforms to type Y (IEC
detail A |
cutout dimensions | : | 560 | x | |
490 |
| mm |
|
|
hob dimensions | : 572 | x 502 | mm | |
Fig.1 | sealing | glassceramic |
worktop
bracket
Fig.2
20 |
16