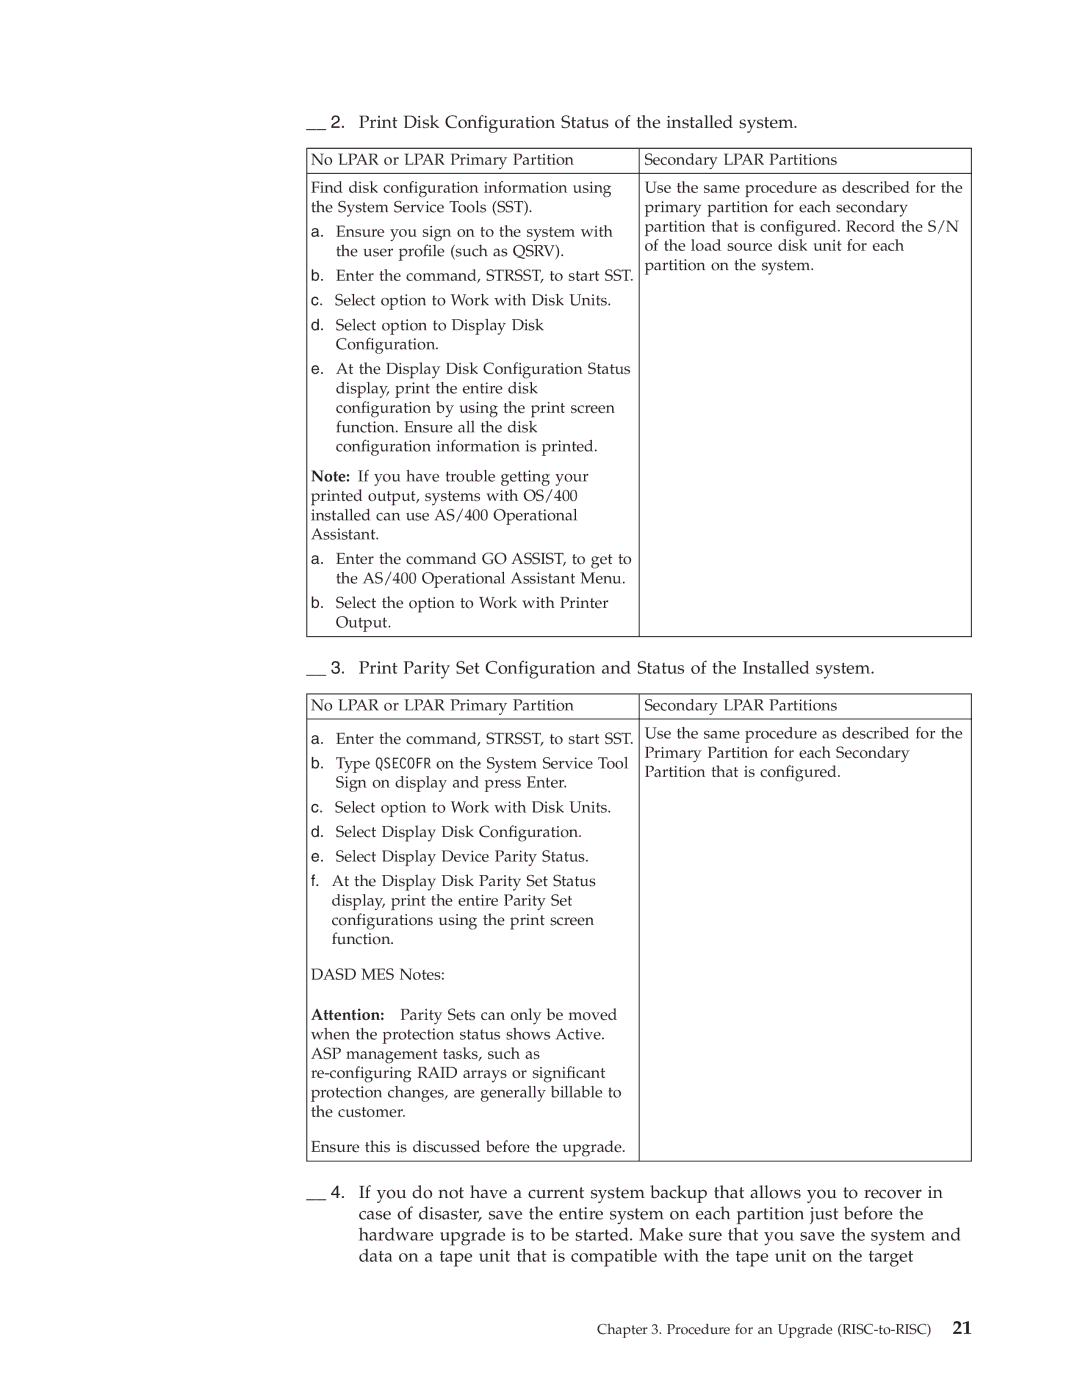
__ 2. Print Disk Configuration Status of the installed system.
No LPAR or LPAR Primary Partition | Secondary LPAR Partitions | |
|
| |
Find disk configuration information using | Use the same procedure as described for the | |
the System Service Tools (SST). | primary partition for each secondary | |
a. Ensure you sign on to the system with | partition that is configured. Record the S/N | |
of the load source disk unit for each | ||
the user profile (such as QSRV). | ||
partition on the system. | ||
b. Enter the command, STRSST, to start SST. | ||
c. Select option to Work with Disk Units. |
| |
d. Select option to Display Disk |
| |
Configuration. |
| |
e. At the Display Disk Configuration Status |
| |
display, print the entire disk |
| |
configuration by using the print screen |
| |
function. Ensure all the disk |
| |
configuration information is printed. |
| |
Note: If you have trouble getting your |
| |
printed output, systems with OS/400 |
| |
installed can use AS/400 Operational |
| |
Assistant. |
| |
a. Enter the command GO ASSIST, to get to |
| |
the AS/400 Operational Assistant Menu. |
| |
b. Select the option to Work with Printer |
| |
Output. |
| |
|
|
__ 3. Print Parity Set Configuration and Status of the Installed system.
No LPAR or LPAR Primary Partition | Secondary LPAR Partitions |
a.Enter the command, STRSST, to start SST. Use the same procedure as described for the
b. Type QSECOFR on the System Service Tool | Primary Partition for each Secondary | |
Partition that is configured. | ||
Sign on display and press Enter. | ||
| ||
c. Select option to Work with Disk Units. |
| |
d. Select Display Disk Configuration. |
| |
e. Select Display Device Parity Status. |
| |
f. At the Display Disk Parity Set Status |
| |
display, print the entire Parity Set |
| |
configurations using the print screen |
| |
function. |
| |
DASD MES Notes: |
| |
Attention: Parity Sets can only be moved |
| |
when the protection status shows Active. |
| |
ASP management tasks, such as |
| |
| ||
protection changes, are generally billable to |
| |
the customer. |
| |
Ensure this is discussed before the upgrade. |
|
__ 4. If you do not have a current system backup that allows you to recover in case of disaster, save the entire system on each partition just before the hardware upgrade is to be started. Make sure that you save the system and data on a tape unit that is compatible with the tape unit on the target
Chapter 3. Procedure for an Upgrade