Minor Adjustment
Required equipment 10mm Open End Wrench
(JIS No.2 equivalent)
To adjust the print head alignment and consistent quality across label, perform the following steps:
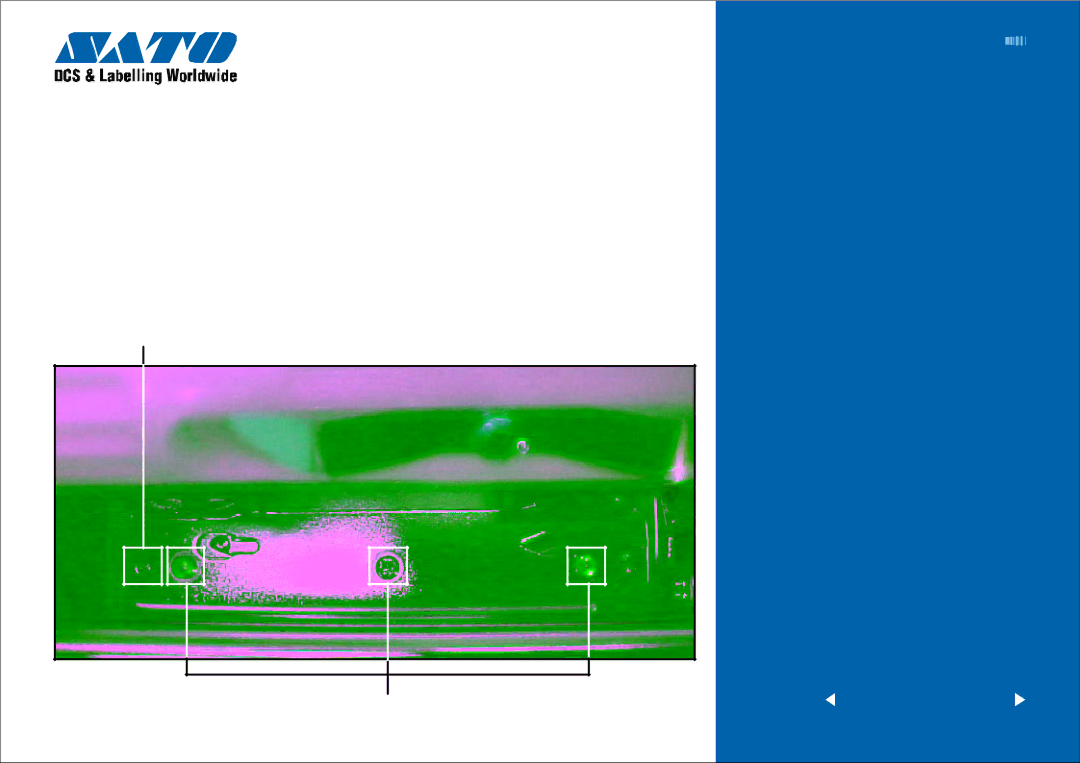
Adjustment Marks
STEPS
1Loosen the screws on the head plate. Print user test pattern. Realign the print head by prying adjust plate forward or backward with flat blade screwdriver. Refer to illus tr ations and no te adjus tment marks.
2Tighten the screws.
EZ Manual: | 8 |
Print Head Position Alignment
Screw
<previous home next >
Barcode SATO International Pte Ltd