NETGEAR A6210 user manual Select the Enter wireless information myself radio button

Page 22

A6210 WiFi USB Adapter

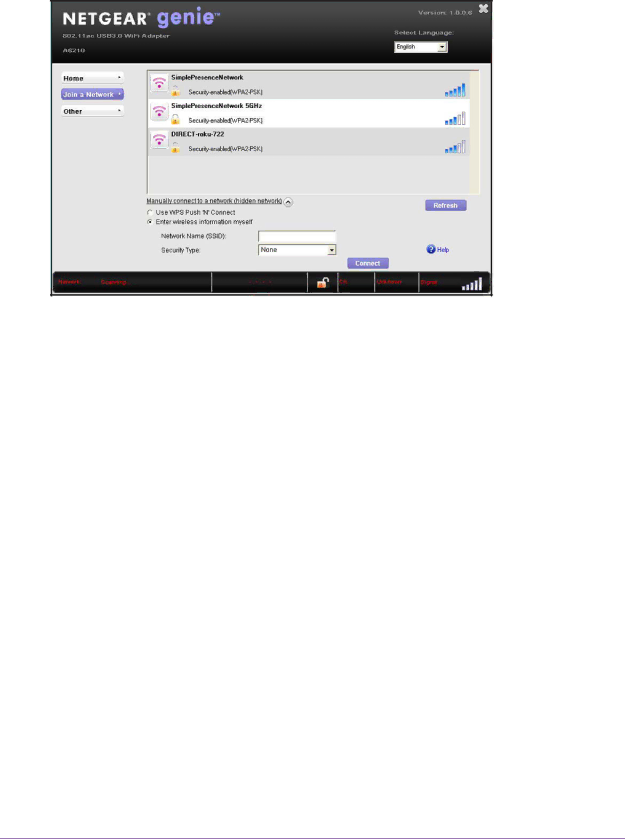
5.Select the Enter wireless information myself radio button.

6.In the Network Name (SSID) field, type the network name (SSID).

7.From the Security Type menu, select the network’s security type:

None. The network is not secure and does not require a key or passphrase.

WEP (Open). If the encryption strength of the network is 64 bit, the network key must consist of 10 hexadecimal digits. If the encryption strength of the network is 128 bit, the network key must consist of 26 hexadecimal digits.

WEP (Shared). If the encryption strength of the network is 64 bit, the network key must consist of 10 hexadecimal digits. If the encryption strength of the network is 128 bit, the network key must consist of 26 hexadecimal digits.

WPA-PSK (TKIP). The network passphrase is 8–63 characters in length or 64 hexadecimal digits.

WPA-PSK (AES). The network passphrase is 8–63 characters in length or 64 hexadecimal digits.

WPA2-PSK (TKIP). The network passphrase is 8–63 characters in length or 64 hexadecimal digits.

WPA2-PSK (AES). The network passphrase is 8–63 characters in length or 64 hexadecimal digits.

Note: Hexadecimal digits consist of 0–9, a–f, and A–F characters only.

8.Type the network’s password (passphrase) in the Passphrase field.

If you selected the WEP security type, type the WEP key in the Key field.

9.Click the Connect button.

The adapter joins the network, which can take a few minutes. Your settings are saved in a profile.

Get Started and Connect to a WiFi Network

22

Image 22
Contents A6210 WiFi USB Adapter Compliance SupportTrademarks Contents Network Set Up and Install the Adapter  To set up your adapterGet Started and Connect to a WiFi Network Get Started and Connect to a WiFi Network Get Started and Connect to a WiFi Network View Network Details Before Joining a WiFi Network  To view network detailsGet Started and Connect to a WiFi Network Join a WiFi Network Join a Network Using WPS  To use WPS to let the adapter join a WiFi networkJoin a Network Using Netgear genie  To let the adapter join a network by using Netgear genieGet Started and Connect to a WiFi Network Get Started and Connect to a WiFi Network Click the Install Windows Standalone Driver button Get Started and Connect to a WiFi Network  To use WPS to let the adapter join a hidden WiFi network Join a Hidden NetworkGet Started and Connect to a WiFi Network Manually Set Up a WiFi Connection to a Hidden Network Join a Network screen displays Select the Enter wireless information myself radio button Get Started and Connect to a WiFi Network Monitor and Maintain the Adapter White View the Connection Status and Details To view connection status and details YellowView More Information About the Adapter and Network  To view more information about the adapter and networkMonitor and Maintain the Adapter Get Diagnostic Information for the Adapter  To get diagnostic information about the adapterUpgrade the Adapter Software  To check or upgrade the adapter’s softwareMonitor and Maintain the Adapter Uninstall the Adapter Software Troubleshooting and Frequently Asked Questions Adapter LED Is Not Lit TroubleshootingIcon Is Not in the Windows System Tray Adapter Does Not Connect to a WiFi Network Adapter Lost Its IP Address How Can I Improve the Speed of My WiFi Connection? Frequently Asked QuestionsHow Can I View the IP Address of the Adapter? Factory Default Settings Technical Specifications Factory Default Settings Following table lists the default settings of your adapterTechnical Specifications Technical specifications