Chapter 2
Configuration
To create a new Internet Access policy:
1.Select a number from the Internet Access Policy drop- down menu.
2.Enter a Policy Name in the Enter Policy Name field.
3.To enable this policy, click Enable.
4.Click Edit List of PCs to select which PCs will be affected by the policy. The List of PCs screen will appear. You can select a PC by MAC address or IP address. You can also enter a range of IP addresses if you want this policy to affect a group of PCs. After making your changes, click Save Settings to apply your changes or Cancel Changes to cancel your changes.
Internet Access Policy > List of PCs
5.Clicktheappropriateoption,DenyorAllow,depending on whether you want to block or allow Internet access for the PCs you listed on the List of PCs screen.
6.Decide which days and what times you want this policy to be enforced. Select the individual days during which the policy will be in effect, or select Everyday. Then enter a range of hours and minutes during which the policy will be in effect, or select 24 Hours.
7.You can block websites with specific URL addresses. Enter each URL in a separate field next to Website Blocking by URL Address.
8.You can also block websites using specific keywords. Enter each keyword in a separate field next to Website Blocking by Keyword.
9.You can filter access to various services accessed over the Internet, such as FTP or Telnet. (You can block up to two applications per policy.) Select a service from the
Port Services
To add a new service to the list, enter the service’s name in the Service Name field, enter the service’s range in the Port Range fields, and select the service’s protocol from the Protocol
To modify a service, select it from the service list. Change its name, port range, and/or protocol setting as needed. Then click Modify.
To delete a service, select it from the service list. Then click Delete.
Click Apply to apply the current settings. Click Close to close the Port Services screen and return to the Internet Access screen. Click Cancel to cancel your changes.
When finished making your changes to the Internet Access screen, click Save Settings to save the changes, or click Cancel Changes to undo your changes.
The Applications & Gaming Tab > Single Port Forwarding
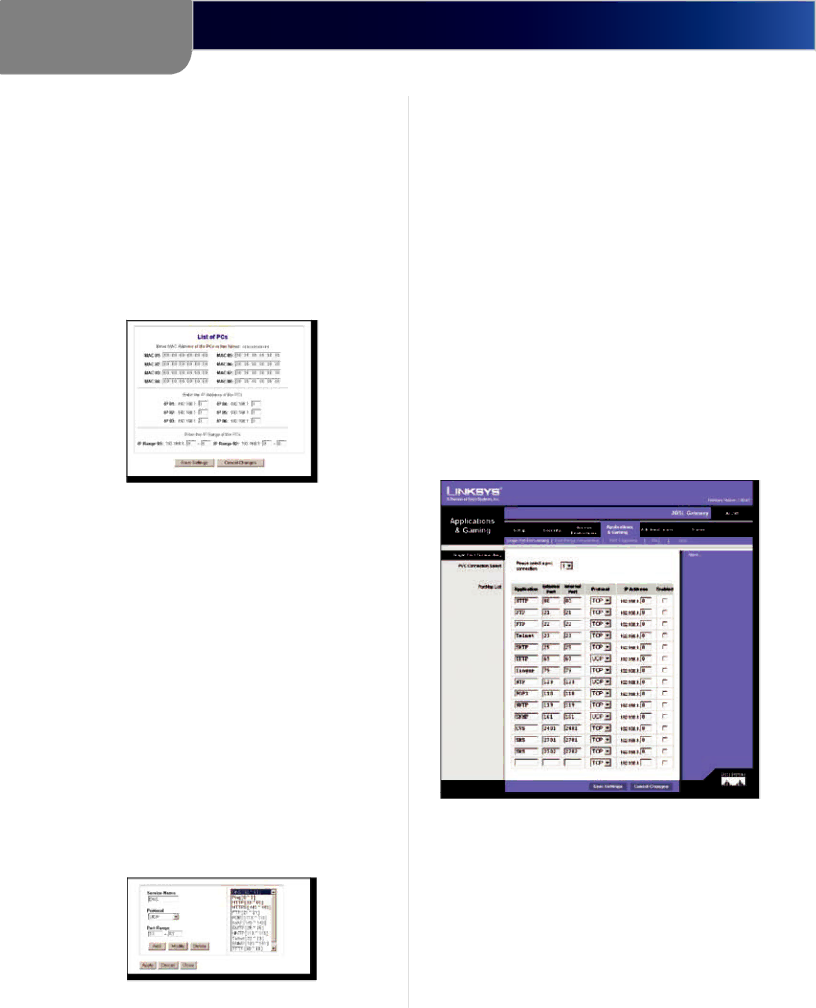
The Single Port Forwarding screen provides options for customization of port services for common applications.
Applications & Gaming > Single Port Forwarding
When users send this type of request to your network via the Internet, the Gateway will forward those requests to the appropriate computer. Any computer whose port is being forwarded should have its DHCP client function disabled and should have a new static IP address assigned to it because its IP address may change when using the DHCP function.
Choose or enter the Application in the Application field. Then, enter the external and internal port numbers in the External Port and Internal Port fields. Select the type of protocol you wish to use for each application: TCP or UDP.
SubProduct | 11 |